
Traveling around South America for 6 months was one of the longest trips I have ever taken in my life. Starting from Colombia, I traveled through 7 countries from top to bottom, witnessing the landscapes shift from tropical to desert and from desert to mountainous, all in one trip.
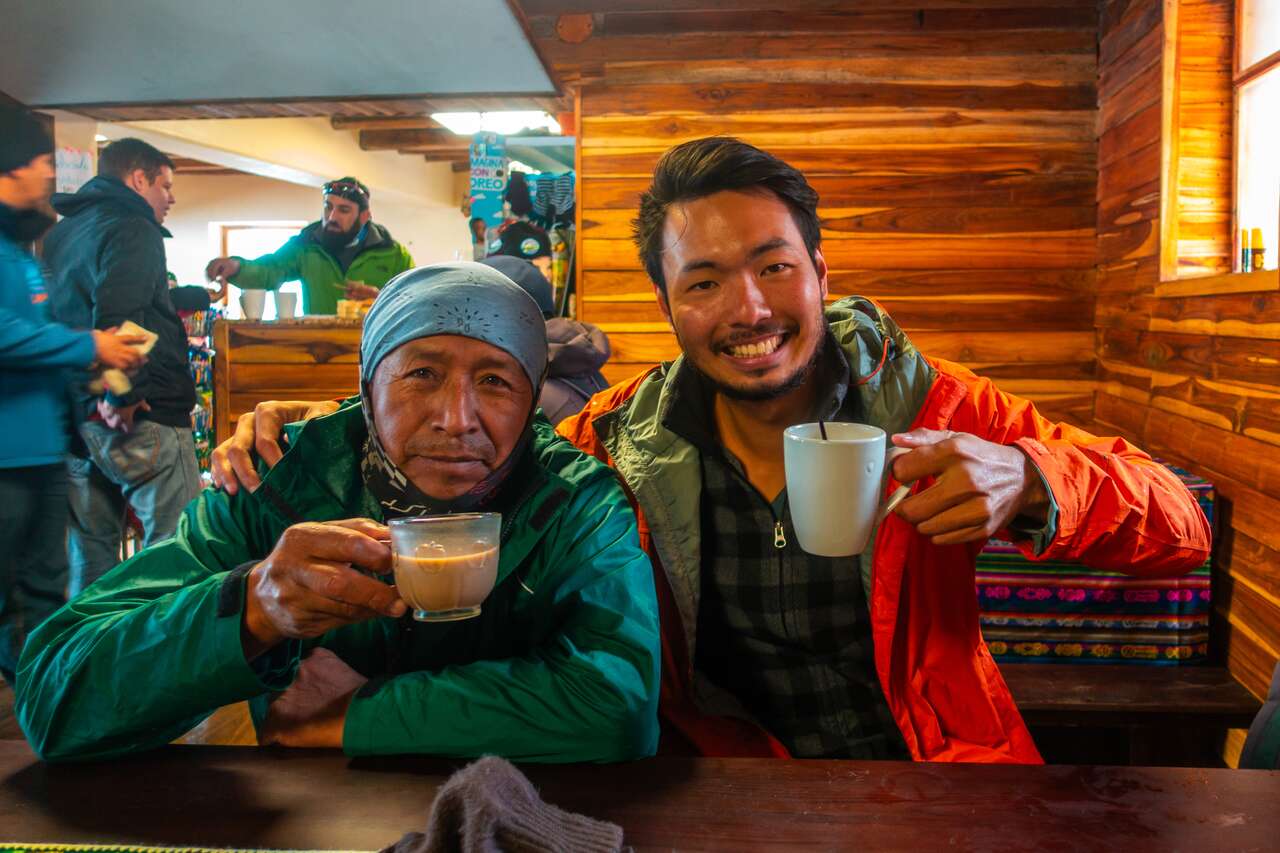
It was one of the best trips I have done so far. I went to South America without knowing a word of Spanish, and I came out pretty well-versed at ordering café con leche and getting the coffee I want 😂.
Being inspired by all the different cultures I have experienced in South America, I have decided to write a comprehensive backpacking itinerary for South America for those who have the luxury of time to get lost in one of the most vibrant and interesting continents in the world.
The itinerary begins in Colombia as we traverse along the western coast of the continent through Ecuador, Peru, Bolivia, Chile, all the way to the end of the world in Ushuaia, Argentina, while we traverse back from the east to Brazil.
During these visits, we will be exploring many of the great wonders of the world, from the Galapagos and Easter Island to Machu Picchu and Patagonia. It is going to be one hell of a backpacking trip and a ton of information to cover in this post, so without further ado, let’s look at an overview of the 6-month itinerary for South America, all mapped out below:
Table of Contents
South America Itinerary Map
Quick Summary: 6 Months Backpacking South America Itinerary
6 Months South America Backpacking Itinerary
Bogota, ColombiaMore Activities in Bogota
Where to Stay in Bogota?
Getting From Bogota to Santa Marta
Santa Marta, ColombiaMore Activities in Santa Marta
Where to Stay in Santa Marta?
Getting From Santa Marta to Tayrona National Park
Tayrona National Park, ColombiaMore Activities in Tayrona National Park
Getting From Santa Marta to Minca
Minca, ColombiaMore Activities in Minca
Where to Stay in Minca?
Getting From Santa Marta to The Lost City
The Lost City, ColombiaMore Activities in The Lost City
Getting From Santa Marta to Cartagena
Cartagena, ColombiaMore Activities in Cartagena
Where to Stay in Cartagena?
Getting From Cartagena to Medellin
Medellin, ColombiaMore Activities in Medellin
Where to Stay in Medellin?
Getting From Medellin to Salento
Salento, ColombiaMore Activities in Salento
Where to Stay in Salento?
Getting From Salento to Popayan
Popayan, ColombiaWhere to Stay in Popayan?
Getting From Popayan to San Agustin
San Agustin, ColombiaMore Activities in San Agustin
Where to Stay in San Agustin?
Getting From San Agustin to Pasto
Pasto, ColombiaWhere to Stay in Pasto?
Getting From Las Lajas to Quito
Quito, EcuadorMore Activities in Quito
Where to Stay in Quito?
Getting From Quito to Mindo
Mindo, EcuadorMore Activities in Mindo
Where to Stay in Mindo?
Getting From Mindo to the Amazon
The Amazon, EcuadorMore Activities in The Amazon
Getting From Quito to Cotopaxi
Where to Stay in the Amazon ?
Cotopaxi, EcuadorMore Activities in Cotopaxi
Where to Stay in Latacunga?
Getting From Latacunga to Quitotoa
Quilotoa Laguna, EcuadorMore Activities in Quilotoa Laguna
Where to Stay in Quilotoa?
Getting From Quilotoa to Banos
Banos, EcuadorMore Activities in Banos
Where to Stay in Banos?
Getting From Banos to Guayaquil
Guayaquil, EcuadorMore Activities in Guayaquil
Where to Stay in Guayaquil?
Getting From Guayaquil to Galapagos
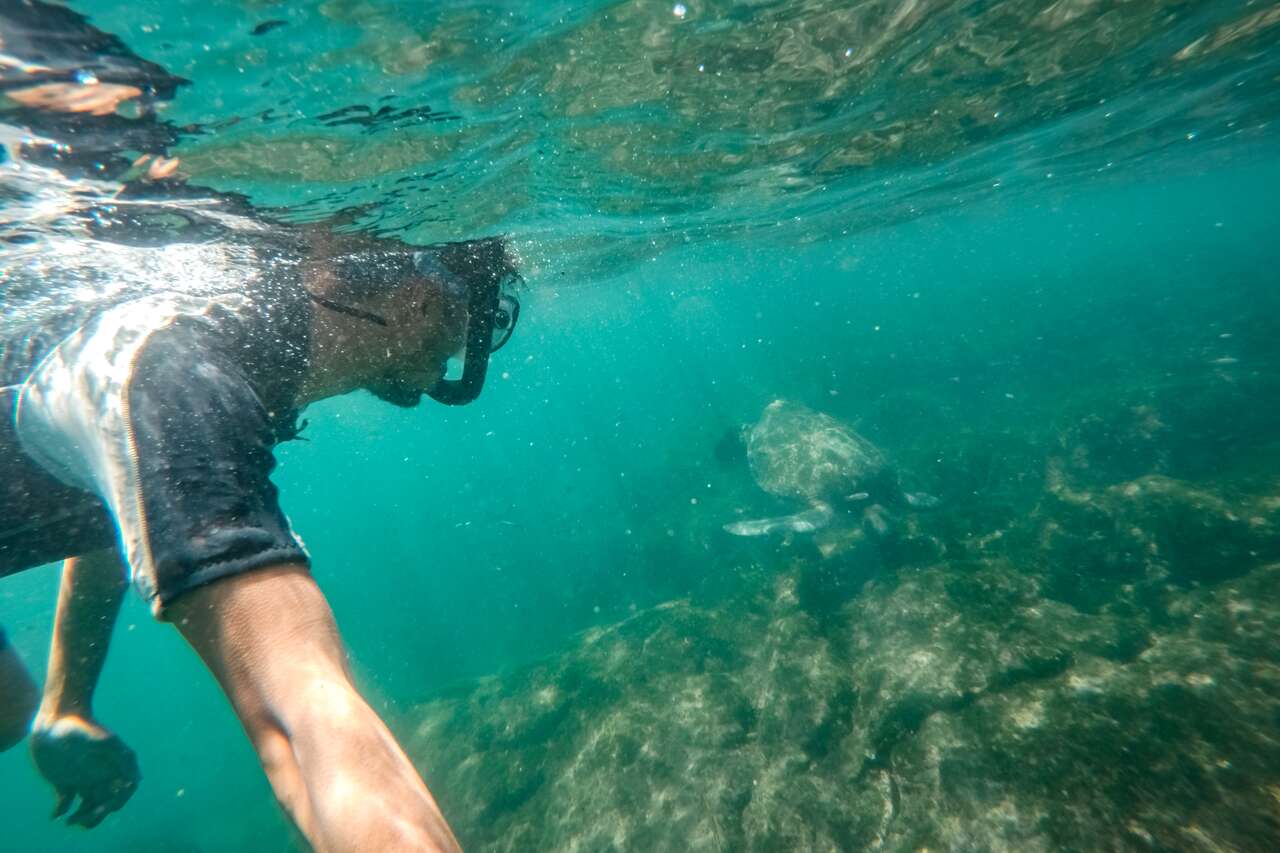
Galapagos, EcuadorMore Activities in Galapagos
Where to Stay on Galapagos?
Getting From Galapagos to Cuenca
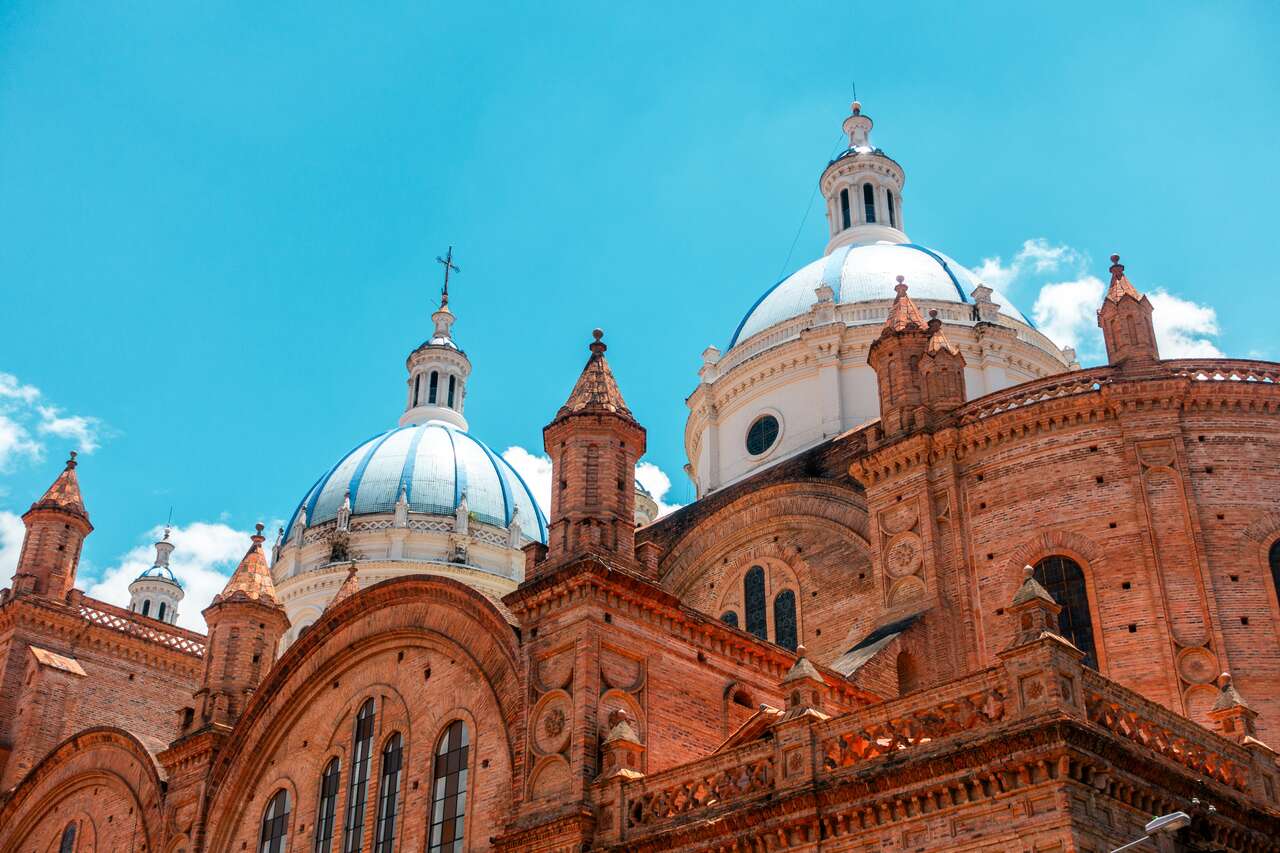
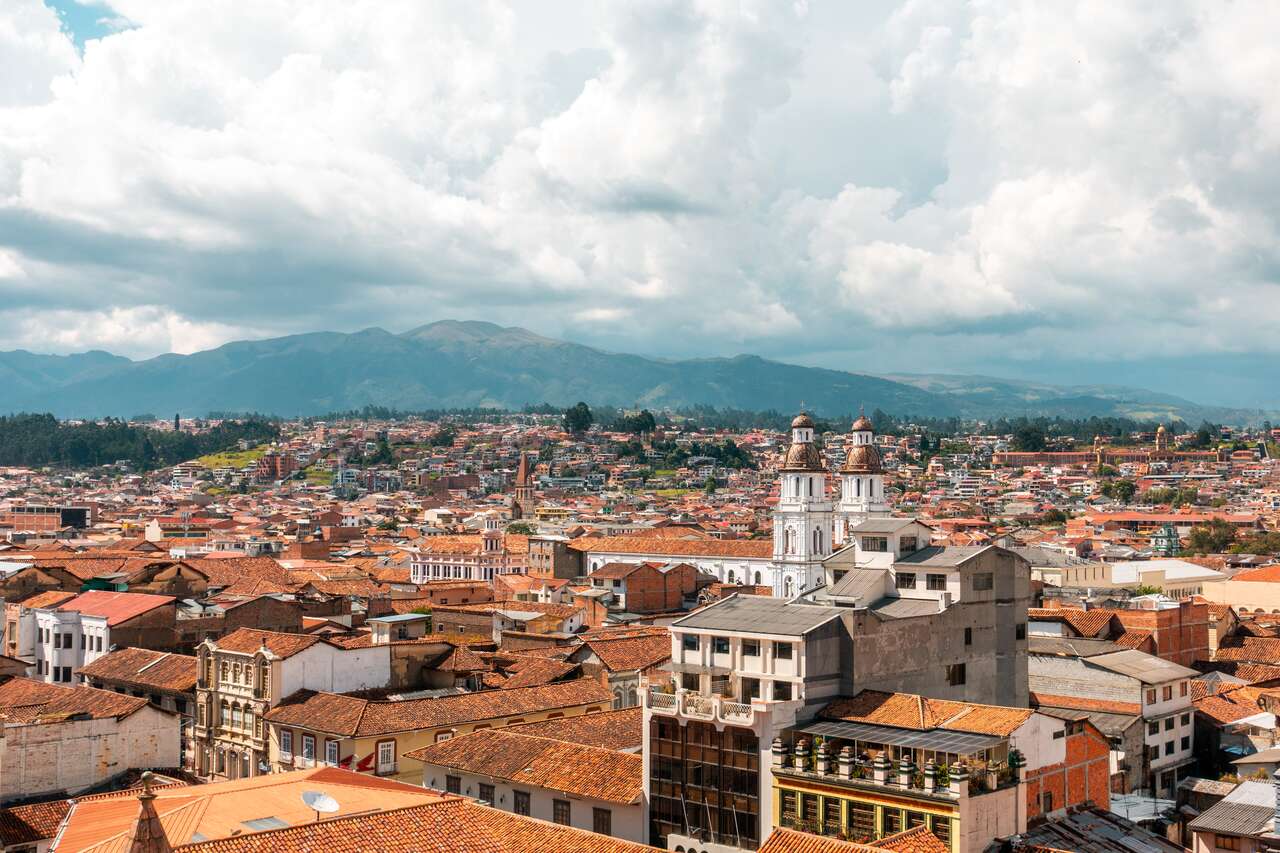
Cuenca, EcuadorMore Activities in Cuenca
Where to Stay in Cuenca?
Getting From Cuenca to Vilcabamba
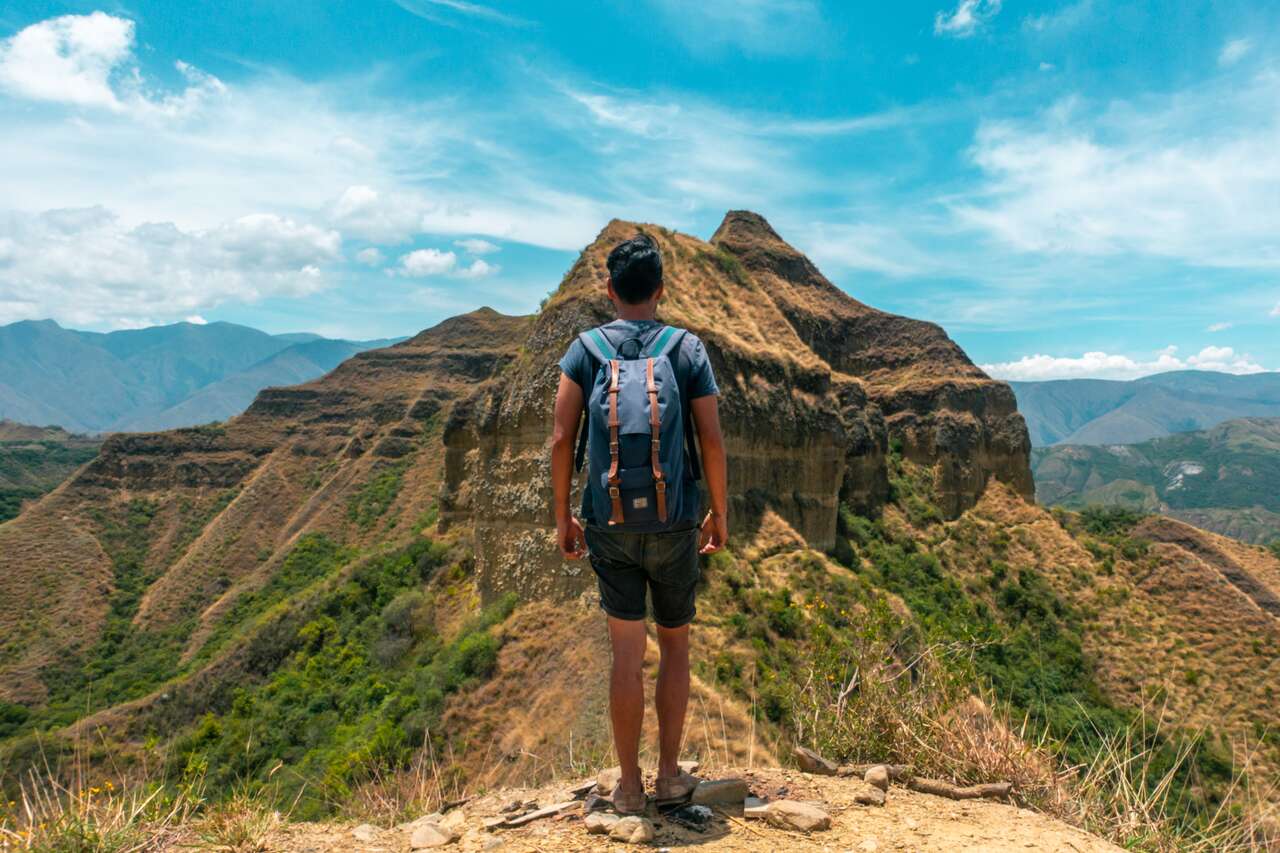
Vilcabamba, EcuadorWhere to Stay in Vilcabamba?
Getting From Vilcabamba to Huanchaco
Huanchaco, PeruMore Activities in Huanchaco
Where to Stay in Huanchaco?
Getting From Huanchaco to Huaraz
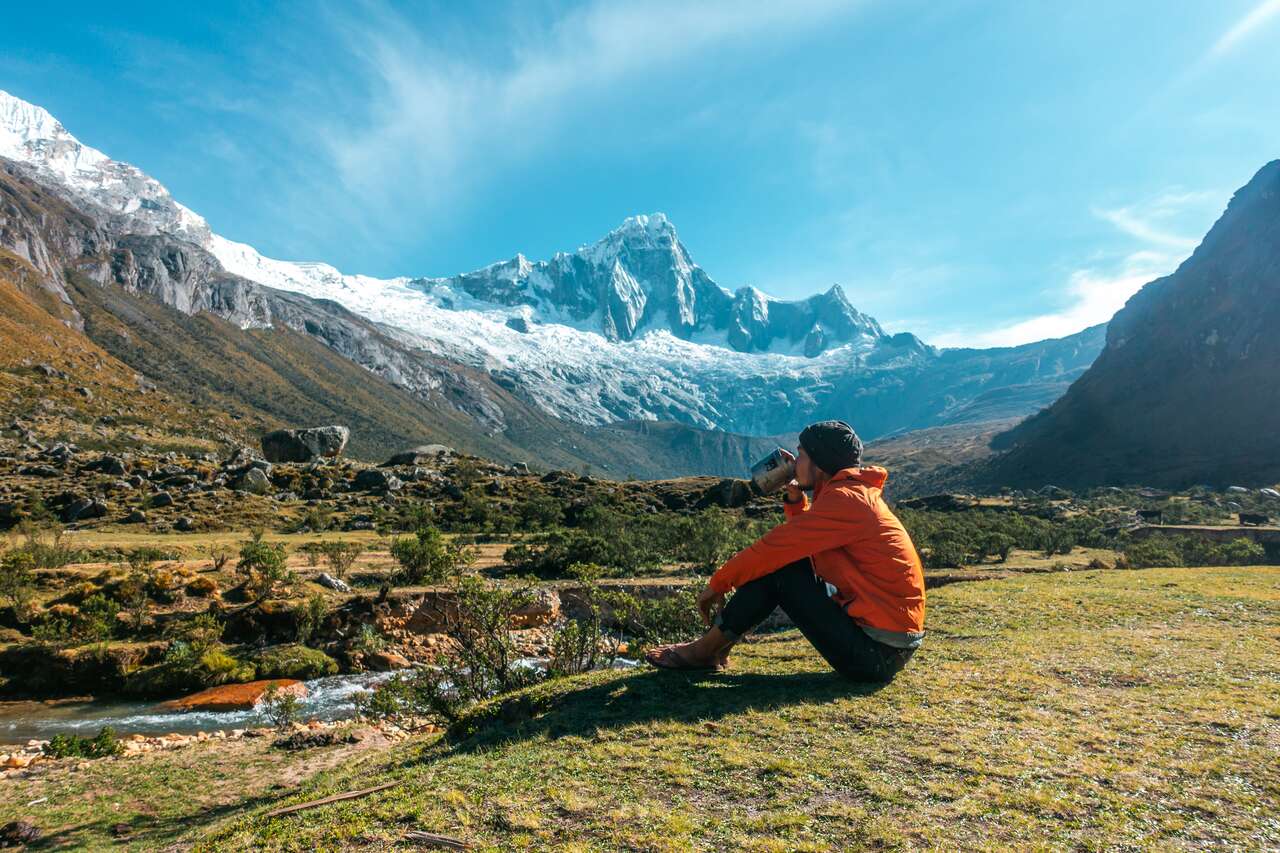
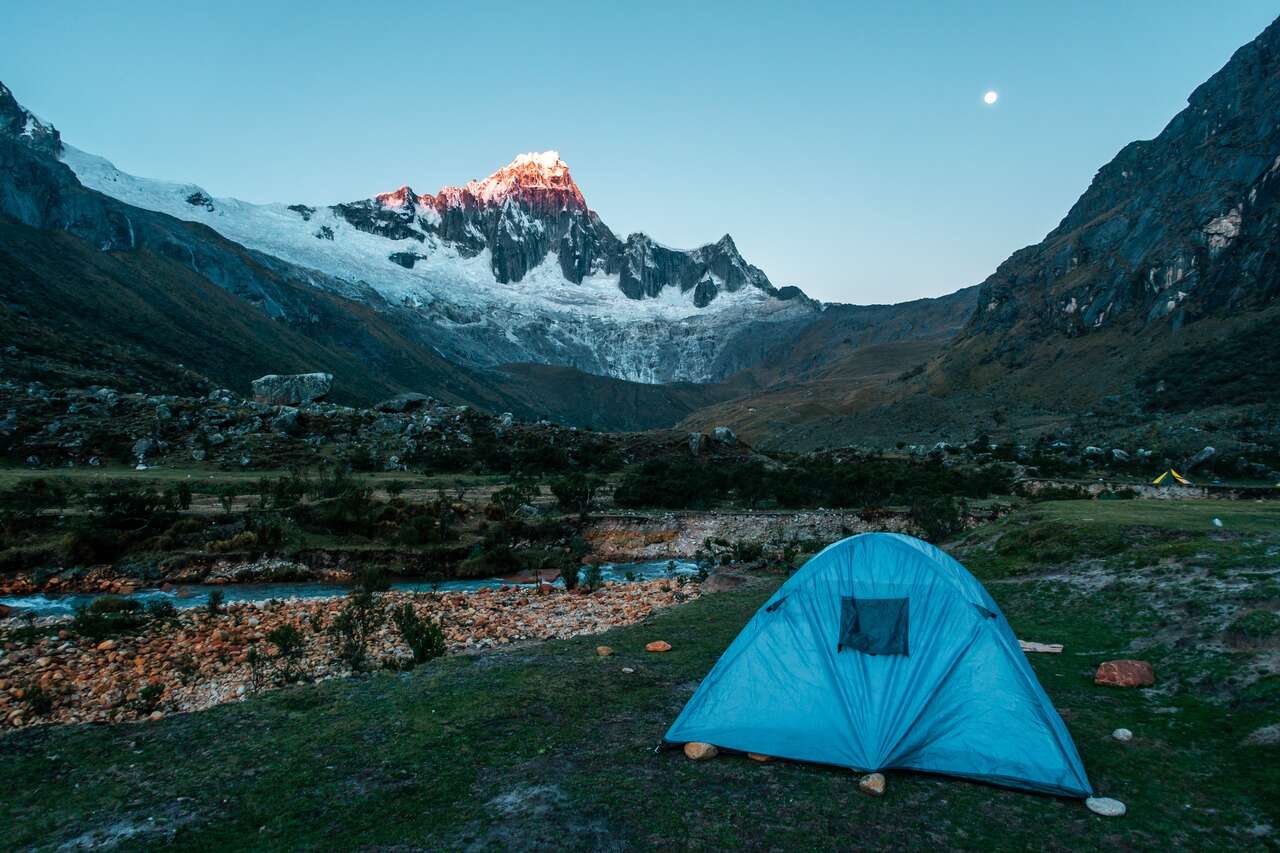
Huaraz, PeruMore Activities in Huaraz
Where to Stay in Huaraz?
Getting From Huaraz to Lima
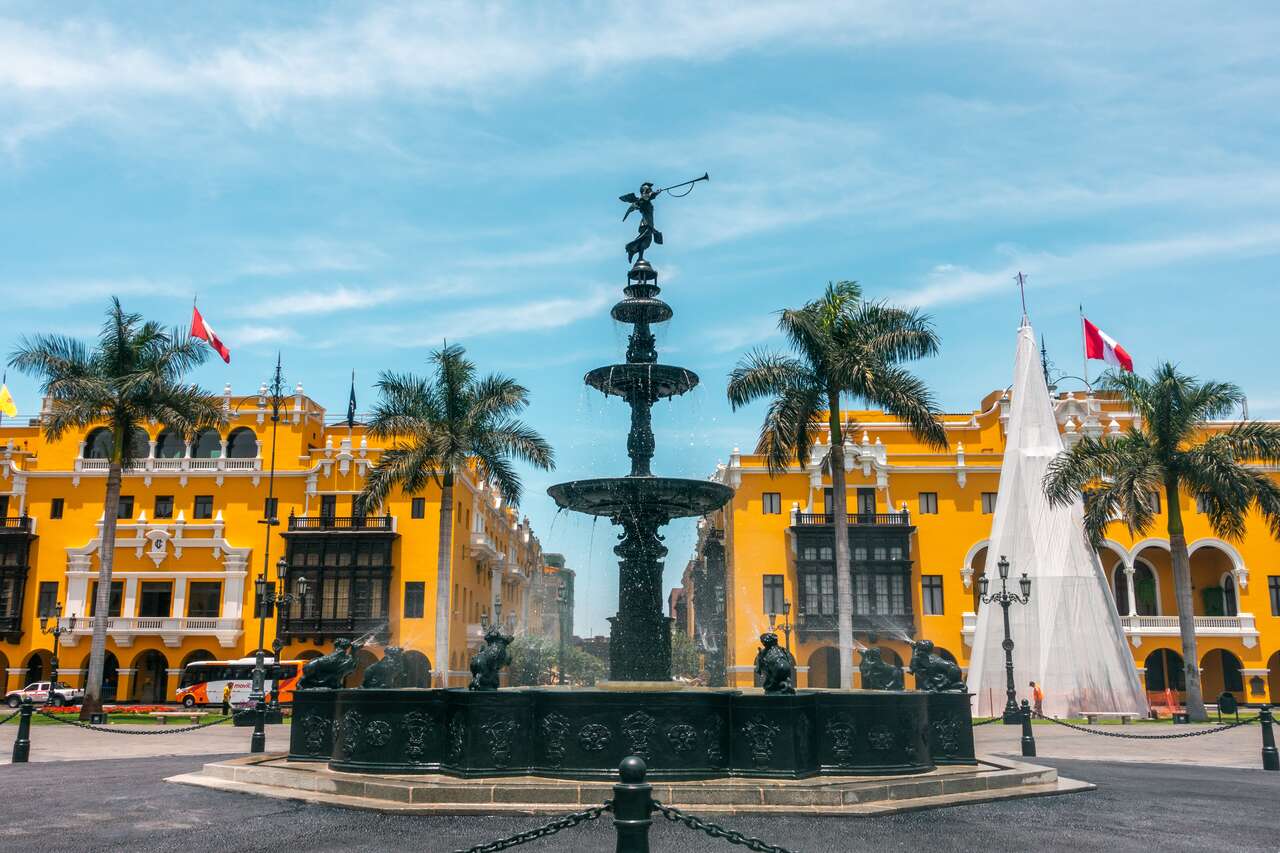
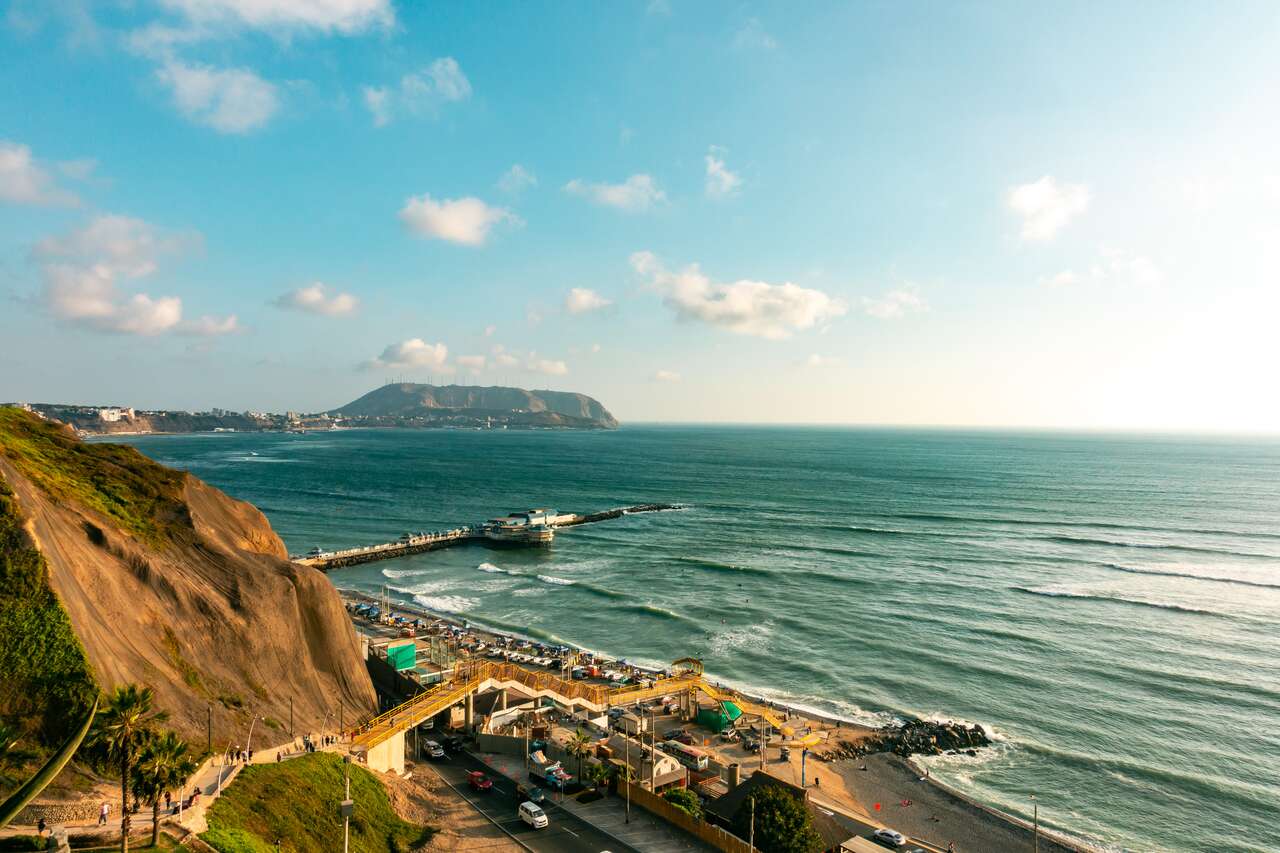
Lima, PeruMore Activities in Lima
Where to Stay in Lima?
Getting From Lima to Ica
Ica, PeruMore Activities in Ica
Where to Stay in Ica?
Getting From Ica to Nazca
Nazca, PeruMore Activities in Nazca
Getting From Nazca to Cusco
Cusco and Machu Picchu, PeruMore Activities in Cusco and Machu Picchu
Where to Stay in Cusco?
Getting From Cusco to Arequipa
Arequipa, PeruMore Activities in Arequipa
Where to Stay in Arequipa?
Getting From Arequipa to Copacabana
Copacabana, BoliviaMore Activities in Copacabana
Where to Stay in Copacabana?
Getting From Copacabana to La Paz
La Paz, BoliviaMore Activities in La Paz
Where to Stay in La Paz?
Getting From La Paz to Potosi
Potosi, BoliviaWhere to Stay in Potosi?
Getting From Potosi to Uyuni
Salar de Uyuni, BoliviaMore Activities in Salar de Uyuni
Where to Stay in Uyuni?
Getting From Salar de Uyuni to San Pedro de Atacama
San Pedro de Atacama, ChileMore Activities in San Pedro de Atacama
Where to Stay in San Pedro de Atacama?
Getting From San Pedro de Atacama to Antofagasta
Antofagasta, ChileMore Activities in Antofagasta
Where to Stay in Antofagasta?
Getting From Antofagasta to La Serena
La Serena, ChileMore Activities in La Serena
Where to Stay in La Serena?
Getting From La Serena to Valparaiso
Valparaíso, ChileMore Activities in Valparaíso
Where to Stay in Valparaiso?
Getting From Valparaiso to Santiago
Santiago, ChileMore Activities in Santiago
Where to Stay in Santiago?
Getting From Santiago to Easter Island
Easter Island, ChileMore Activities in Easter Island
Where to Stay on Easter Island?
Getting From Santiago to Pucon
Pucon, ChileMore Activities in Pucon
Where to Stay in Pucon?
Getting From Pucon to San Carlos De Bariloche
San Carlos De Bariloche, ArgentinaMore Activities in San Carlos De Bariloche
Where to Stay in San Carlos de Bariloche?
Getting From San Carlos De Bariloche to El Chalten
El Chalten, ArgentinaMore Activities in El Chalten
Where to Stay in El Chalten?
Getting From El Chalten to El Calafate
El Calafate, ArgentinaMore Activities in El Calafate
Where to Stay in El Calafate?
Getting From El Calafate to Puerto Natales
Puerto Natales, ChileMore Activities in Puerto Natales
Where to Stay in Puerto Natales?
Getting From Puerto Natales to Ushuaia
Ushuaia, ArgentinaMore Activities in Ushuaia
Where to Stay in Ushuaia?
Getting From Ushuaia to Buenos Aires
Buenos Aires, ArgentinaMore Activities in Buenos Aires
Getting From Buenos Aires to Iguazu Falls
Where to Stay in Buenos Aires?
Iguazu Falls, ArgentinaMore Activities in Iguazu Falls
Where to Stay in Iguazu?
Getting From Iguazu Falls to Foz do Iguaçu
Foz do Iguaçu, BrazilMore Activities in Foz do Iguaçu
BrazilMore Activities in Brazil
Where to Stay in Sao Paulo?
Where to Stay in Paraty?
Where to Stay in Rio de Janeiro?
Where to Stay in Salvador?
South America Travel Videos
When to Visit South America?
How to Get to South America?
How to Get Around South America?Getting Around South America by Bus
Getting Around South America by Collectivo
Getting Around South America by Flights
Getting Around Cities in South America
How Much Money Do I Need For South America?
Is South America Safe?
Which tourist SIM card is best for South America?
What to Pack for South America?
Further Reading for South America
[Show More]
South America Itinerary Map
Quick Summary: 6 Months Backpacking South America Itinerary
Day 1-3: Bogota, Colombia
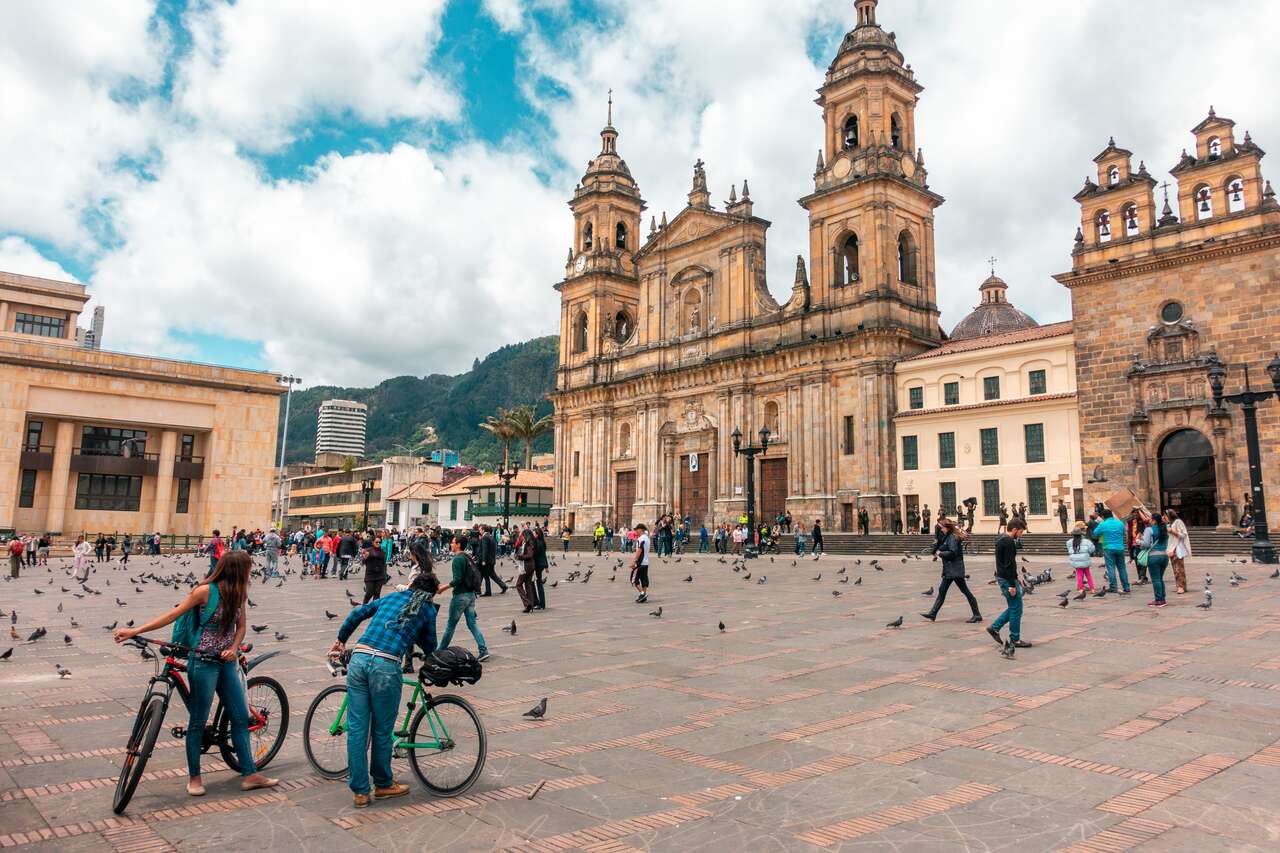
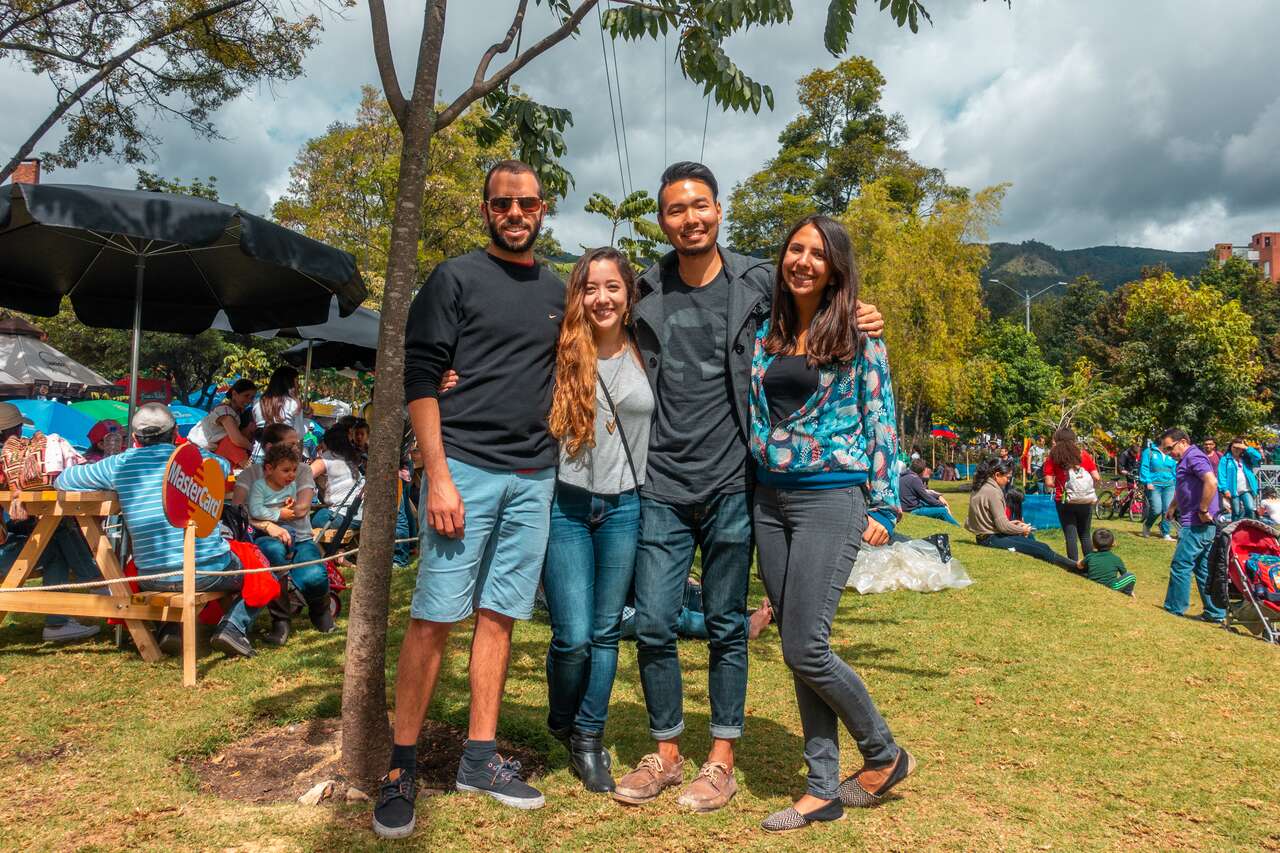
Our journey in South America begins in Bogota, the capital city of Colombia. When you arrive in Bogota, you might feel a little out of breath, which is normal as Bogota is located at 2644 m above sea level. This is very common here in South America, and you will encounter this kind of altitude throughout your trip to South America.
Read More
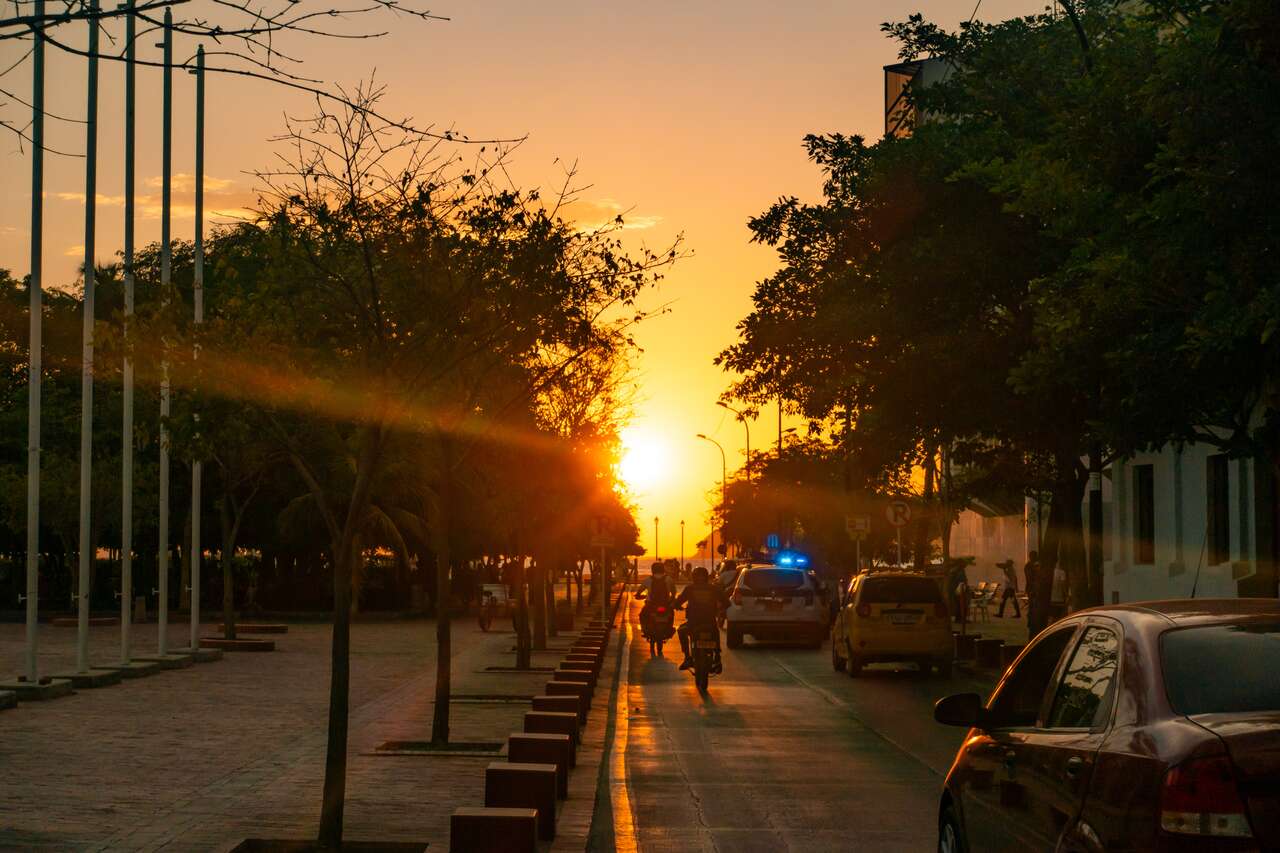
Day 4: Santa Marta, Colombia
Santa Marta is a nice city to stay for a night or two, but our focus here will be more on the nature side of things and maybe a trek into the forest to search for the Lost City, the Machu Picchu of Colombia.
Read More
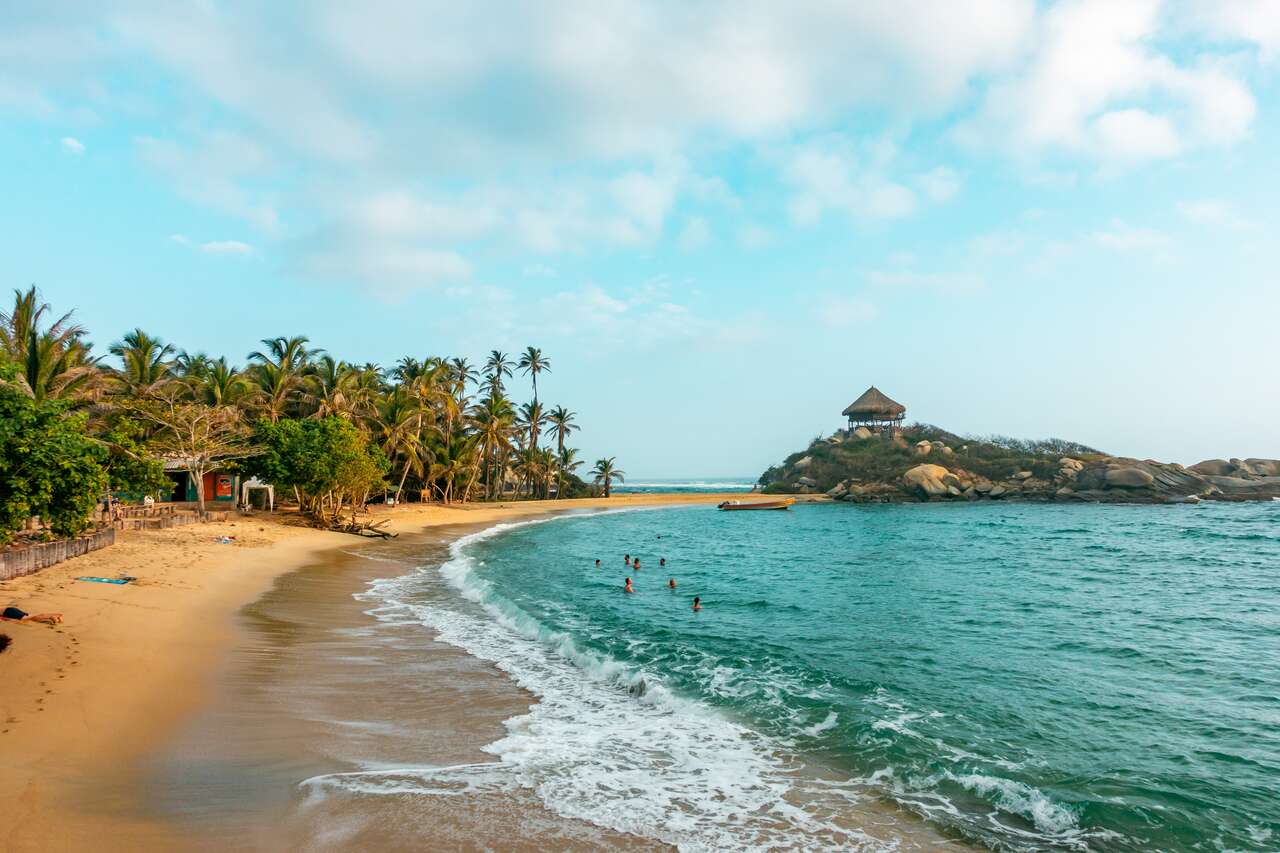
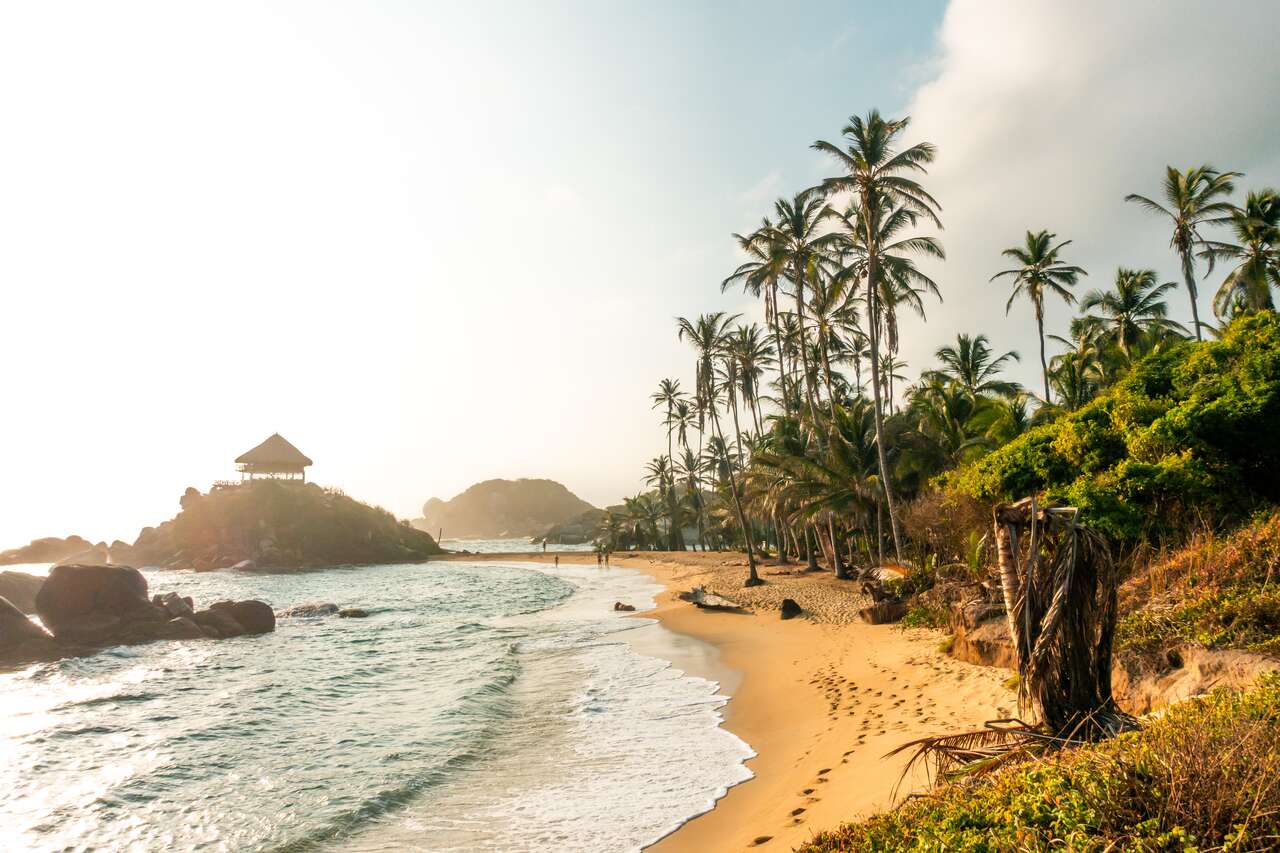
Day 5: Tayrona National Park, Colombia
Tayrona National Park is a beautiful forest area on the northern coast of Colombia. You can hike there from El Zaino to the Tayrona campground, where you can then choose to spend the night in a hammock by the beach or rent out a tent.
Read More
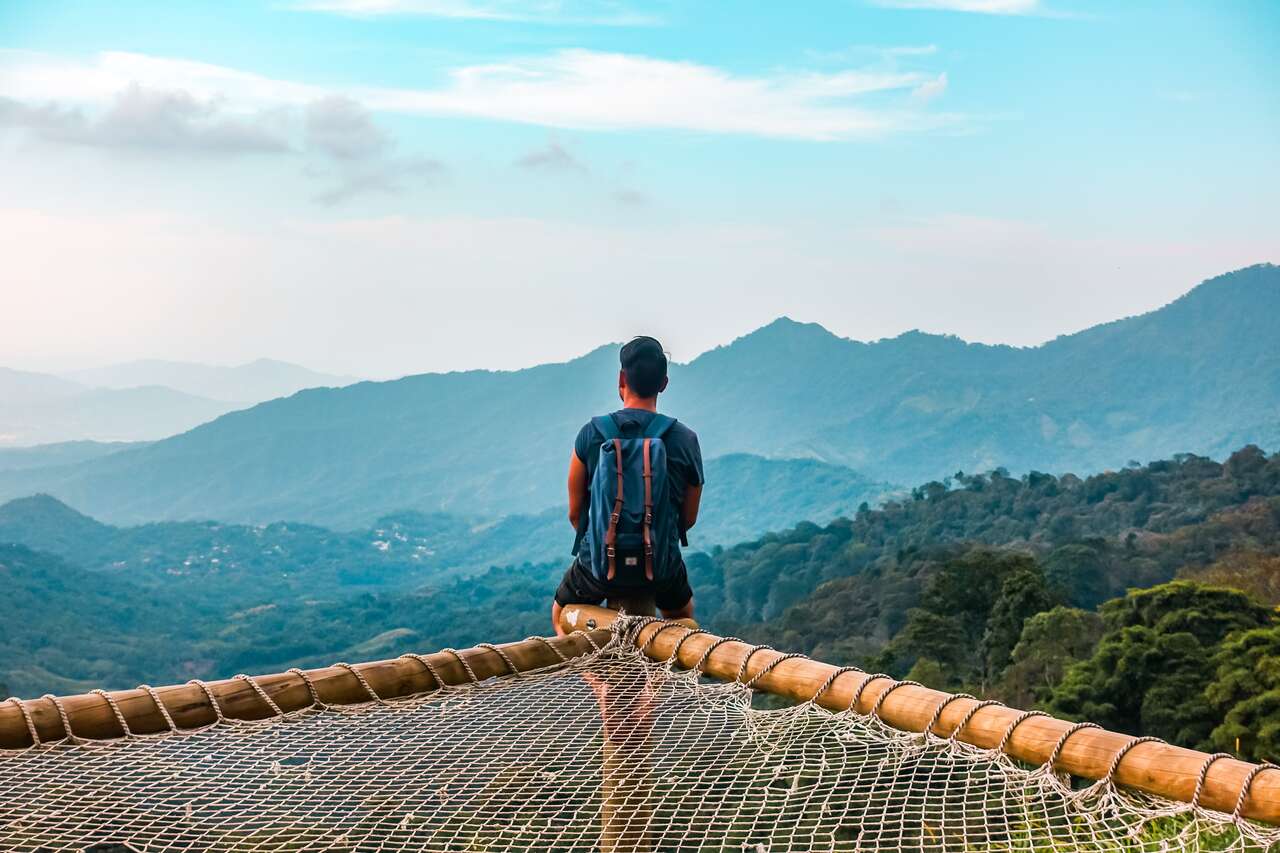
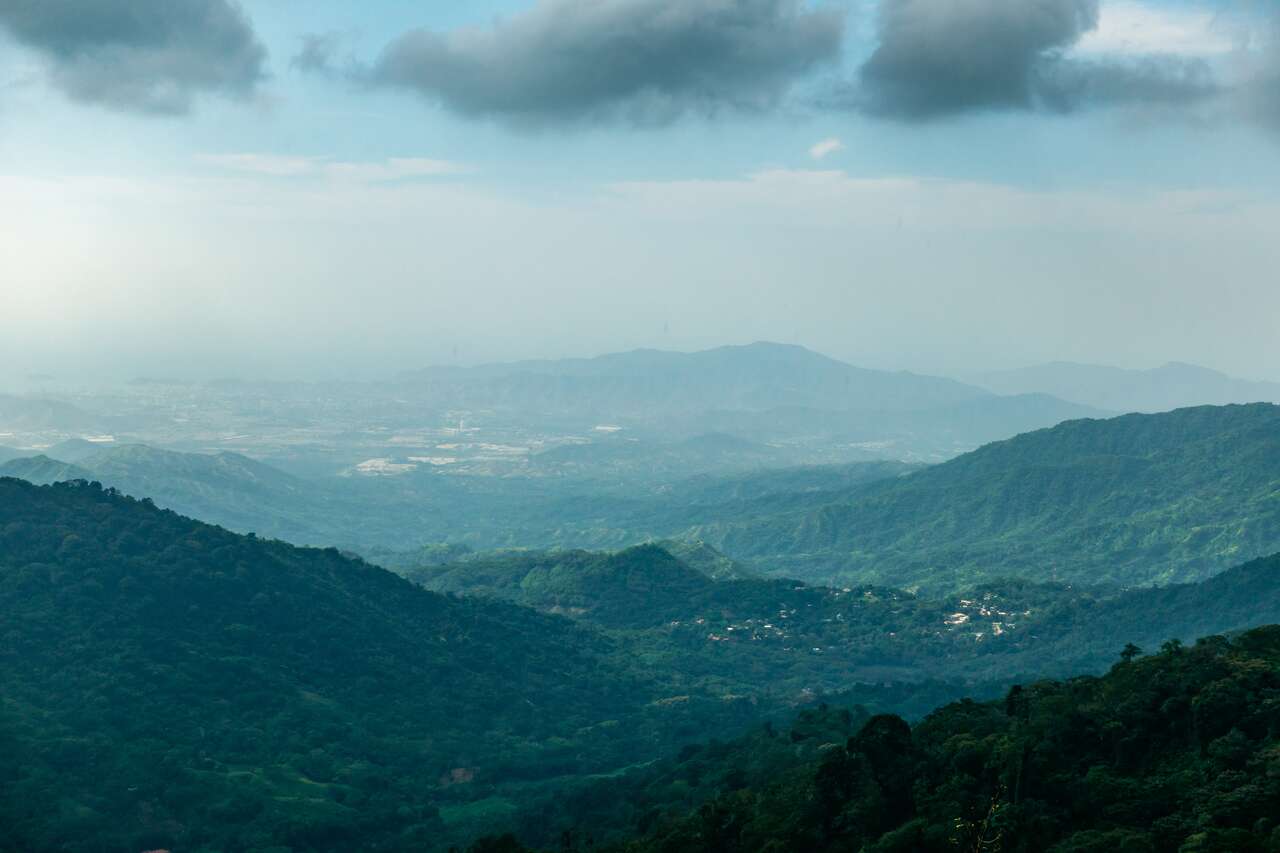
Day 6: Minca, Colombia
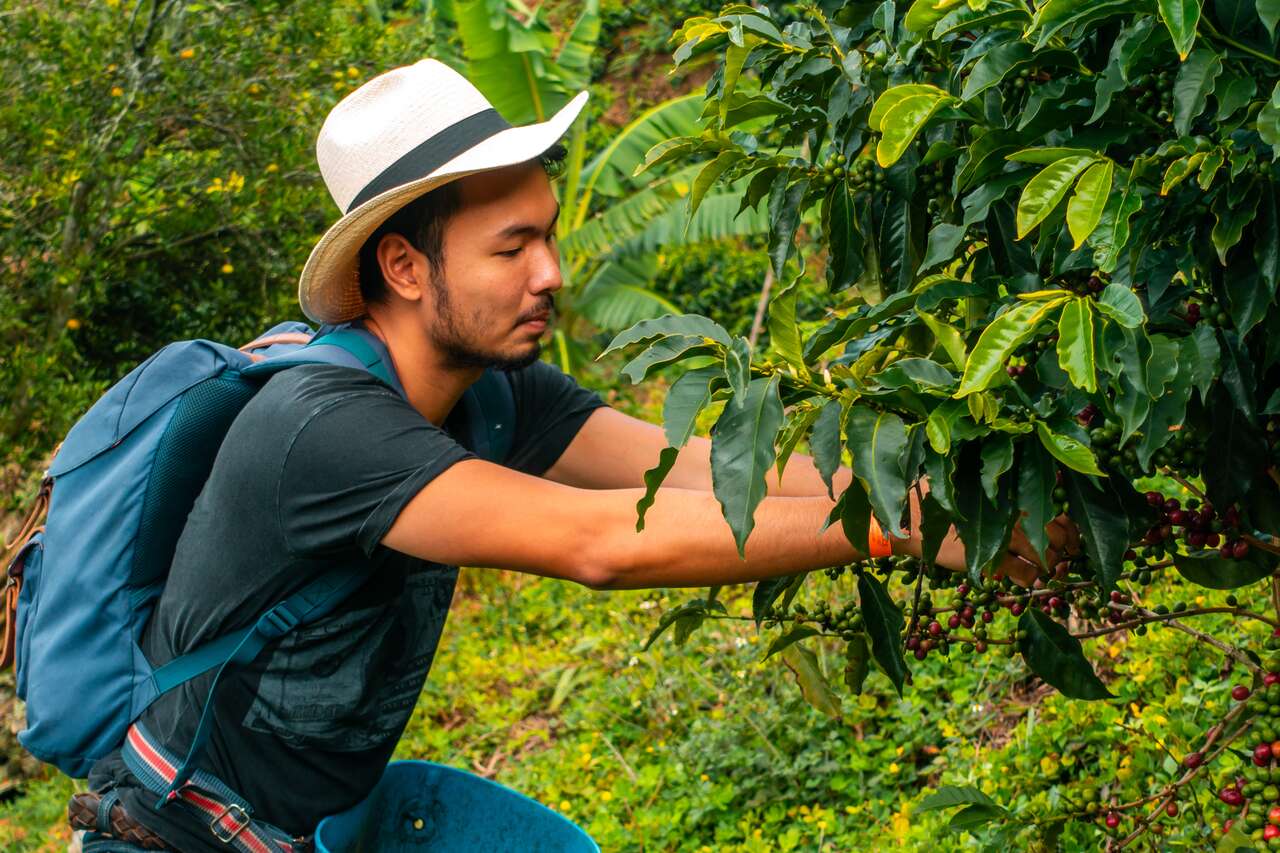
From the hot and humid Santa Marta, Minca is a breath of fresh air. Located in the coffee region of the north, Minca offers you a great chance to see the beautiful mountains of northern Colombia on a motorbike, taste some of the finest coffee in the country, and find solitude in the middle of the mountain as you relax on the giant hammock at Casa Elemento hostel.
Read More
Day 7-10: The Lost City, Colombia
I was unable to do the trek due to timing, but I have met many people who enjoyed hiking the trek to the Lost City. You first have to get a tour, which should cost you about 1,150,000 pesos, and then they will provide you with places to sleep, usually hammocks, food, and guide you through the deep jungle of the Andes to the forgotten Lost City. Beware of insects and mosquitoes, as the north of Colombia can be quite tropical and the insects love that.
Read More
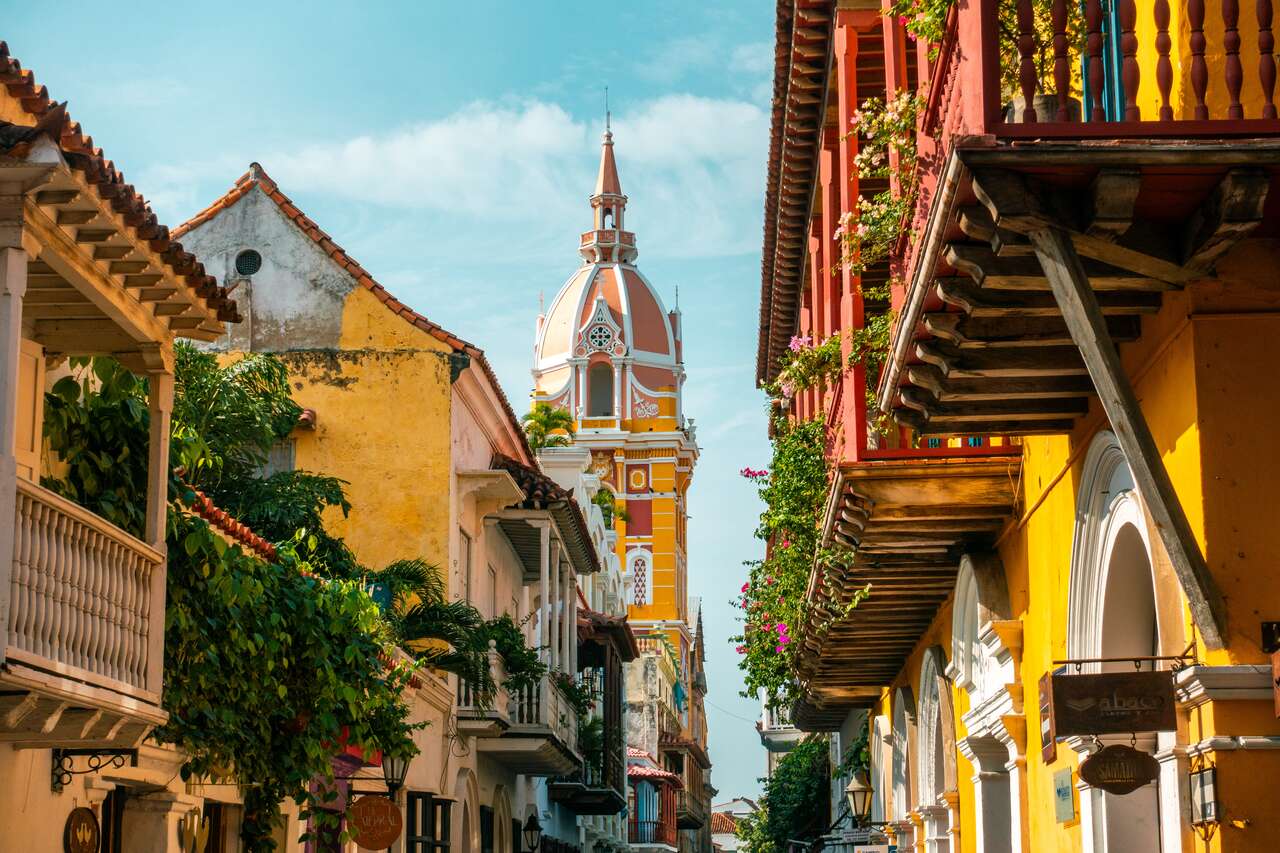
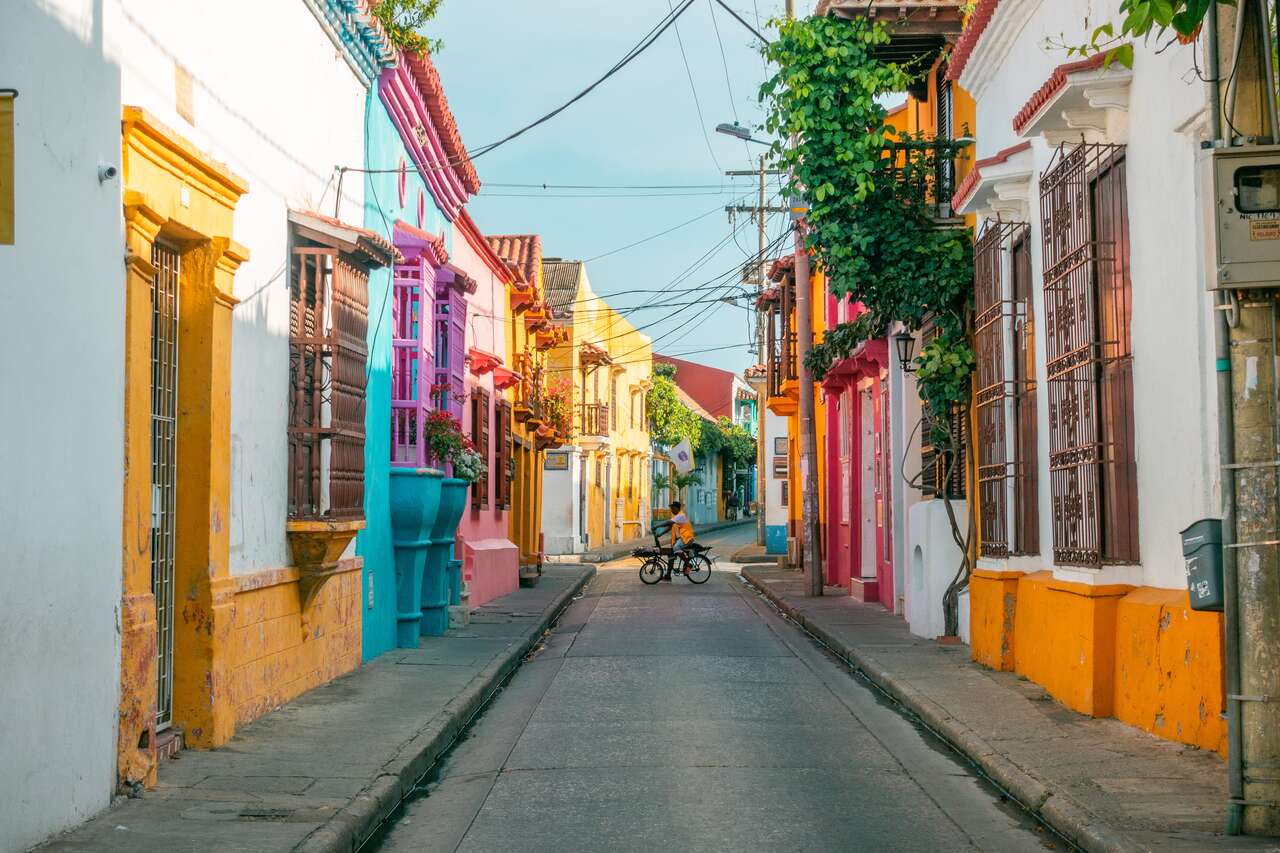
Day 11-12: Cartagena, Colombia
Cartagena is a colonial city on the northern coast of Colombia. It is possibly one of the most photogenic colonial towns in Colombia, hence the number of tourists you will find here. Despite that, the old town part is definitely worth a visit.
Read More
Day 13-17: Medellin, Colombia
Medellin has quite a lot to offer in terms of hiking and culture. As some of you may know, Medellin was the stage for the drug lord Pablo Escobar and his reign of terror. So, in order to understand the history of the city and where it came from, going on a Pablo Escobar tour might help you understand the truth about the conflict a little bit more.
Read More
Day 18-19: Salento, Colombia
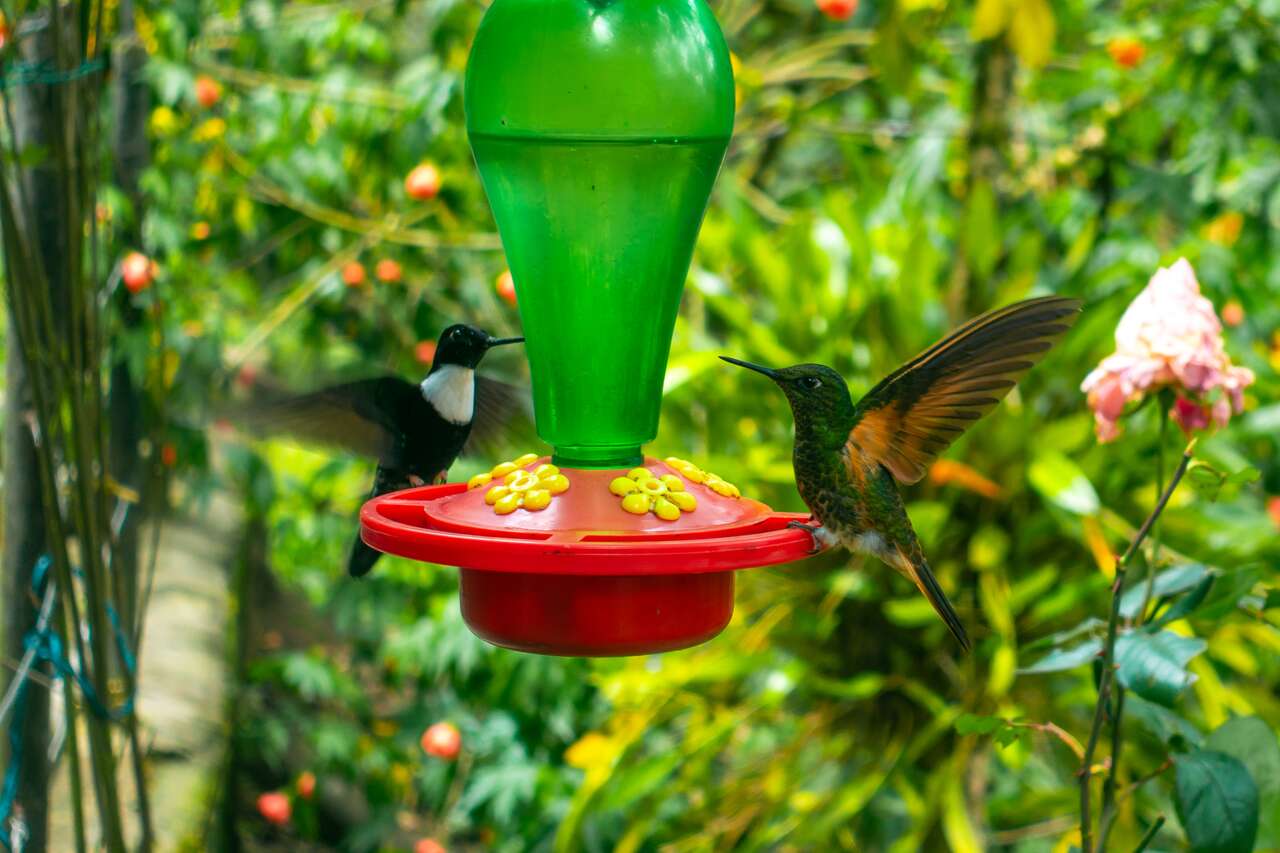
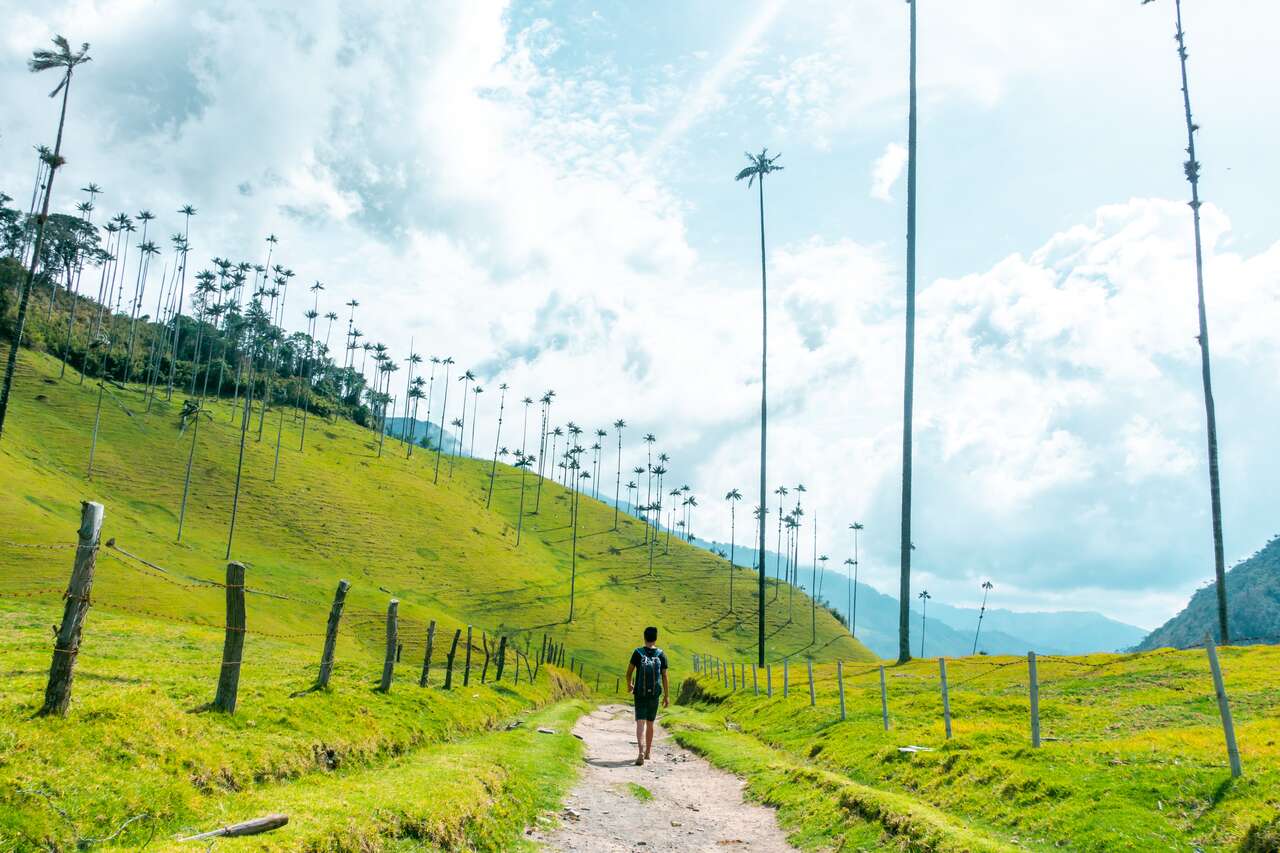
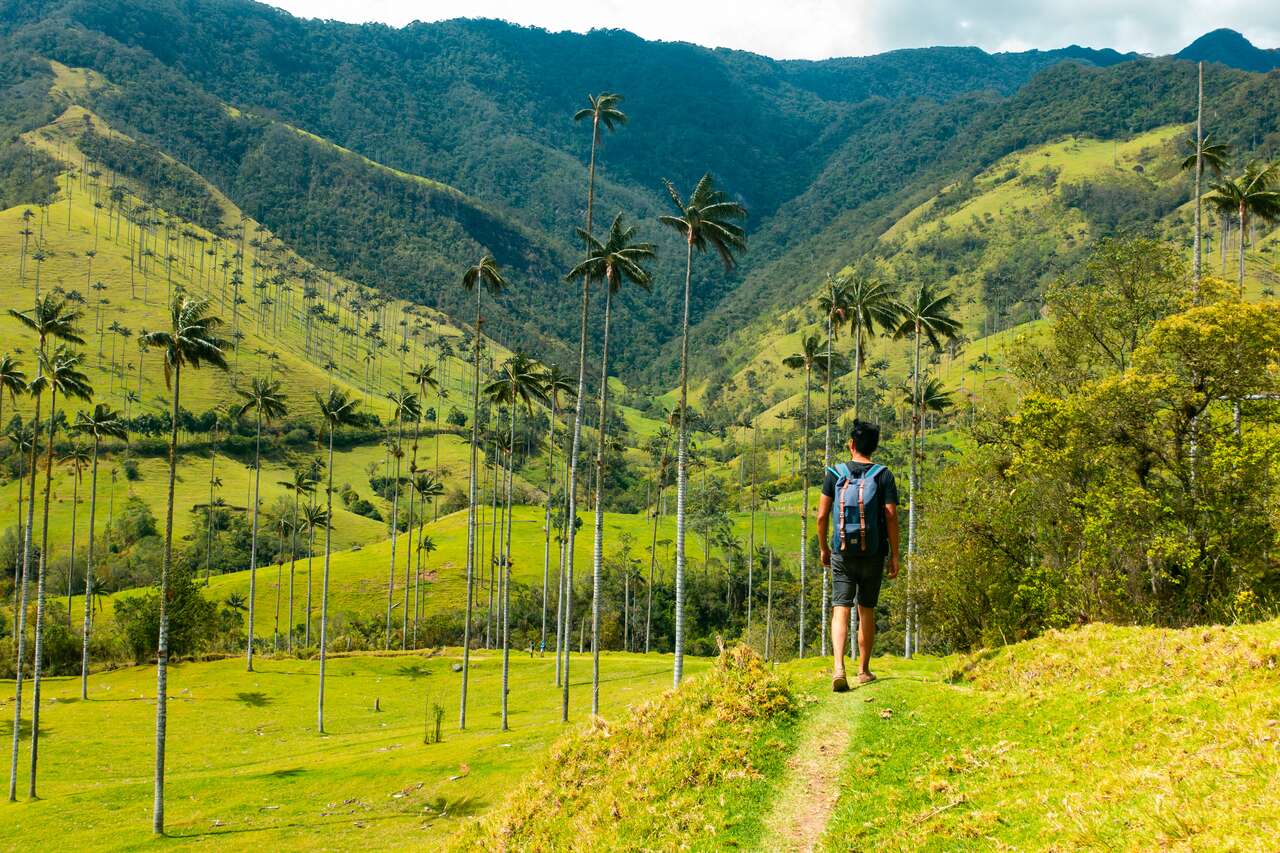
Salento is where the adventure is at. Spend a full day hiking around the Cocora valley, where all the tall palm trees are. Get up to Finca Acaime for a nice warm coffee break and witness the hummingbirds up close.
Read More
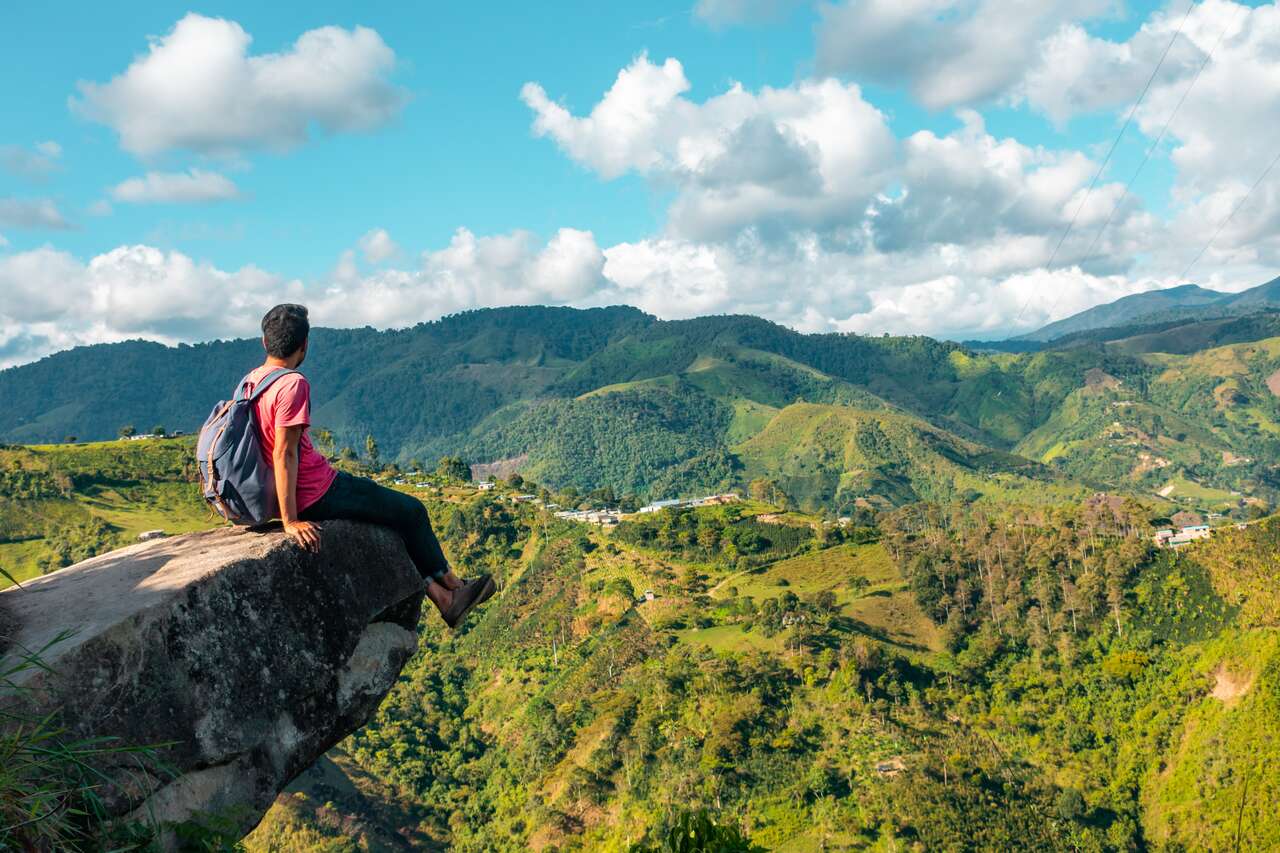
Day 20-22: Popayan, Colombia
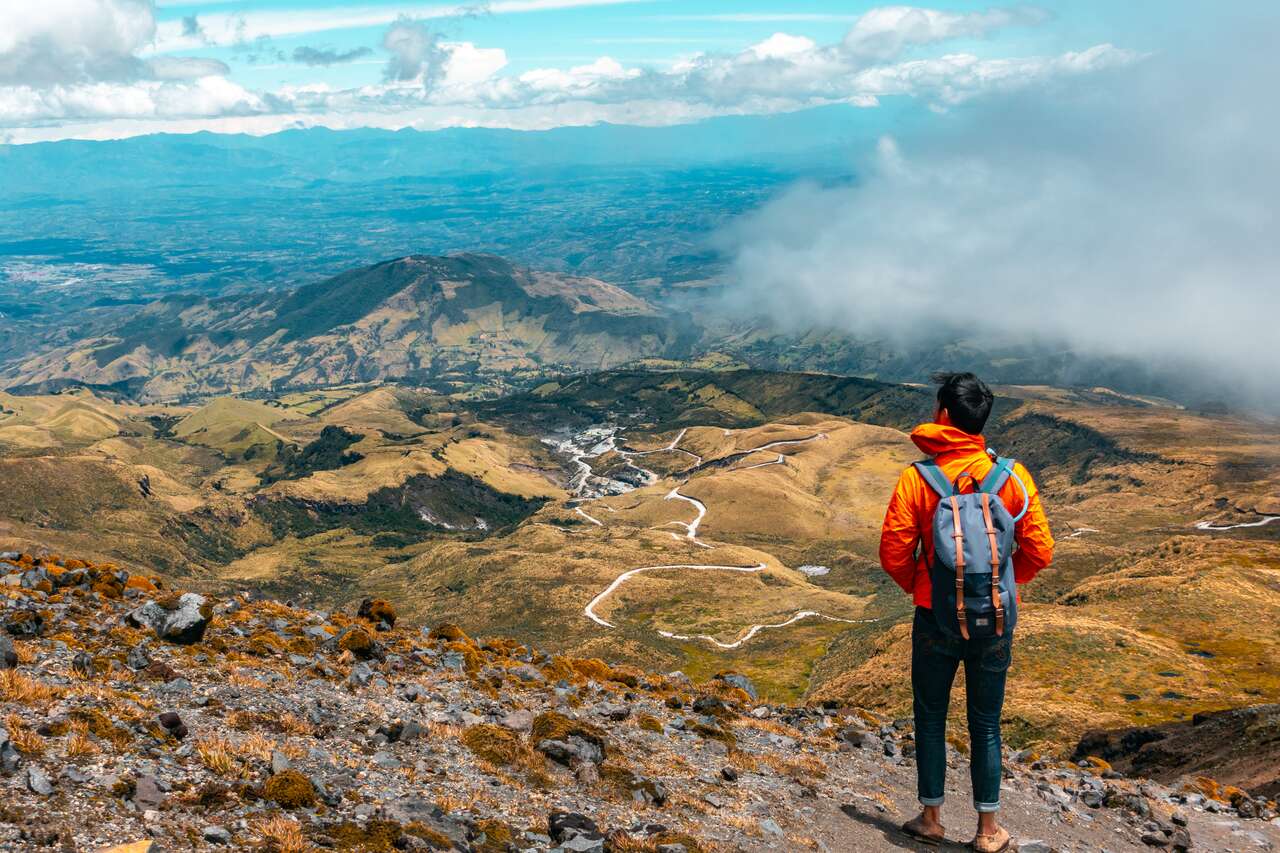
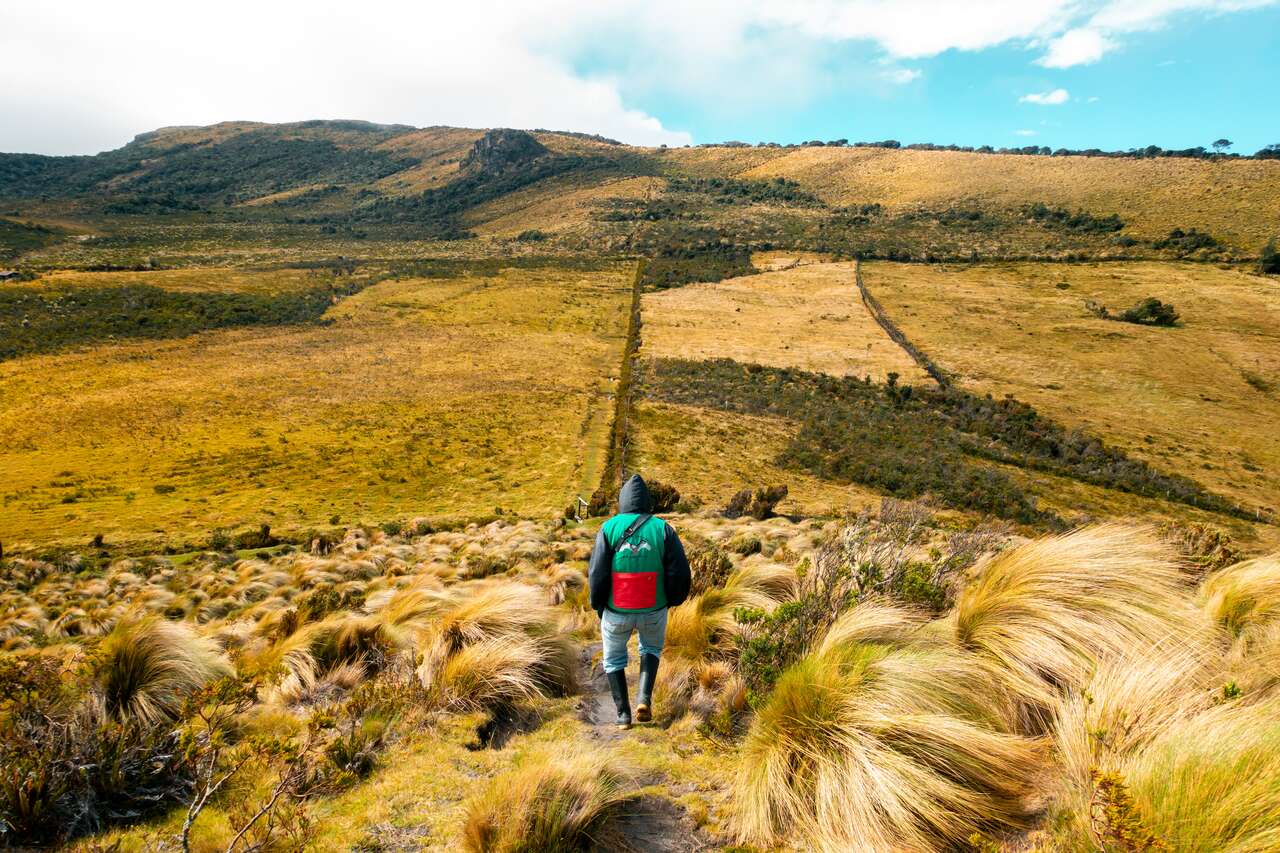
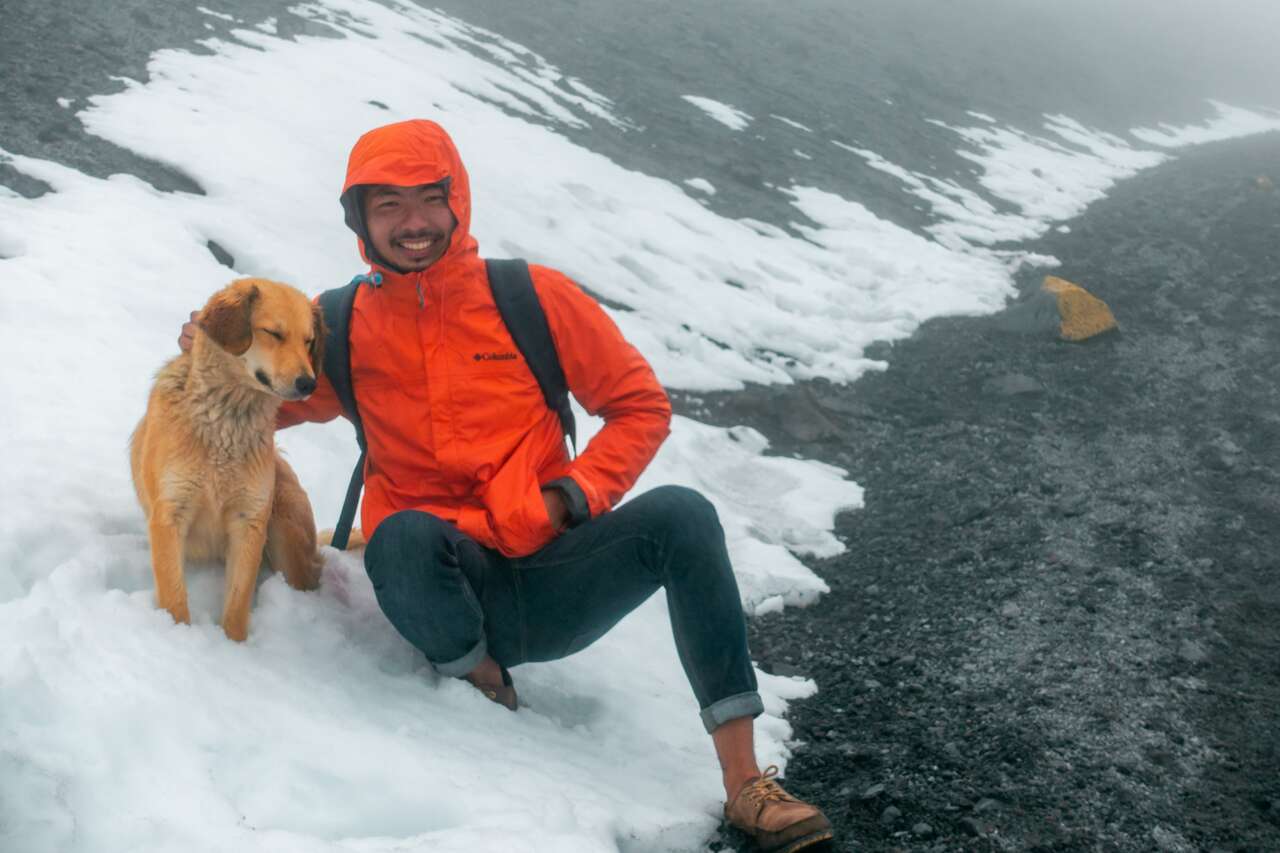
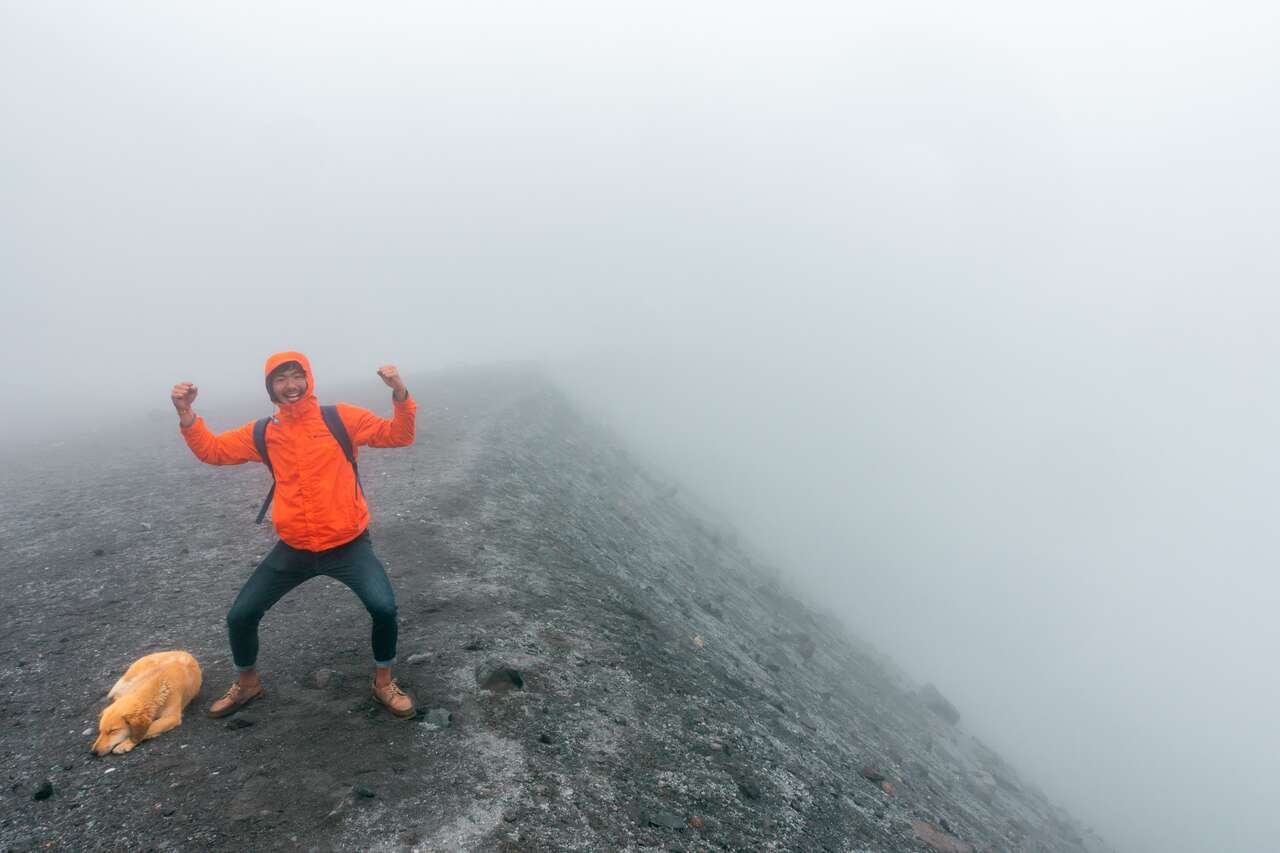
After quite a relaxing itinerary, it is time for a real adventure. Near Popayan, there is a volcano called Purace where you can climb. You have to take a bus at 5 AM from the terminal up to the trailhead by 8 AM before starting an 8-hour hike to the summit and back.
Read More
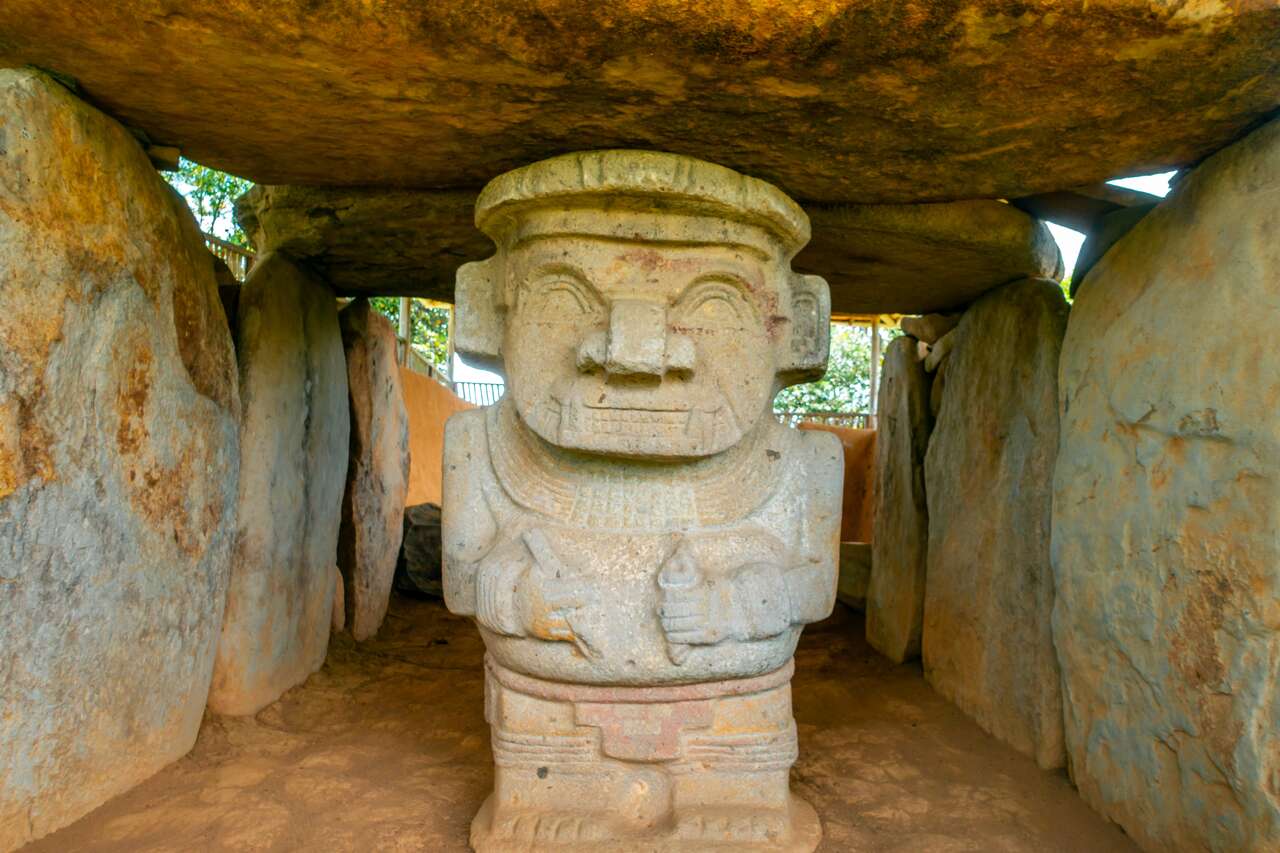
Day 23-24: San Agustin, Colombia
San Agustin is a gateway to learning about the Pre-Columbian history of this region, with plenty of stone statues scattered around the archaeological site. Parque Arqueologico is one such site, and I highly recommend taking a tour to see the others.
Read More
Day 25: Pasto, Colombia
Since the ride from San Agustin to Pasto can be horrid, it is important to stop in Pasto so that you can wake up early in the morning and make your way to the border of Ecuador.
Read More
Day 26-29: Quito, Ecuador
After a month in Colombia, it is time to move on to our next destination: Ecuador. This country, though it looks quite small compared to its neighbors, does have a ton of things to do and see. I saw more wildlife in Ecuador than in my entire life.
Read More
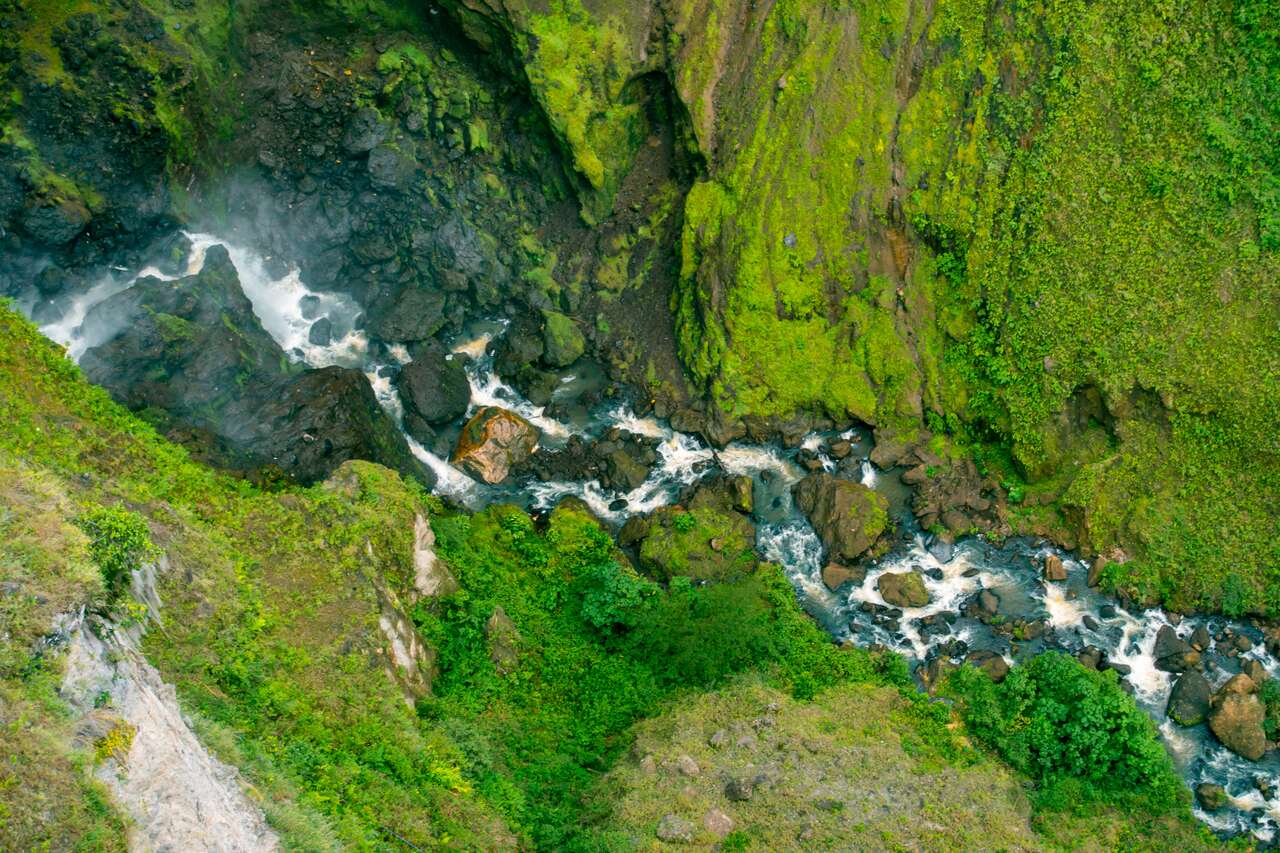
Day 30-31: Mindo, Ecuador
Mindo is a peaceful small town in the mountains where you can hike to one of the many waterfalls in the forest and spot some rare species of birds that can’t be seen anywhere else.
Read More
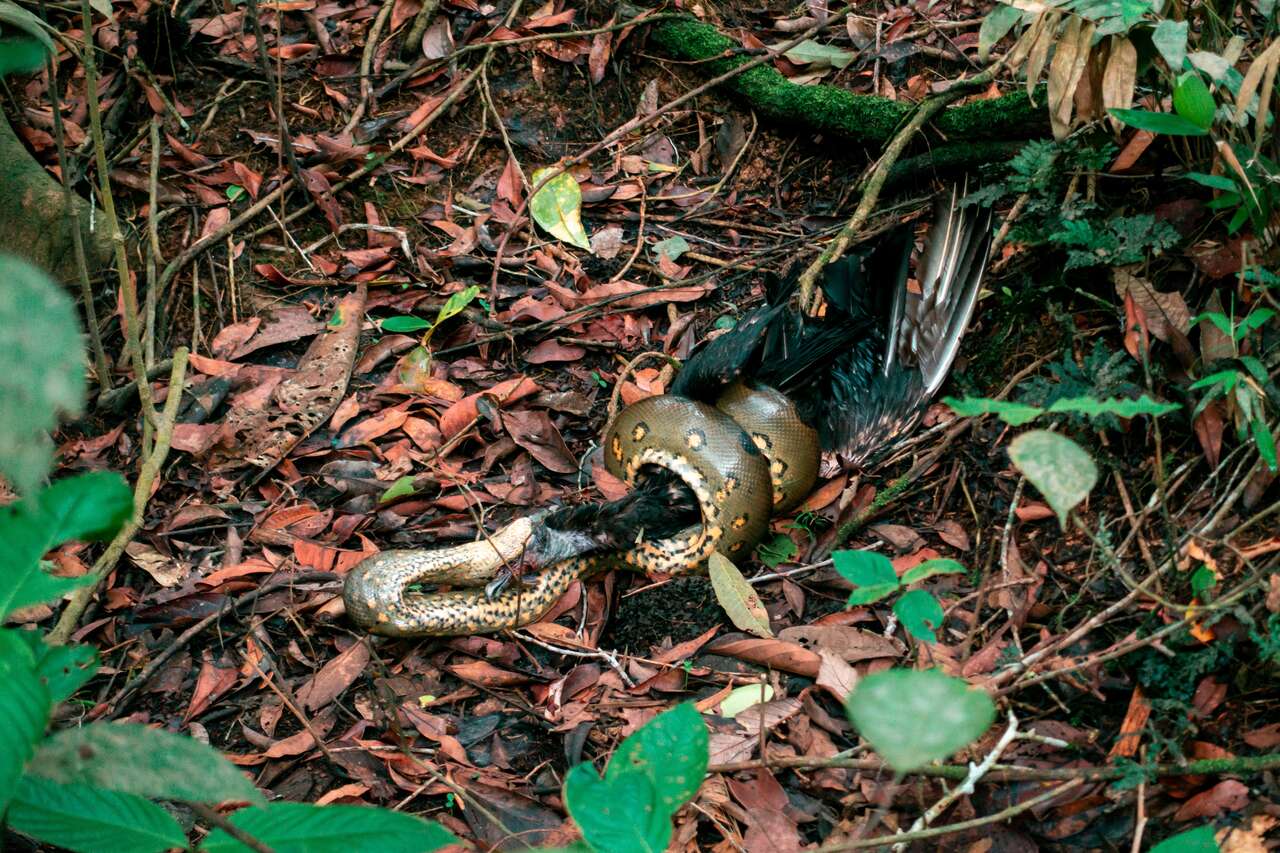
Day 32-35: The Amazon, Ecuador
To be able to go bushwhacking around the Amazon, see an actual anaconda eating birds, and learn about the Amazon culture of the indigenous people living off this untamed rainforest is one of the best things you can do while you are in South America.
Read More
Day 36: Cotopaxi, Ecuador
Cotopaxi is an active stratovolcano in the Andes Mountains and the second highest mountain in Ecuador, reaching a height of 5,897 m. You can climb it, but only to a certain point, as the terrain becomes too treacherous to continue without proper climbing gear. That is where we will be going today.
Read More
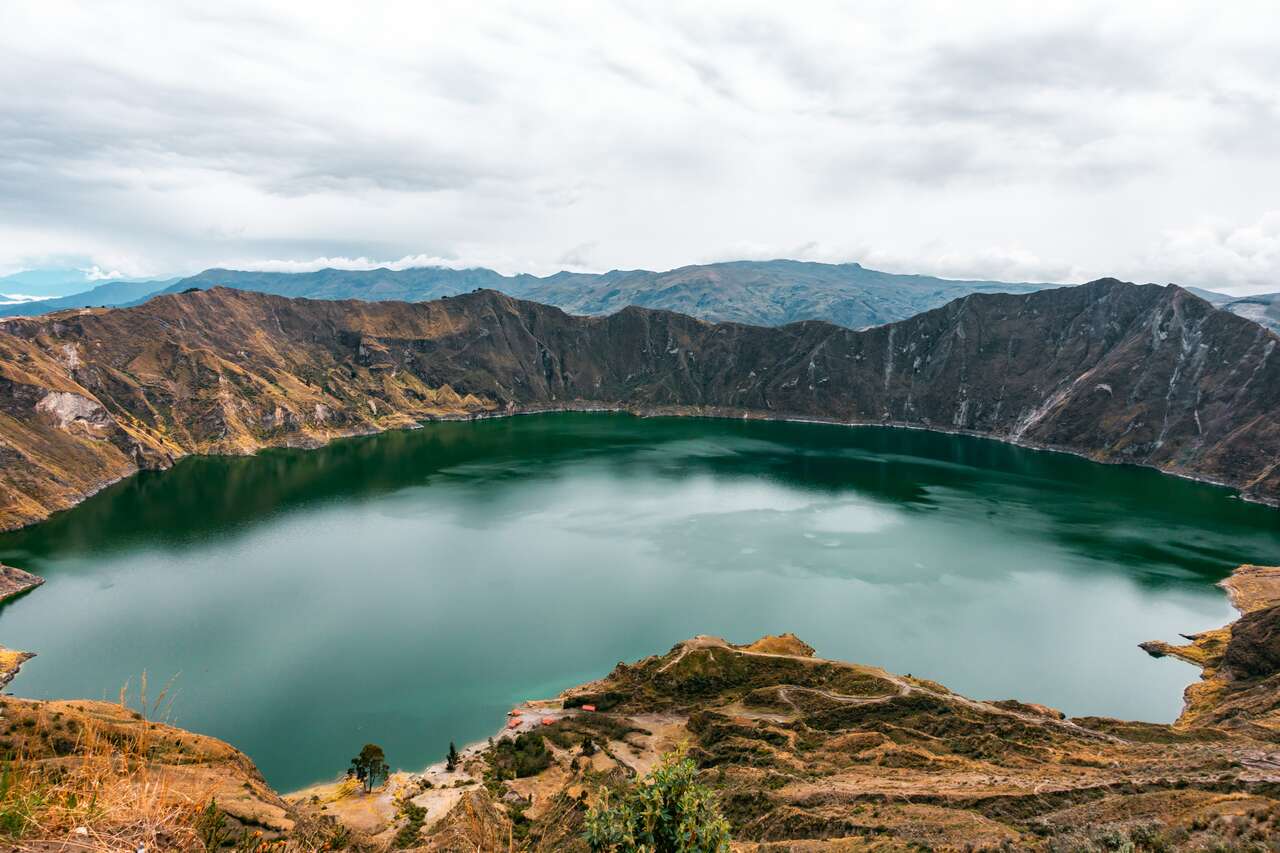
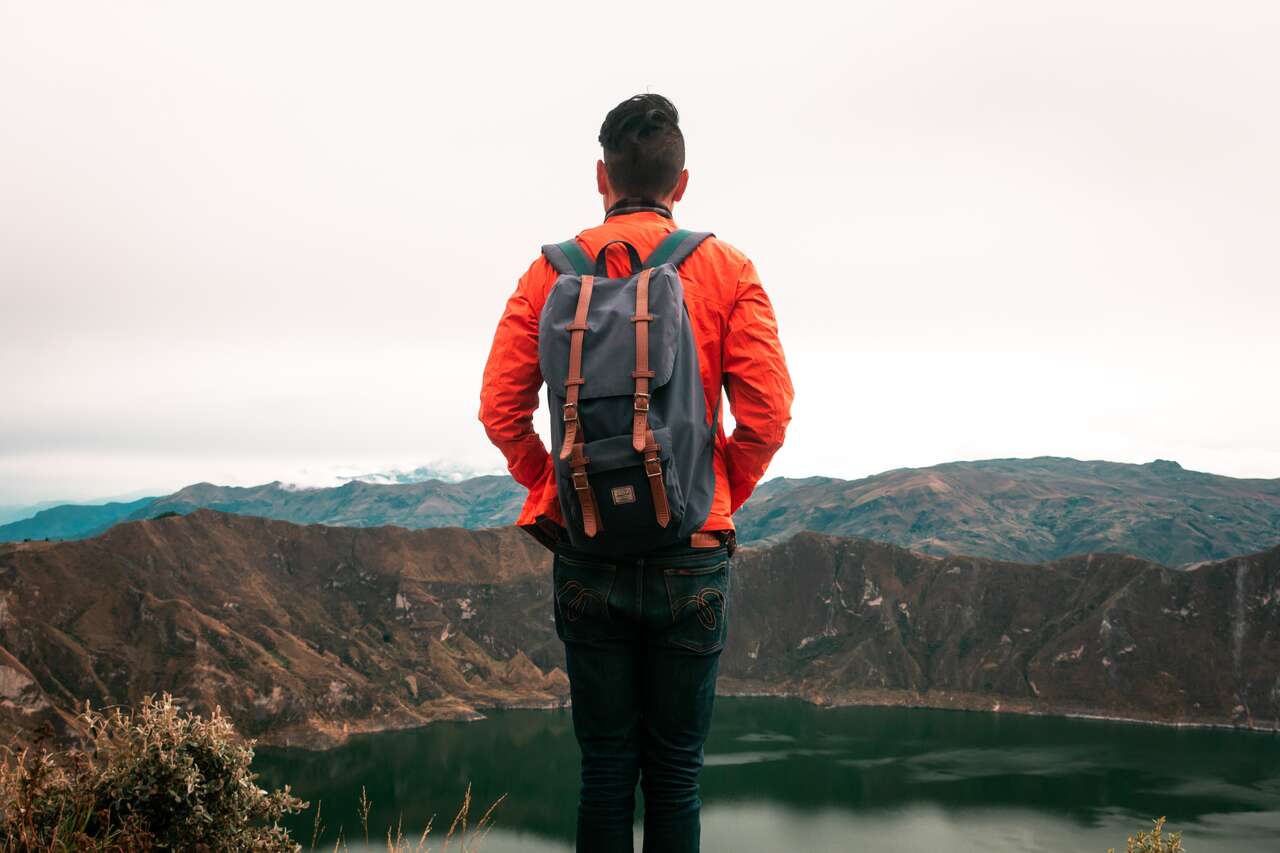
Day 37: Quilotoa Laguna, Ecuador
Quilotoa is a beautiful water-filled caldera where you can hike up to a lookout point and see the emerald-colored, 3-kilometer-wide lake from the ridge. Some people may opt for a 4-day trek called Quilotoa Loop, which will take you around the area, but you don’t really have to do the 4-day trek to see this lookout point if you don’t want to.
Read More
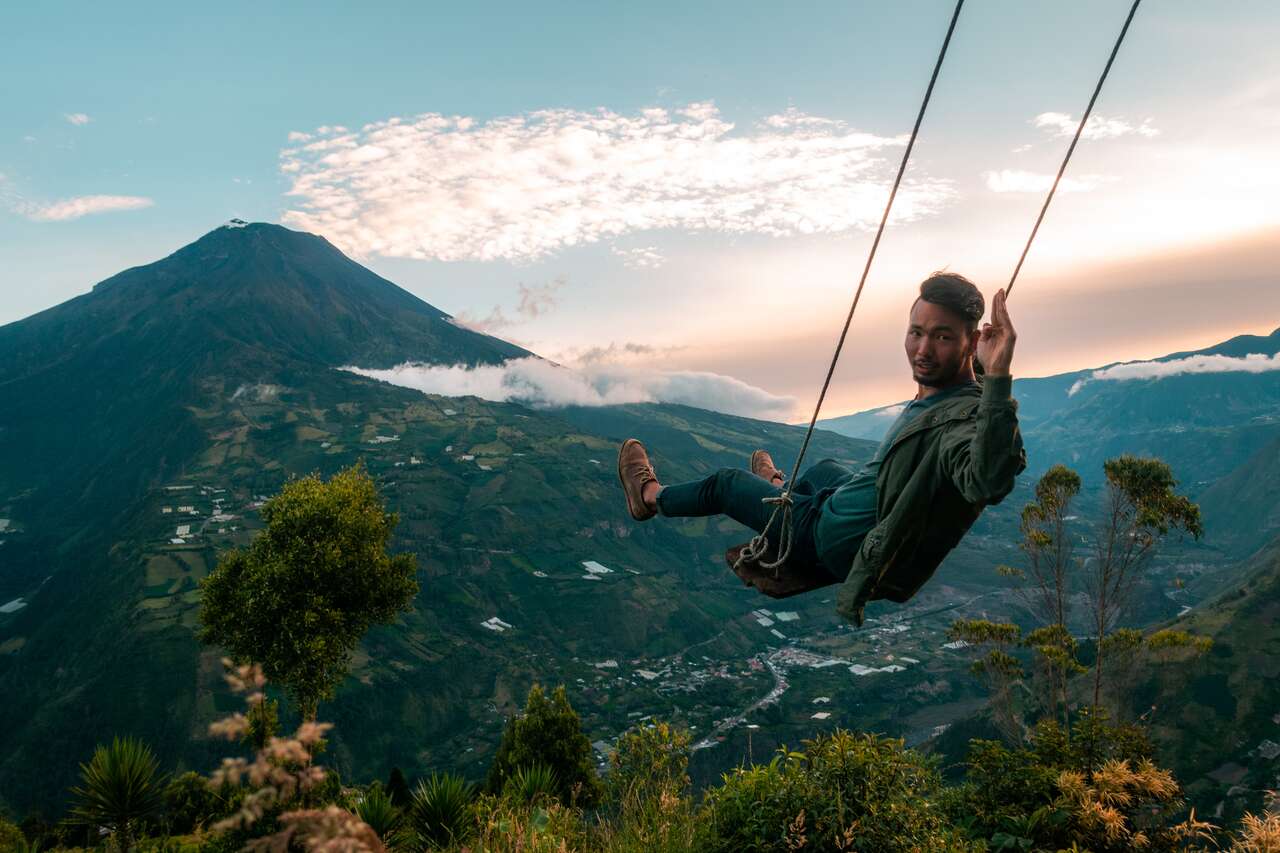
Day 38-39: Banos, Ecuador
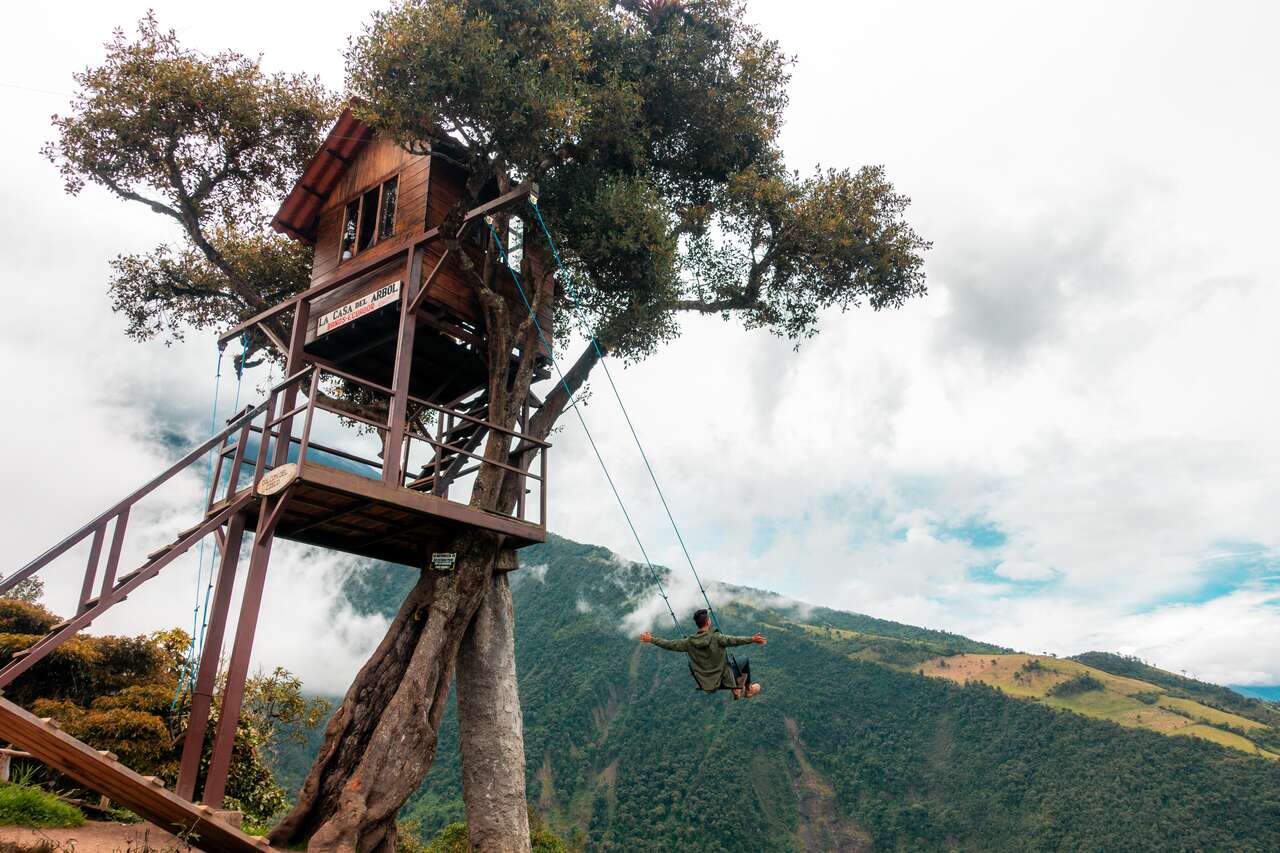
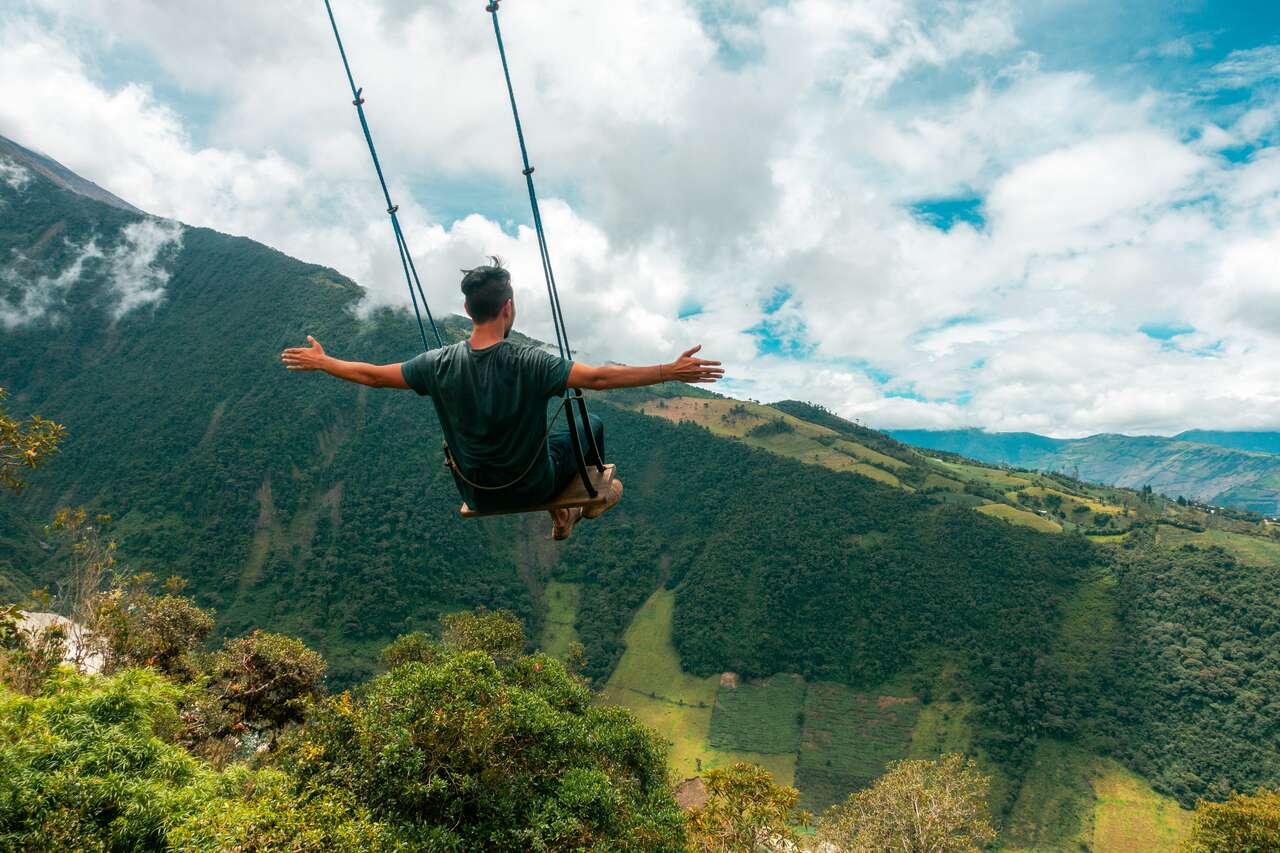
You may have seen a photo of a person swinging off a cliff overlooking an erupting volcano somewhere on the Internet before, but did you know that the volcano is Mt. Tungurahua and the photo was taken in Baños, Ecuador? I didn’t know that and was happily surprised when I arrived in Baños and saw the swing, the treehouse, and the volcano with my own eyes.
Read More
Day 40: Guayaquil, Ecuador
There is not much to see in Guayaquil, but it is a good base to fly off to the Galapagos Islands as it is cheaper than from Quito. You can spend this day relaxing and chilling out before we get on a flight to one of the greatest adventures of your life: a visit to the Galapagos Islands.
Read More
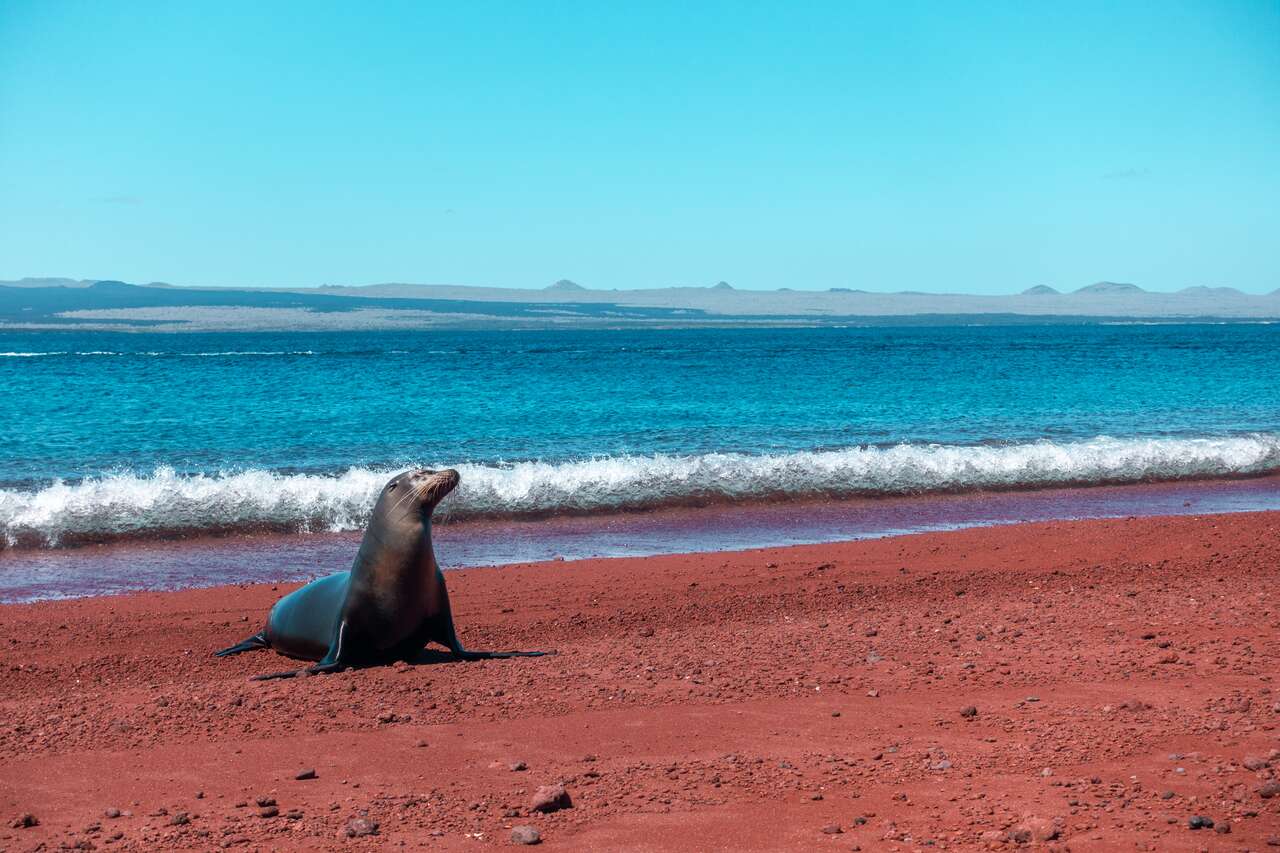
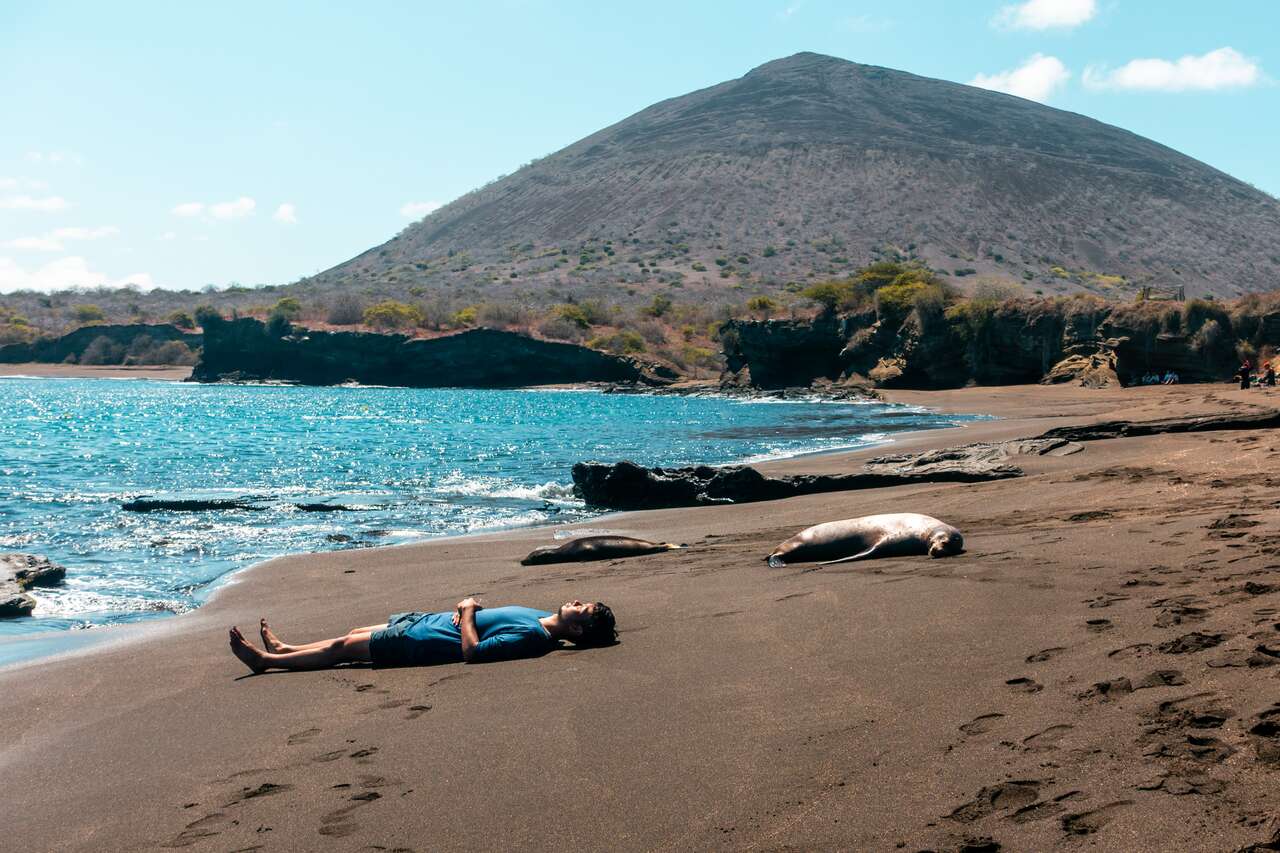
Day 40-49: Galapagos, Ecuador
Visiting the Galapagos will be one of the best trips you will ever take in your life. It is expensive, but trust me, you will not regret it. There is no place in the world that is quite like the Galapagos.
Read More
Day 50-51: Cuenca, Ecuador
Although it is relatively comfortable to do a cruise in Galapagos, you might feel like you want to relax afterward. Cuenca is the perfect place for that. Take it slow and walk around this wonderful city. The city has one of the most photogenic cathedrals in Ecuador.
Read More
Day 52-53: Vilcabamba, Ecuador
Finally, we arrived at our last destination in Ecuador, Vilcabamba, a quiet town in the Andes mountains, with a charming little community, and a few nice hikes you can do.
Read More
Day 54-55: Huanchaco, Peru
Huanchaco is a great first stop after traveling through Ecuador. With a change in scenery from mountains to beaches, you will appreciate what Huanchaco has to offer.
Read More
Day 56-64: Huaraz, Peru
Huaraz is my favorite place in South America, hands down. The best part of the Andes is located here, and if you are into hiking like me, you will find plenty of things to do here.
Read More
Day 65-66: Lima, Peru
If you seek a nice place to rest from a very demanding trip in Huaraz, Miraflores in Lima offers you any convenience you would ever need. In between that, you can go to the main square and check out the Cathedral de Lima and the Basílica y Convento de San Francisco de Lima.
Read More
Day 67-68: Ica, Peru
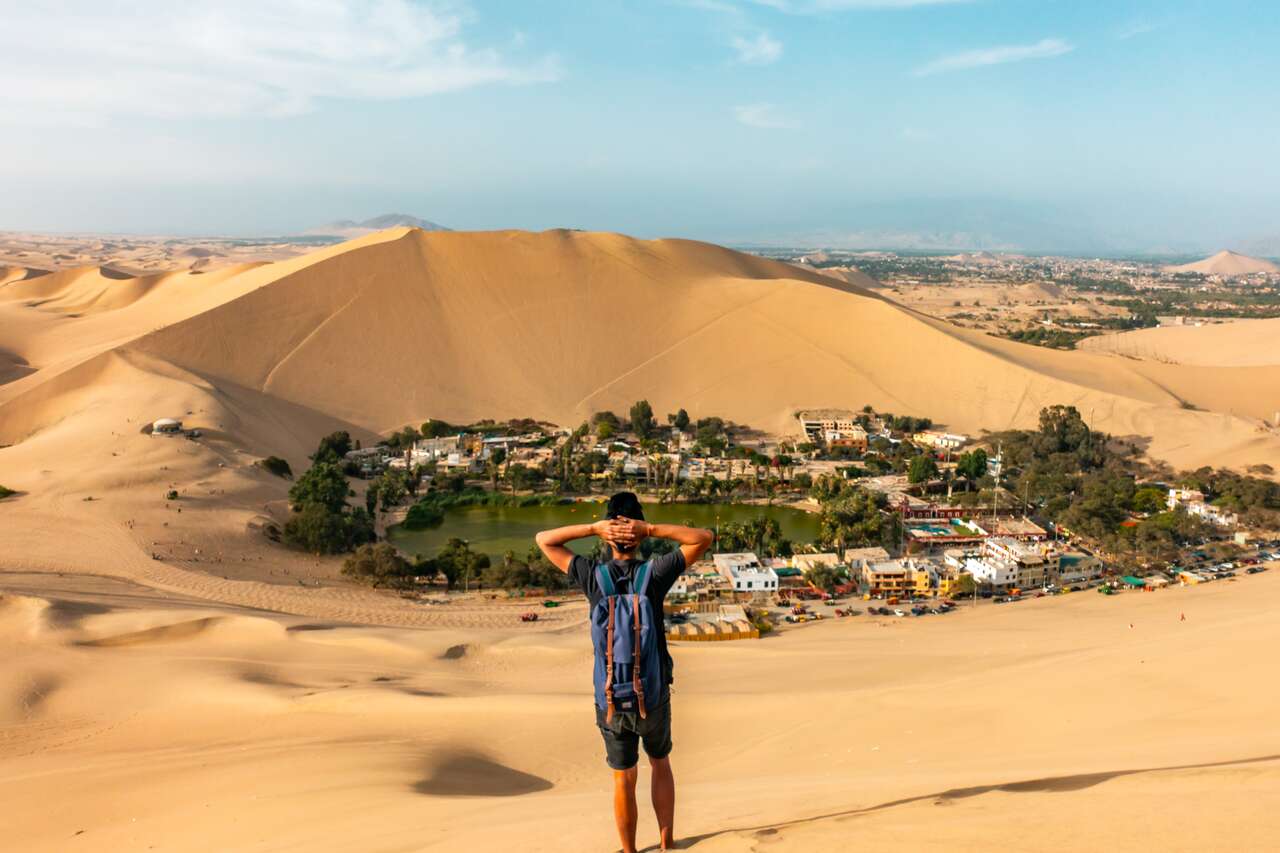
The city of Ica itself is not the main highlight of visiting Ica. The main highlight is Huacachina, an oasis-like town located a few kilometers away from the city center.
Read More
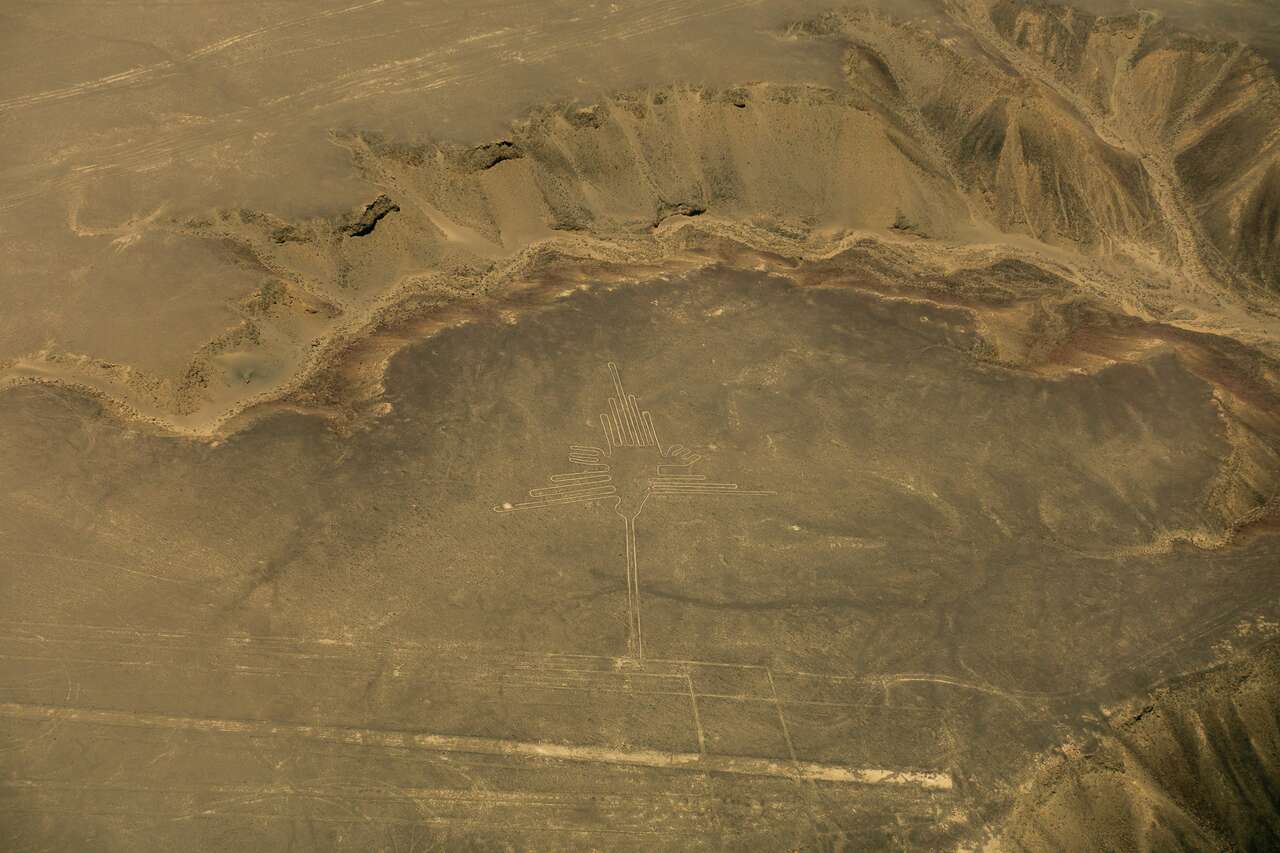
Day 68: Nazca, Peru
Nazca and the Nazca lines can be seen in a half-day, so there is no need to stay in Nazca. At the airport, you can buy a tour to fly above Nazca and see the lines from above.
Read More
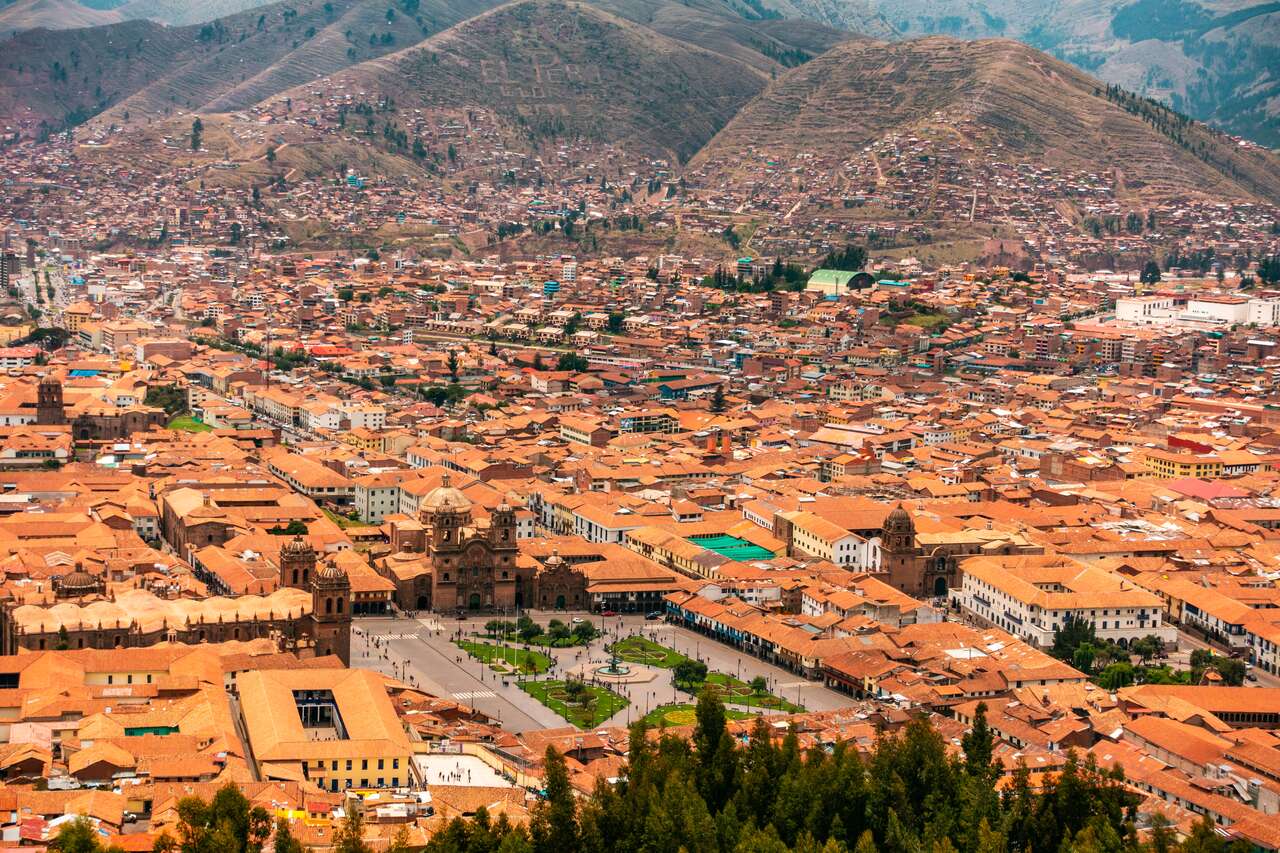
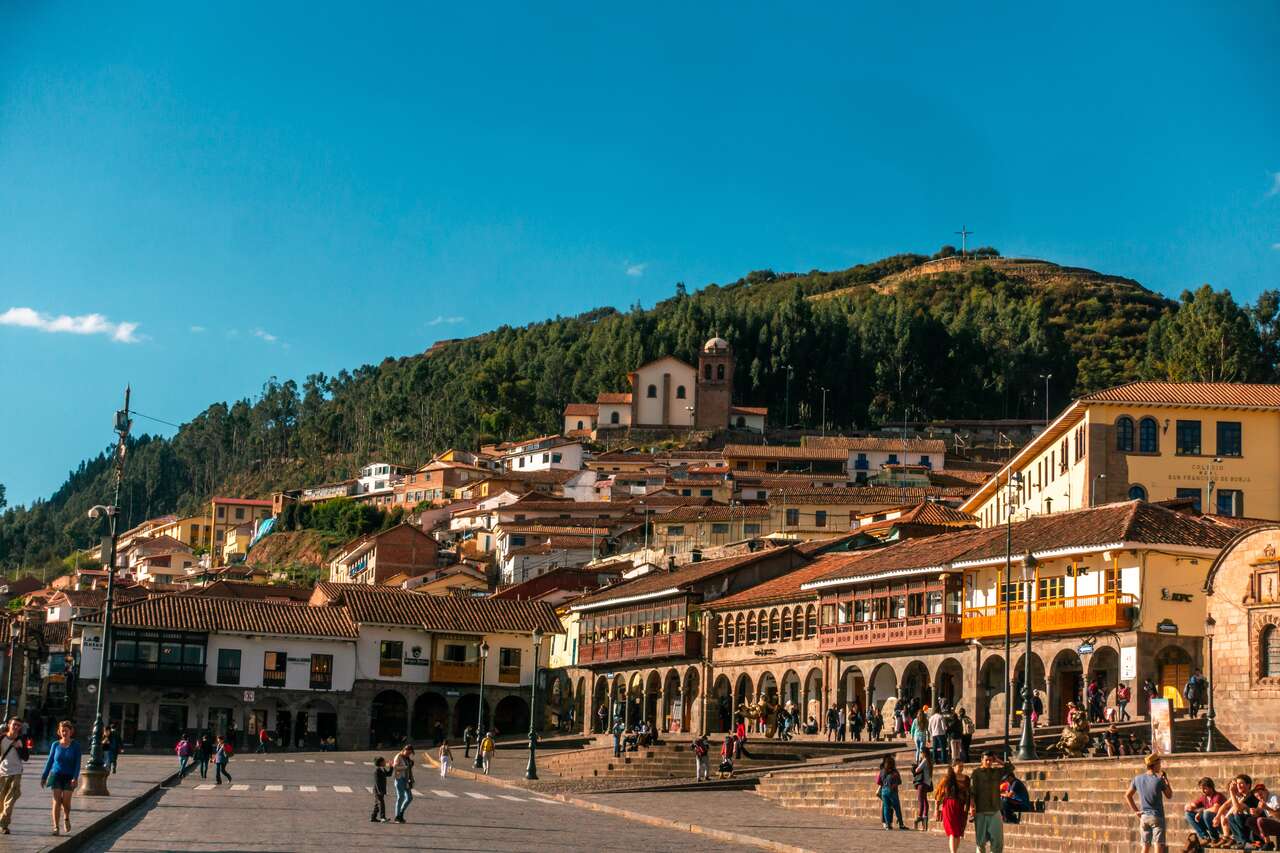
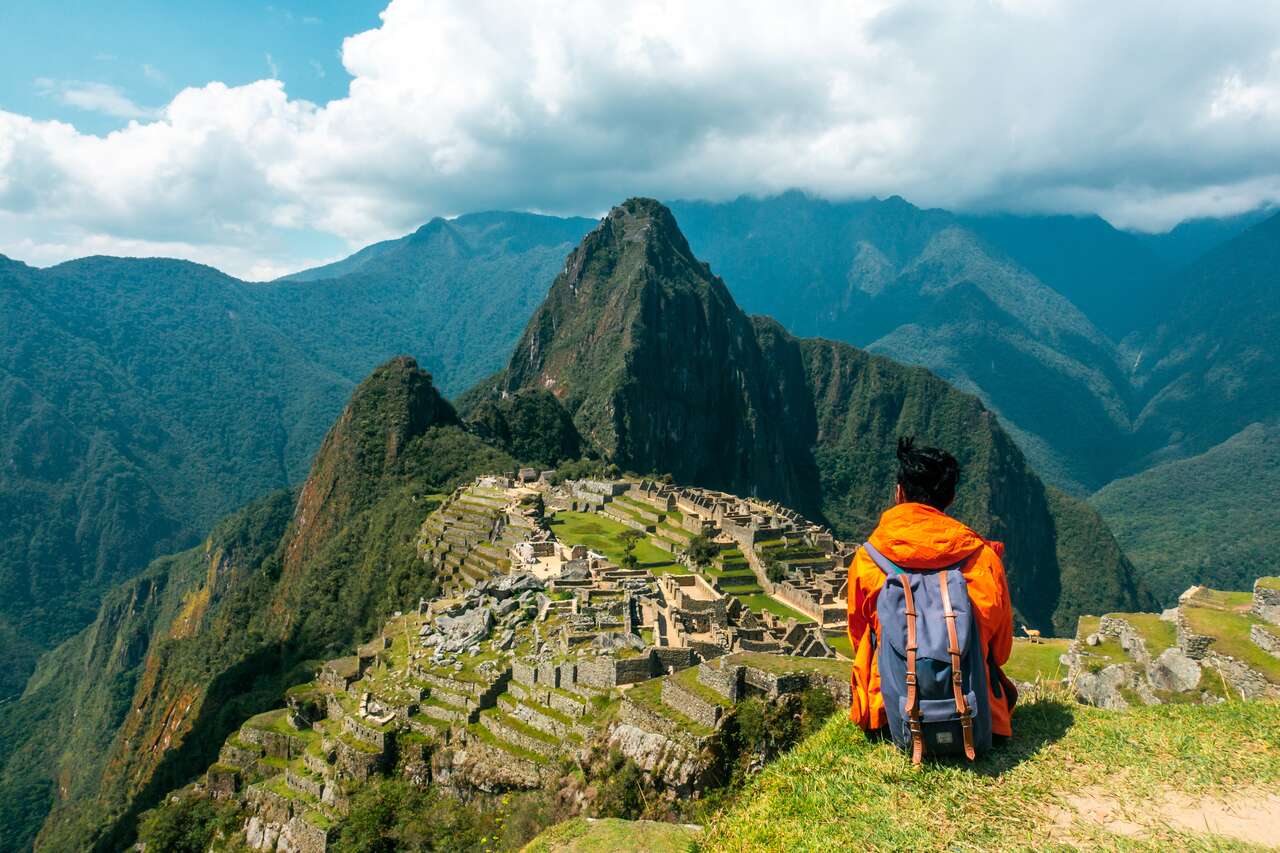
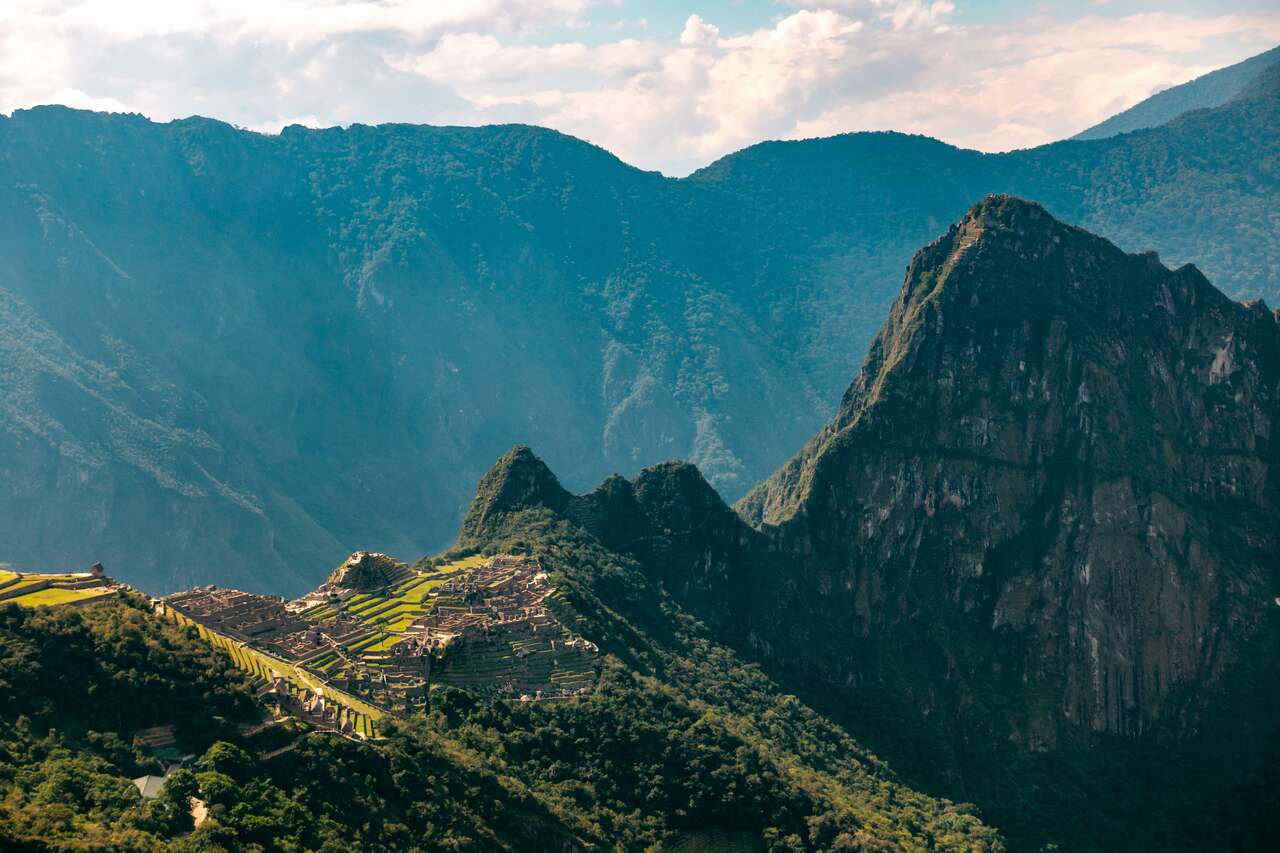
Day 69-71: Cusco and Machu Picchu, Peru
Cusco is one stunning city and a hell of a ride to get to and from. It will take you over 15 hours before you arrive in Cusco, so on the first day, go slow and explore the main square (Plaza De Armas) and walk around the crisscrossing streets up the San Cristobal church on the hill to see the city from above.
Read More
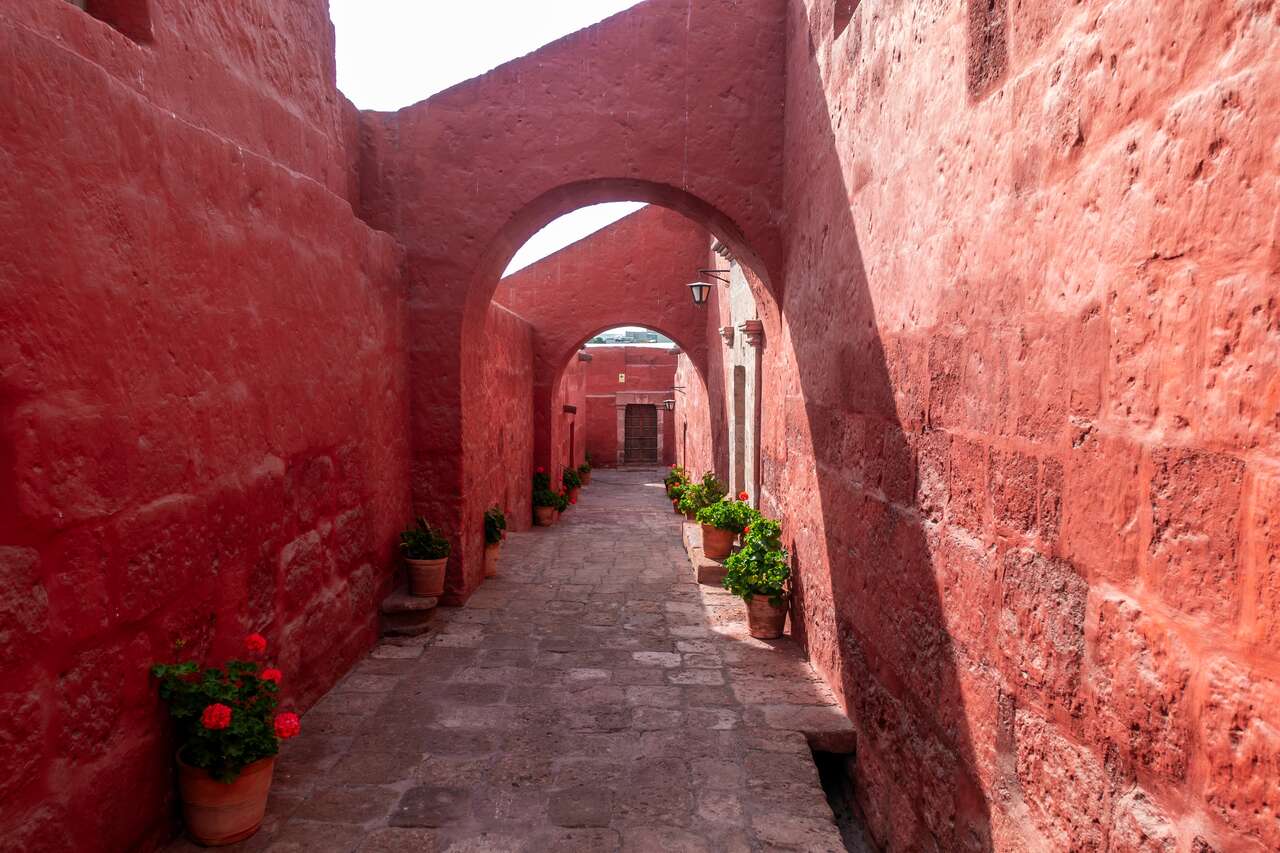
Day 72-73: Arequipa, Peru
Arequipa is a nice, cozy place with a stunning main square, a laid-back vibe, and great food. You can go for a walk around the main square and be fascinated by the beautiful colonial architecture.
Read More
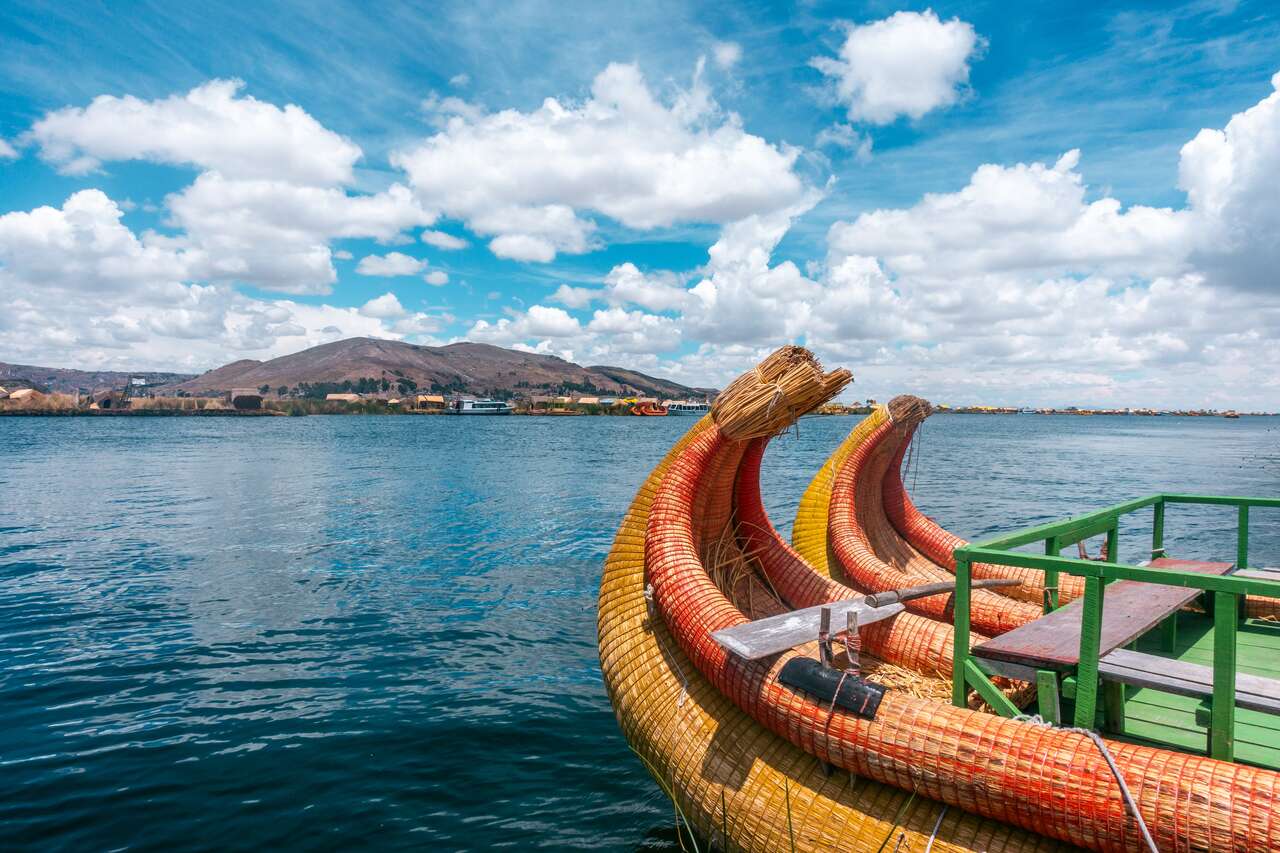
Day 74-75: Copacabana, Bolivia
From Peru to Bolivia, Copacabana makes a great rest stop before heading into La Paz. Located on the other side of Lake Titicaca, opposite Puno, Peru, Copacabana gives you access to hiking trails that you don’t get from the Peruvian side.
Read More
Day 76-78: La Paz, Bolivia
At first glance, La Paz might not be as attractive as Lima or Quito, but a little time spent walking around the main square and socializing with the overly friendly locals, the more you will fall in love with La Paz.
Read More
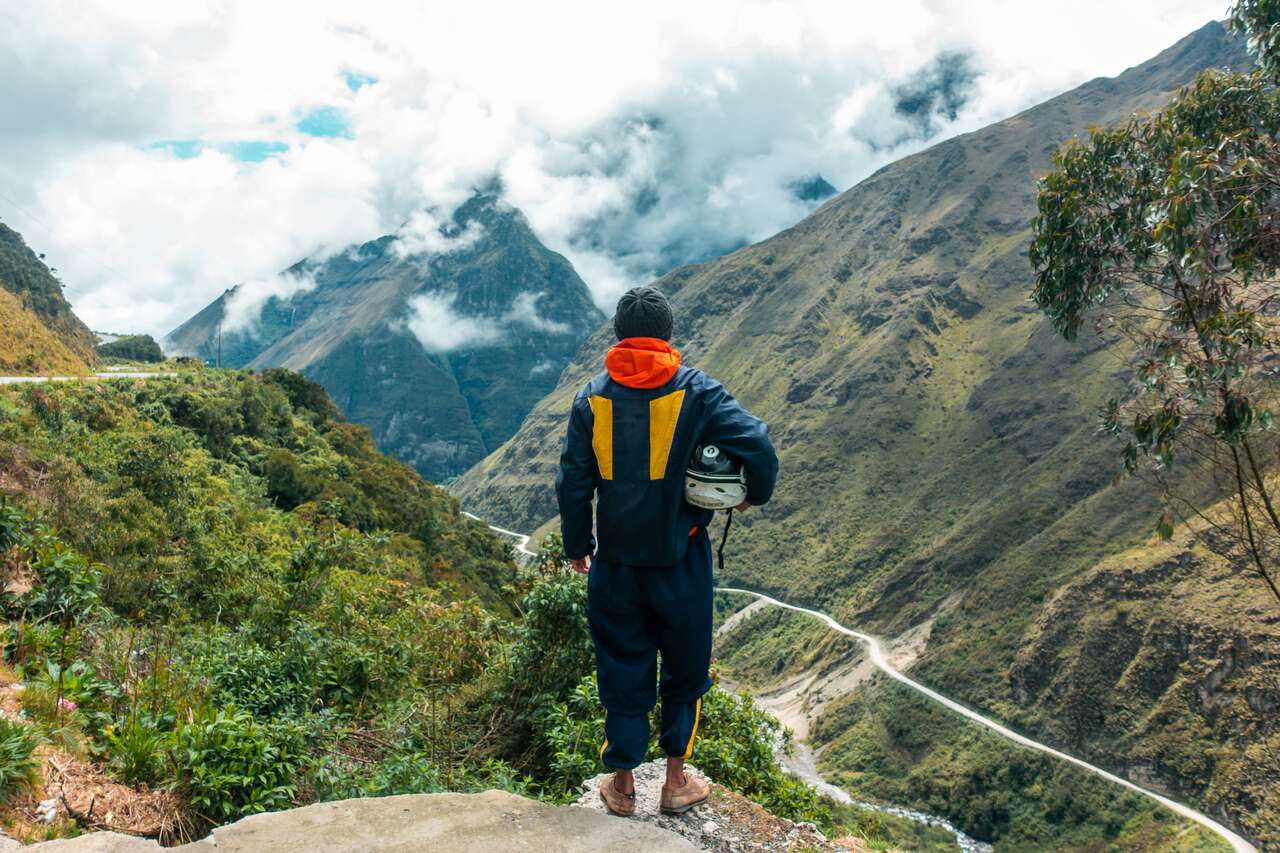
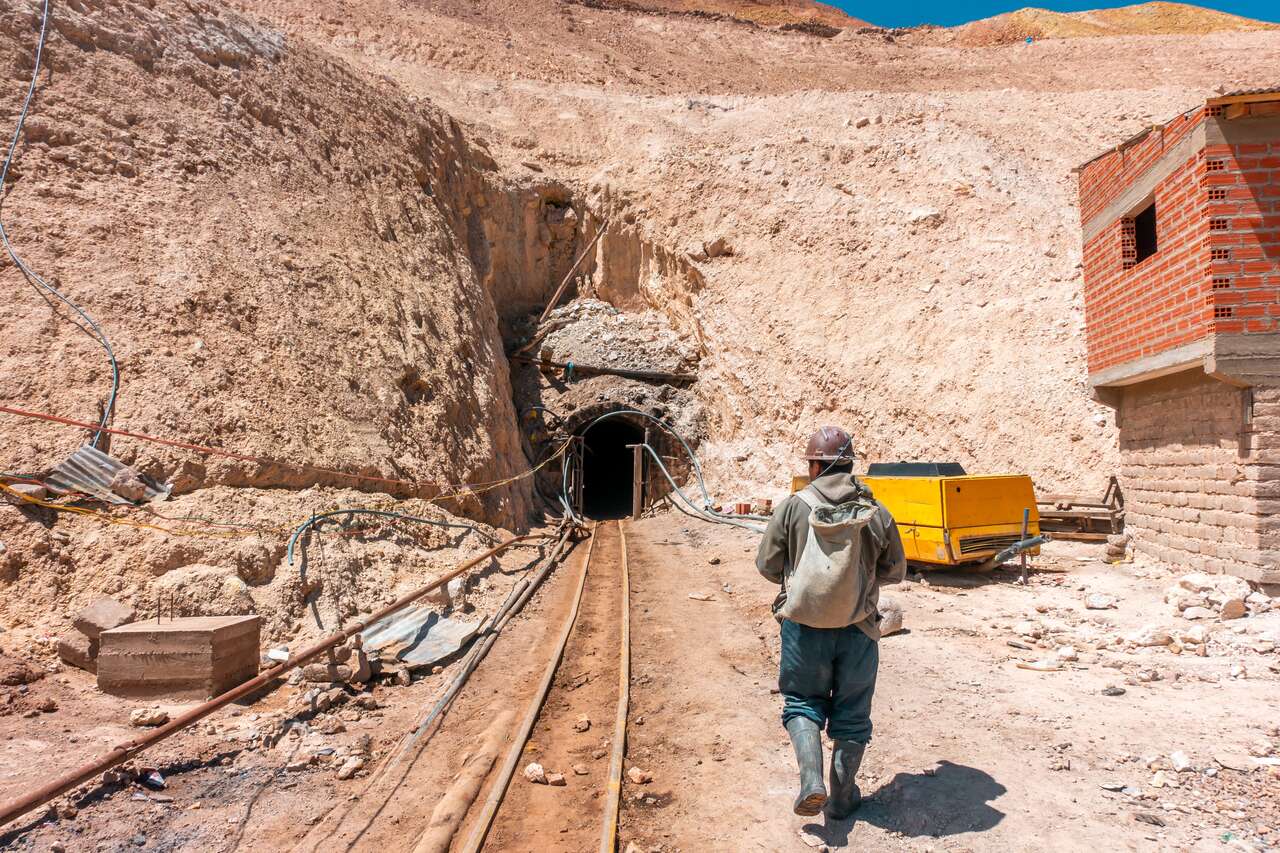
Day 79-80: Potosi, Bolivia
In Potosi, if you are interested in how a mind works and how dangerous it is to work in a mind, I do suggest you go on a day tour into the deep part of the Cerro Rico, or more infamously known as “the mountain that eats men”.
Read More
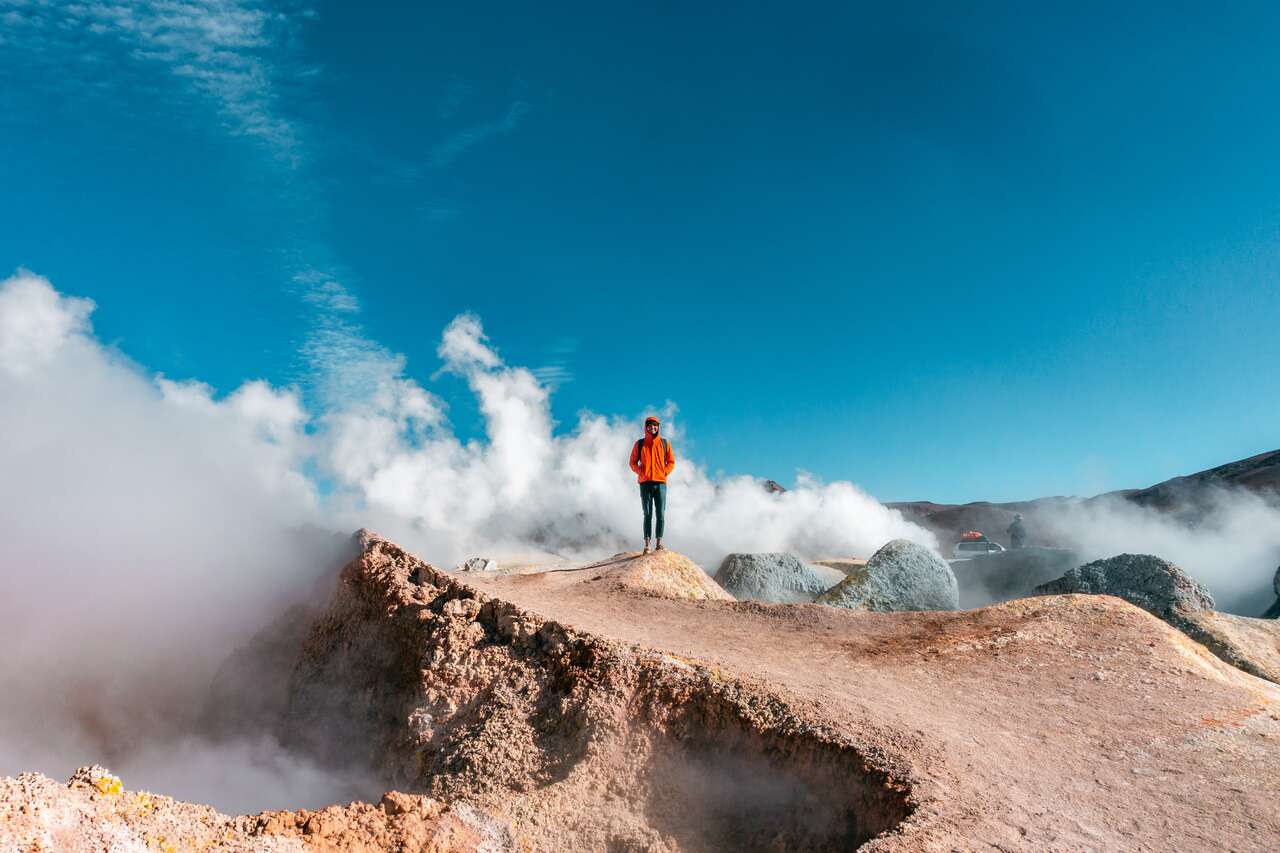
Day 81-83: Salar de Uyuni, Bolivia
And now we arrive at the frontier town before we go out and explore Salar de Uyuni, the largest salt flat in the world. Spend the day you arrive in Uyuni and look for a 3-day tour to join for the next day or you can book a Salar de Uyuni tour online from here.
Read More
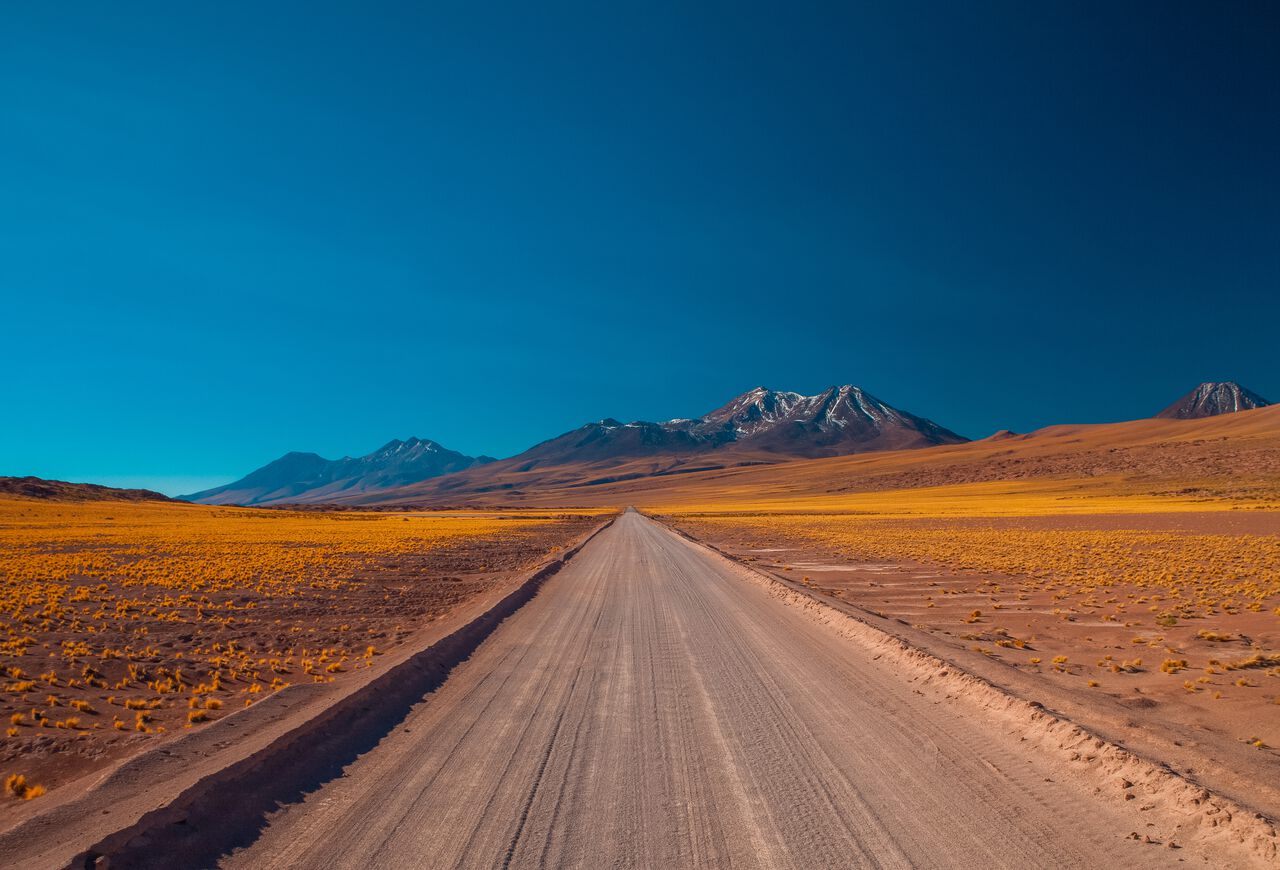
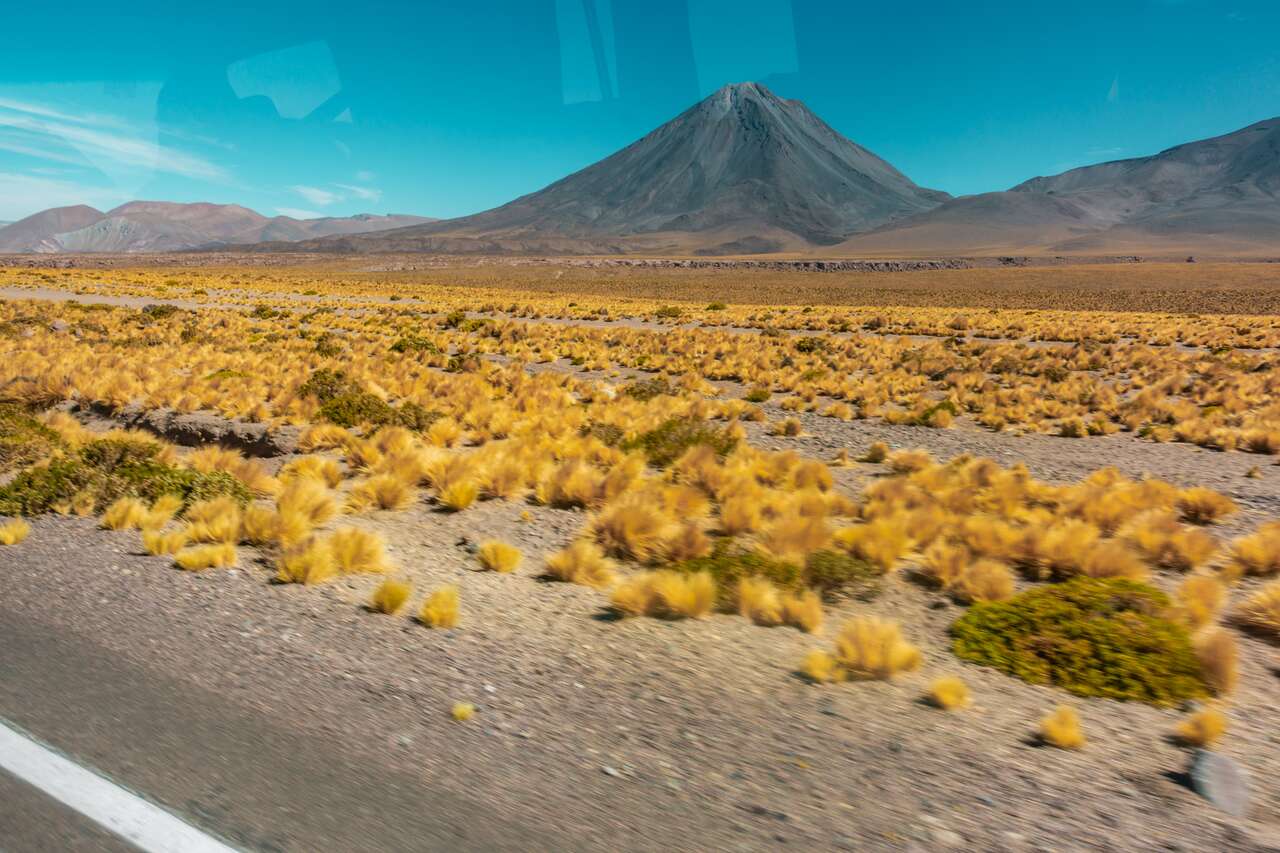
Day 84-86: San Pedro de Atacama, Chile
San Pedro de Atacama is the first place in Chile that you will experience. This is where you have to get used to the new culture and a more expensive price point that you might not be familiar with after traveling in places like Peru and Colombia.
Read More
Day 87-88: Antofagasta, Chile
One of the most surreal experiences in Chile was seeing the Hand of the Desert, an art installation built in the middle of nowhere in the Atacama desert. However, getting here was not so easy. First, you have to base yourself in Antofagasta, where you will need to rent a car and drive 30 minutes out of the city to see the statue.
Read More
Day 89-91: La Serena, Chile
La Serena is the second oldest city in Chile, second only to Santiago. Here, you can easily spend three days exploring the valleys and beaches surrounding La Serena. On your first day, take some time to absorb the unique old town of La Serena, followed by a rest day at the beach.
Read More
Day 92-93: Valparaíso, Chile
Valparaiso is known for its colorful street art, and that is the thing you should do on your full day in the city. You can take a tour, but I preferred walking around and discovering each work of street art at my own pace.
Read More
Day 94-97: Santiago, Chile
Santiago is one of the safest capital cities in South America, and it is easily one of my favorite places to spend time in.
Read More
Day 98-103: Easter Island, Chile
“Easter Island” is the highlight of my trip to Chile. There are many things you can do on this little island, starting with learning about the history of the Rapa Nui people by visiting the “Father Sebastian Englert Anthropological Museum”.
Read More
Day 104-106: Pucon, Chile
When you are in Pucon, if the weather permits, I highly recommend you take a Pucon Climbing Volcano tour and summit the Villarrica volcano to spot spewing lava inside the crater.
Read More
Day 107-109: San Carlos De Bariloche, Argentina
Bariloche is like a little Switzerland in Argentina. The city is located by a beautiful lake with many mountains surrounding it, so naturally, I would recommend that you go up. You can either hike or take the cable car up to Cerro Campanario and appreciate what Bariloche has to offer.
Read More
Day 110-112: El Chalten, Argentina
El Chalten is a hippie mountain town with a view of Fitz Roy’s peak, one of the most well-known peaks in Patagonia. You can hike to a lookout point 30 minutes away from El Chalten and watch the sunset, or you can spend 8-10 hours hiking the Laguna de Los Tres trail to see Fitz Roy peak up close.
Read More
Day 113-115: El Calafate, Argentina
El Calafate is home to the largest glaciers that you can see in your life. The glacier stretches out as far as the eyes can see. Once you arrive in El Calafate, get a tour to see the famous Perito Moreno glacier and spend a day walking around the park.
Read More
Day 116-117: Puerto Natales, Chile
Puerto Natales is a base to launch yourself into Torres del Paine park. The city itself is nothing to brag about, so I would suggest you go straight to the national park.
Read More
Day 118-120: Ushuaia, Argentina
After arriving in Ushuaia, you will literally be at the end of the world. Here, you will find one of the last civilizations located at the most southern tip of the world. This is where you can launch yourself into Antarctica if you have 8000 USD to spare.
Read More
Day 121-124: Buenos Aires, Argentina
Buenos Aires is the capital city of Argentina, and with most capital cities, there come many things to keep you busy for a few days. Now that you are back from Patagonia, you can spend some time spoiling yourself by trying the famous Argentinian beef in one of the many restaurants in San Telmo.
Read More
Day 125-127: Iguazu Falls, Argentina
I thought I had seen the most epic waterfall in the world already when I was in Zambia visiting Victoria Falls. There was no way any waterfall could top that. However, when I arrived at Iguazu Falls, I was blown away by its sheer beauty.
Read More
Day 159: Brazil
Personally, I have not backpacked in Brazil yet due to time constraints, but it would be a shame for you not to see Brazil while you have already traveled the length of South America. Also, if you arrive in Brazil in February, you will be able to attend the famous Carnival celebration in Sao Paulo or Rio de Janeiro, which I’ve heard is one of the most spectacular events in the world.
Read More
Planning to visit soon?
🛌 Booking hotels: Booking.com, Agoda, and Hostelworld.
🏄 Booking tours:
Viator, GetYourGuide, and Klook.
Full Day Tour to Machu Picchu from Cusco (14 to 15 hours)
Huacachina Oasis & Mini-Galapagos! Most reviewed company in Peru! Luxury buses! (16 hours)
Full Day in Rio: Christ the Redeemer, Sugarloaf, Maracana and Selaron with Lunch (8 hours)
🚘 Renting a car: Discover Cars.
🏥 Travel Insurance: Heymondo. Get 5% off today!
6 Months South America Backpacking Itinerary
Our journey in South America begins in Bogota, the capital city of Colombia. When you arrive in Bogota, you might feel a little out of breath, which is normal as Bogota is located at 2644 m above sea level. This is very common here in South America, and you will encounter this kind of altitude throughout your trip to South America.
Looking for a complete one-month itinerary for Colombia?One Month Backpacking Itinerary In Colombia
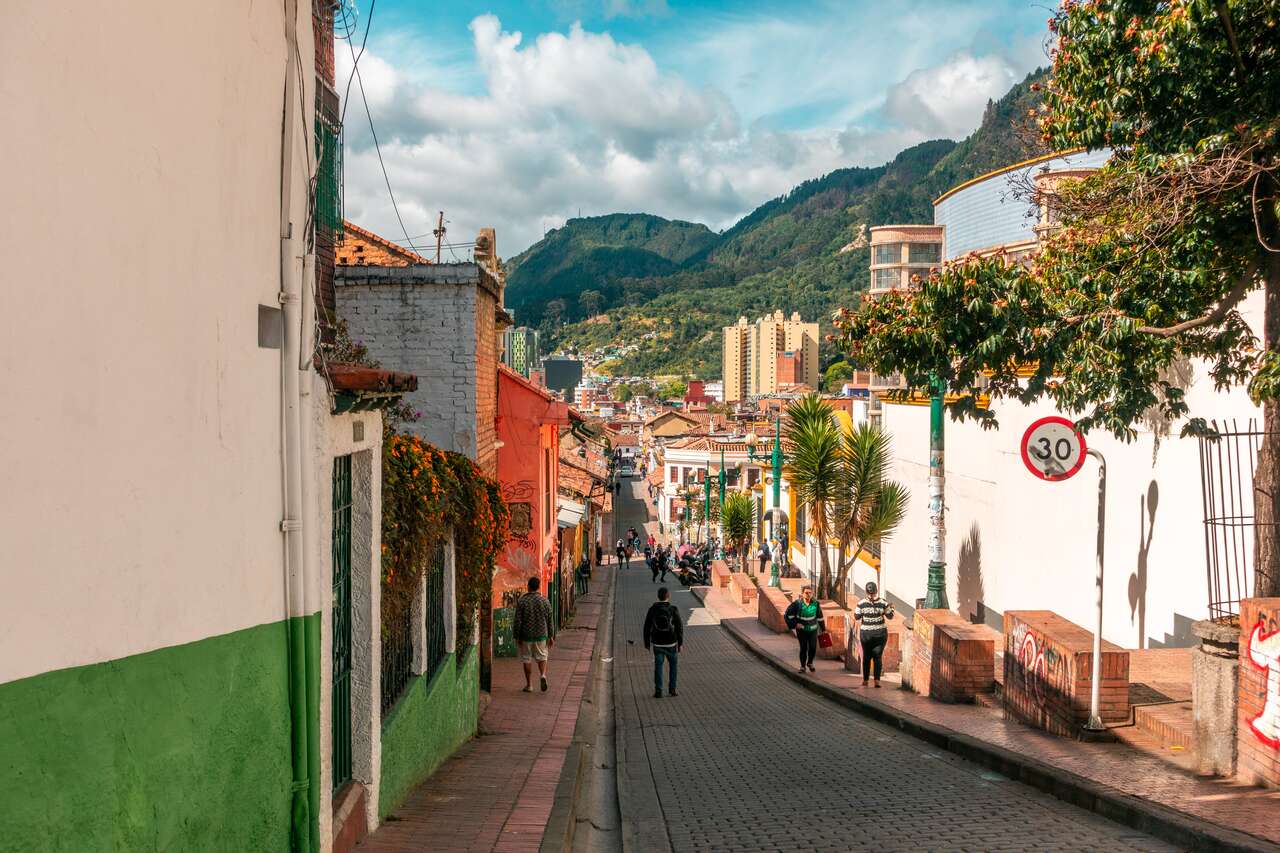
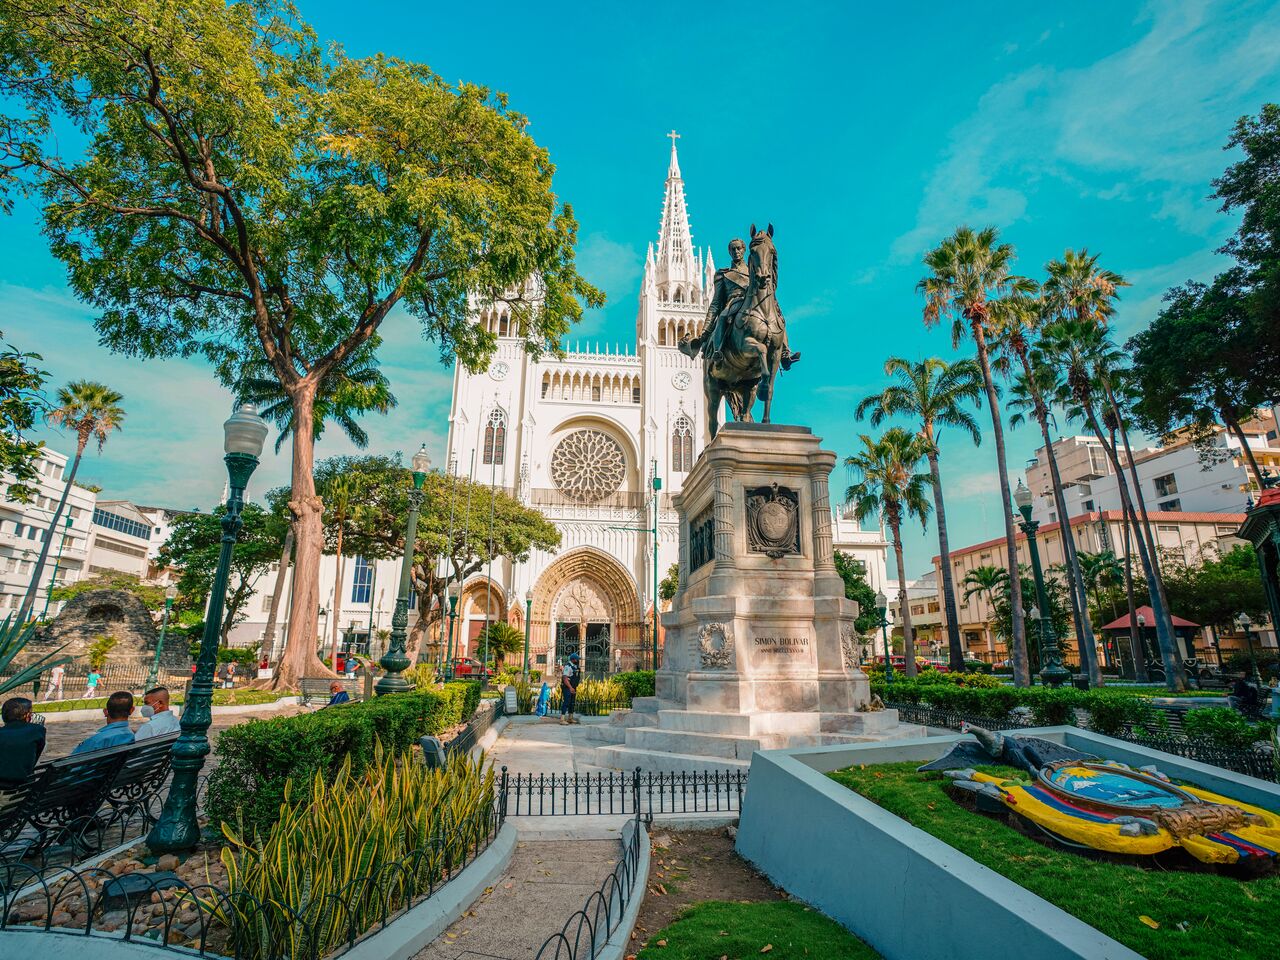
When you are in Bogota, you should first check out the Plaza de Bolívar Square and the colonial part of the city where you can stroll around and immerse in the culture and vibe of Colombia.
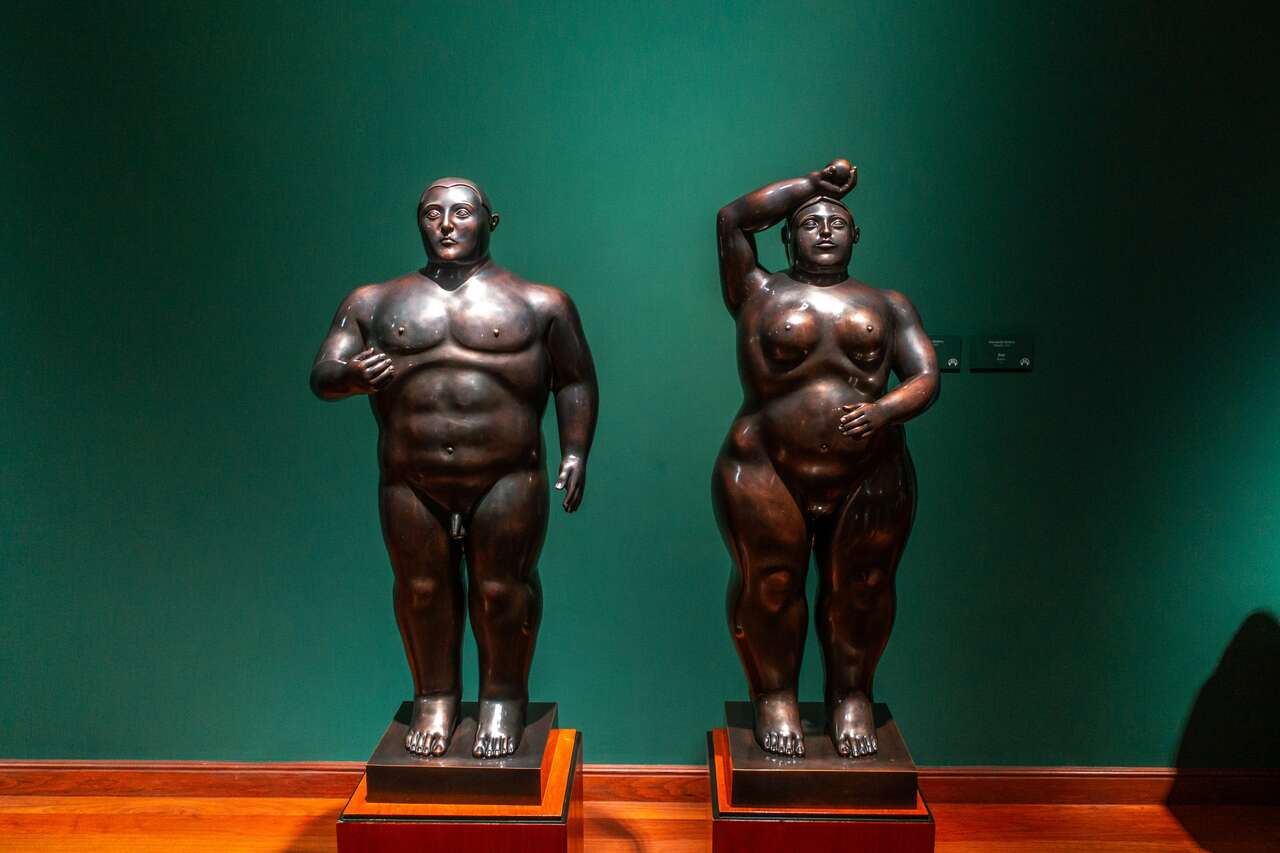
While you are there, you should also visit the Botero Museum, one of the happiest museums I have ever visited. The museum features a collection of Botero’s best works, and on top of that, it is free to enter.
No time to read?
Don’t worry. You can save this page to Pinterest and come back later.
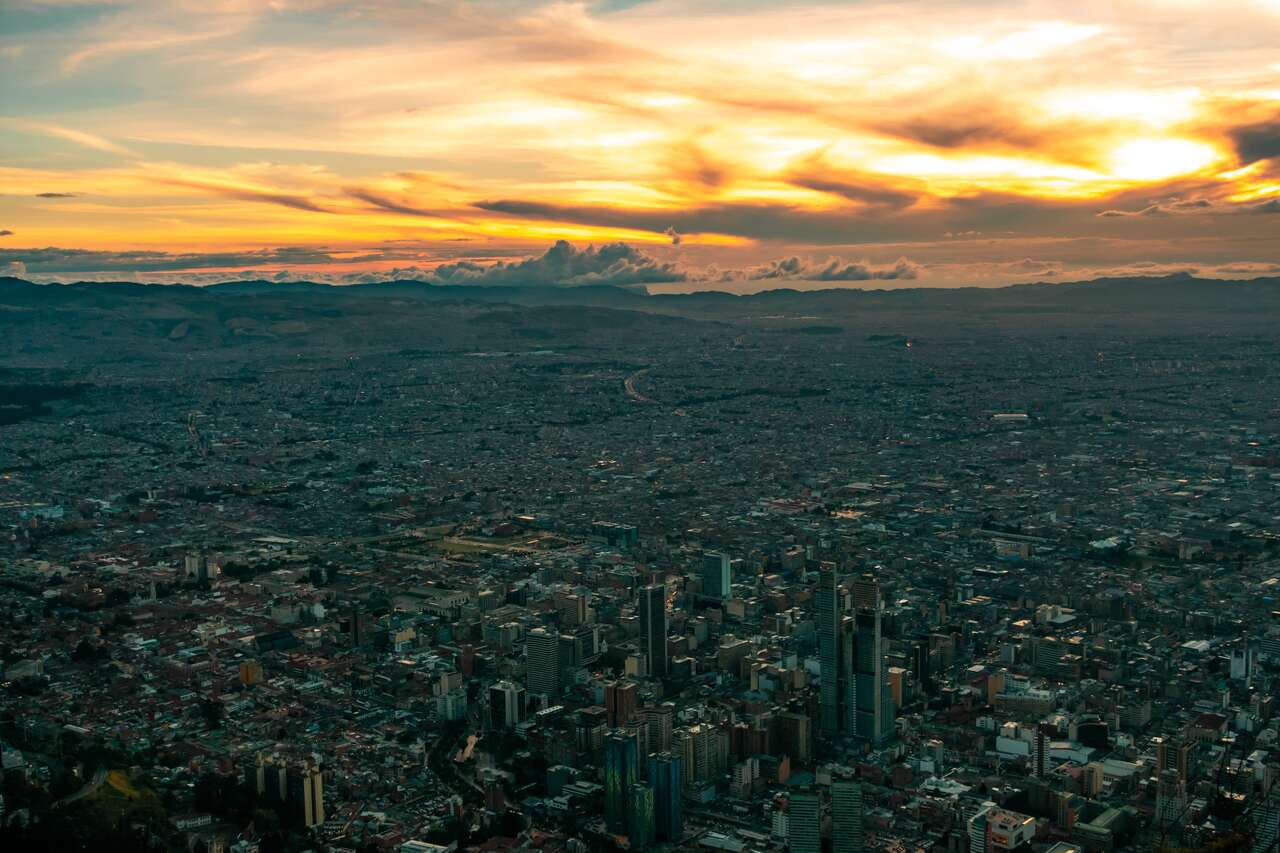
Right before sunset, you can go up the gondola to Monserrate and watch the sunset over Bogota’s nighttime cityscape. This is, hands down, one of my favorite places in Bogota.
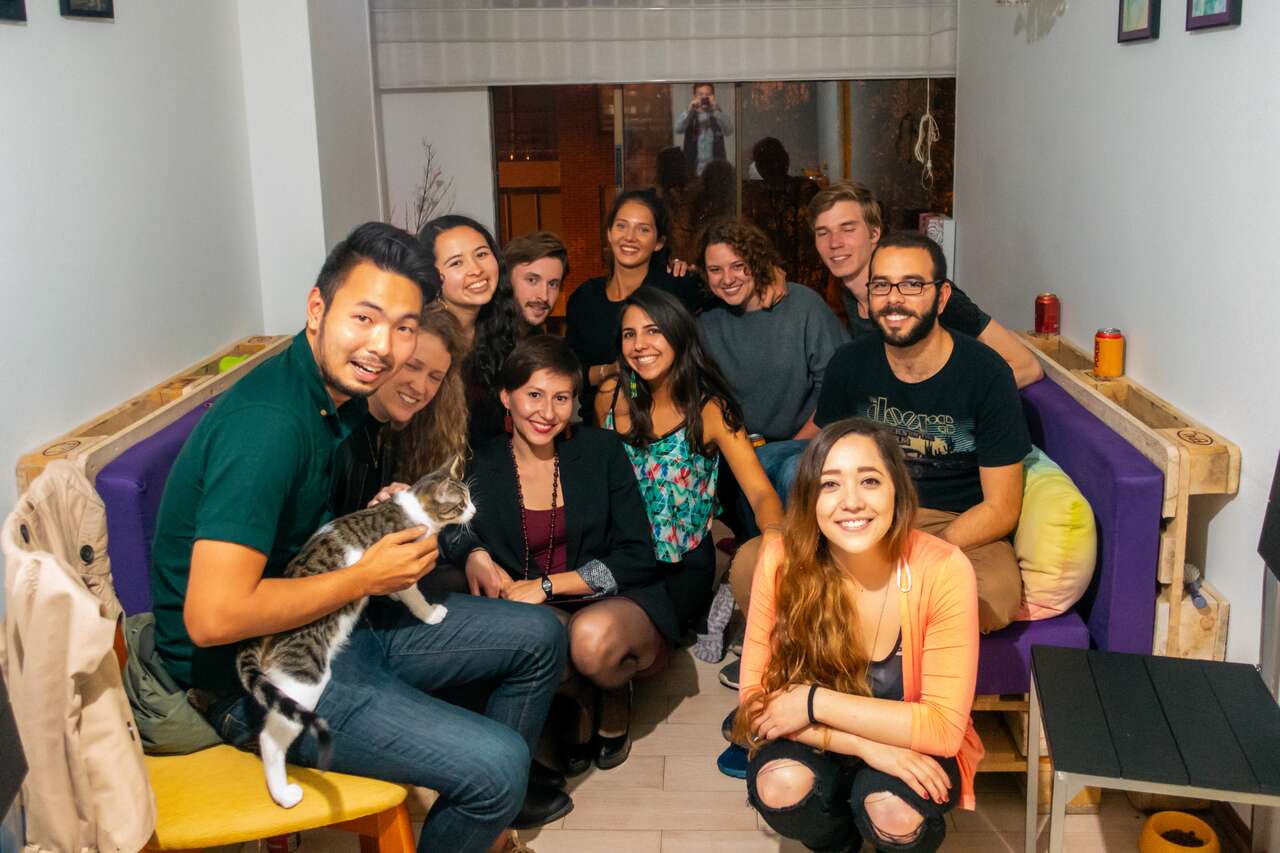
If you are there on a Tuesday night, be sure to drop by Vintrash bar near Zona Rosa and get to know the locals here while also learning a little bit of Spanish at their weekly Gringo Tuesday event.
If you are there on a Sunday, during the day, take an Uber and go to Usaquén Flea Market. Every Sunday, the locals come out and gather at this market, indulging themselves in the sun, the street performances, and all the cool hipster items they can buy there.
Spend at least 4 nights in Bogota so that you can get used to your new environment and have some time to indulge in the charming culture that Colombia has.
If you are looking for more activities to do here, be sure to check out some of the available tours and day trips.
Looking for a complete travel guide for Bogota?11 Unique Things to Do Bogota, Colombia
Where to Stay in Bogota?
Getting From Bogota to Santa Marta
After spending a few days in Bogota, it’s time to go to the tropical north, and a good place to start is Santa Marta. To get there, I highly recommend flying with VivaColombia. They are a low-cost airline in the region, and a flight from Bogota to Santa Marta shouldn’t cost much.
Once you arrive in Santa Marta, there will be a public bus waiting for you to go to the city center. From the airport, it shouldn’t take more than half an hour to get to the center, where you can easily walk to your accommodation.
Santa Marta, Colombia (1 Night)
Santa Marta is a nice city to stay for a night or two, but our focus here will be more on the nature side of things and maybe a trek into the forest to search for the Lost City, the Machu Picchu of Colombia.
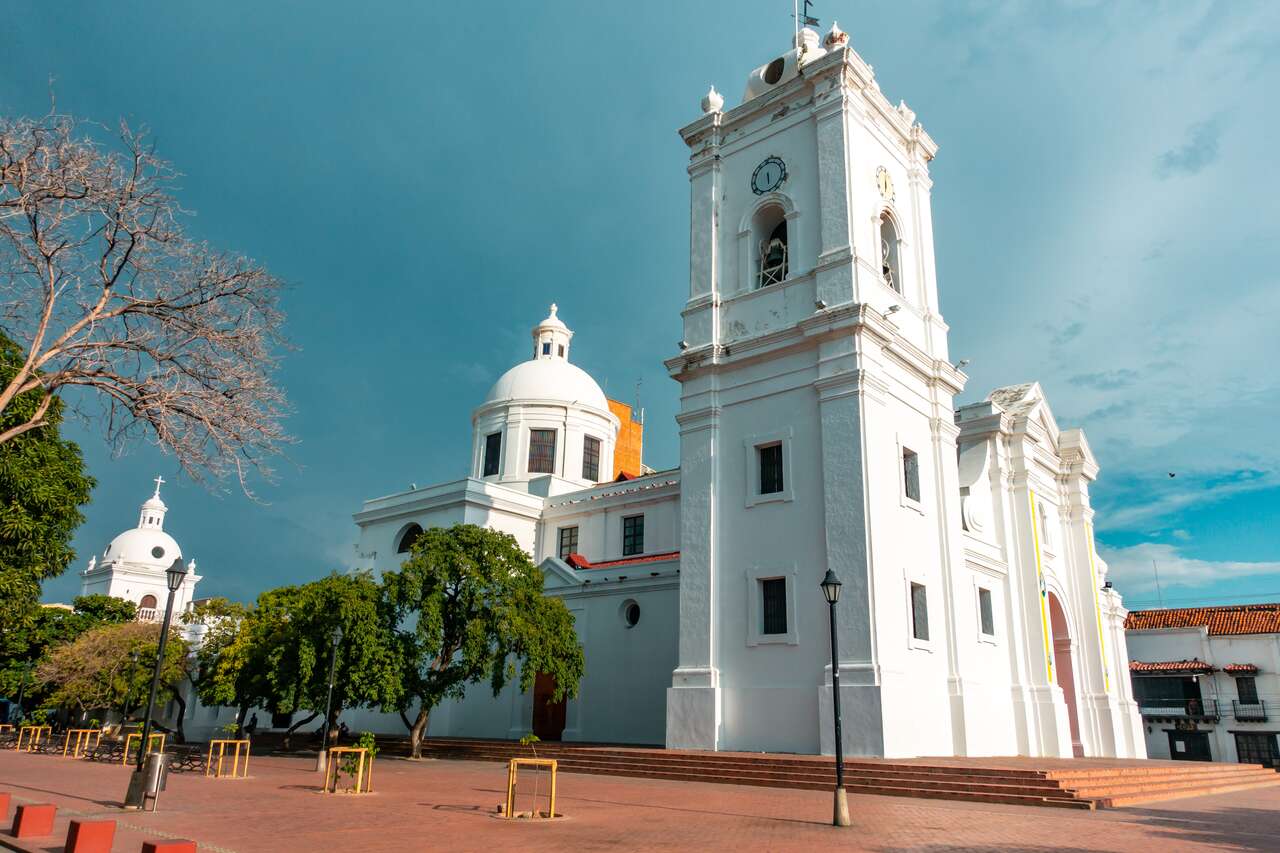
There are a few nice restaurants by the coast where you can have nice and cheap seafood, or you can walk around Santa Marta’s main square and check out the beautiful Cathedral Basilica of Santa Marta. Stay in Santa Marta for a night before going to Tayrona National Park the next day.
If you are looking for more activities to do here, be sure to check out some of the available tours and day trips.
Where to Stay in Santa Marta?
Getting From Santa Marta to Tayrona National Park
From Santa Marta, you can take a local bus to Tayrona National Park and hike for about an hour or two to reach the campground.
To get the bus to Tayrona, you will have to go to Santa Marta’s Central Market and take a local bus to Palomino, where you can then get off at El Zaino and walk into Tayrona National Park.
The bus should cost around 10,000 COP, and the entrance fee to the national park should be around 61,500 COP (15 USD, pretty pricey in my opinion).
Tayrona National Park, Colombia (1 Night)
Tayrona National Park is a beautiful forest area on the northern coast of Colombia. You can hike there from El Zaino to the Tayrona campground, where you can then choose to spend the night in a hammock by the beach or rent out a tent.
For me, it was a little too crowded when I was there, but you can often wander away from the crowds and enjoy the beautiful beaches around the area. It is a nice change of scenery from the humid Santa Marta and the rainy Bogota.
After spending a night in Tayrona, head back the same way you came in and take a bus back to Santa Marta. From here, I would recommend going straight to Minca to spend a night in a cooler region of northern Colombia.
If you are looking for more activities to do here, be sure to check out some of the available tours and day trips.
Getting From Santa Marta to Minca
To get from Santa Marta to Minca, you will have to get a collectivo from the collectivo stop by the Central Market (be sure to confirm the location with your accommodation before you go to Minca, as the bus stop might switch around).
The collectivo should cost around 8000 COP and take about one hour to arrive in Minca.
Minca, Colombia (1 Night)
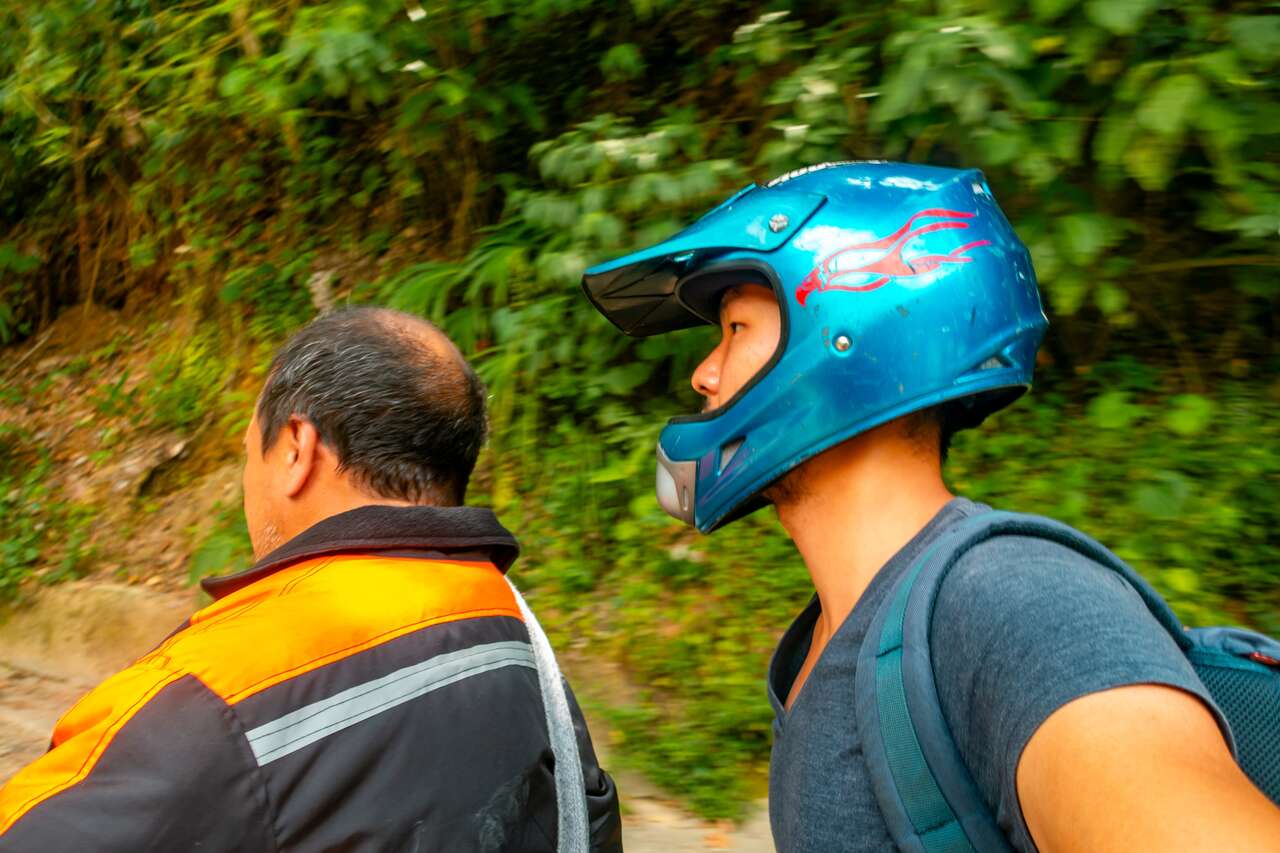
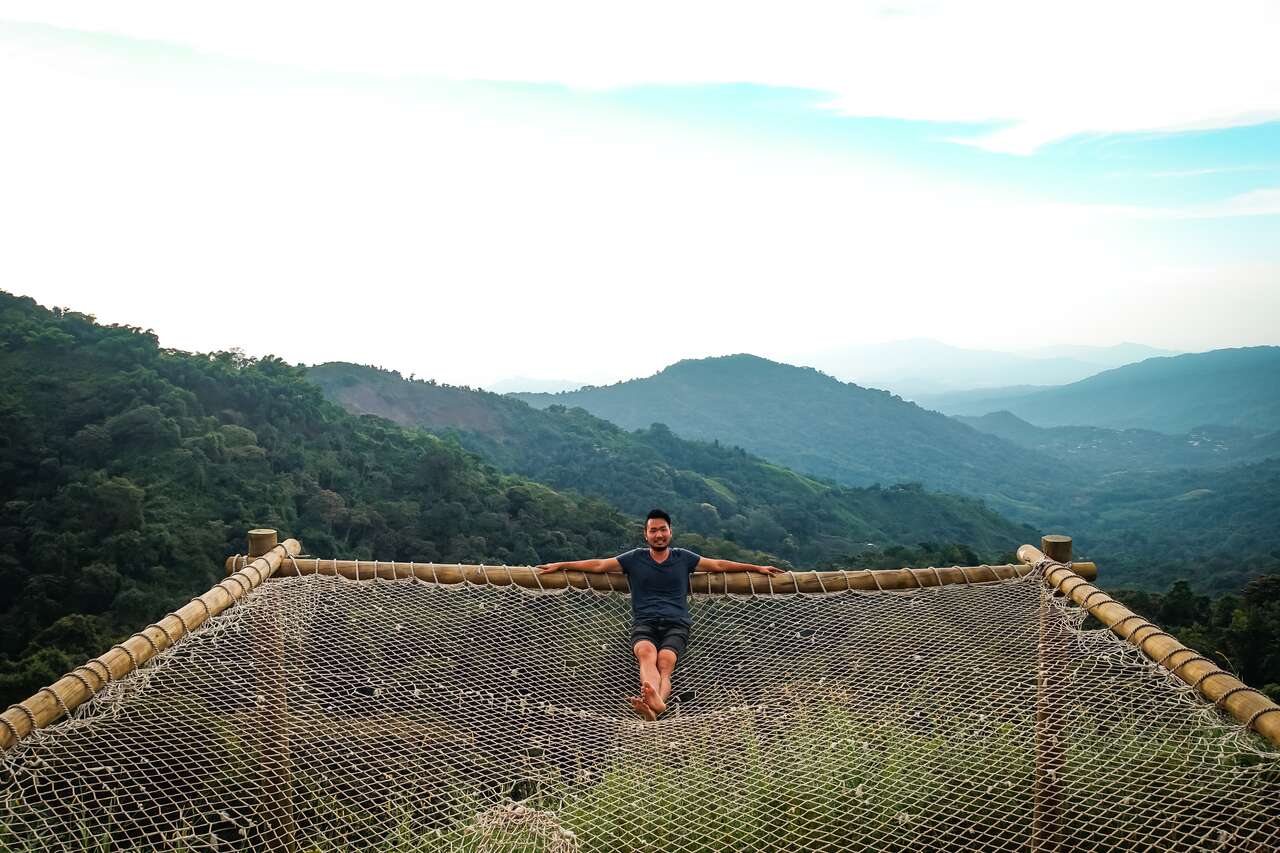
From the hot and humid Santa Marta, Minca is a breath of fresh air. Located in the coffee region of the north, Minca offers you a great chance to see the beautiful mountains of northern Colombia on a motorbike, taste some of the finest coffee in the country, and find solitude in the middle of the mountain as you relax on the giant hammock at Casa Elemento hostel.
When you arrive in the town, you will see a motorcycle stand where you can hire them to show you around. Most of the things are quite far apart, so I highly recommend you get a motorbike.
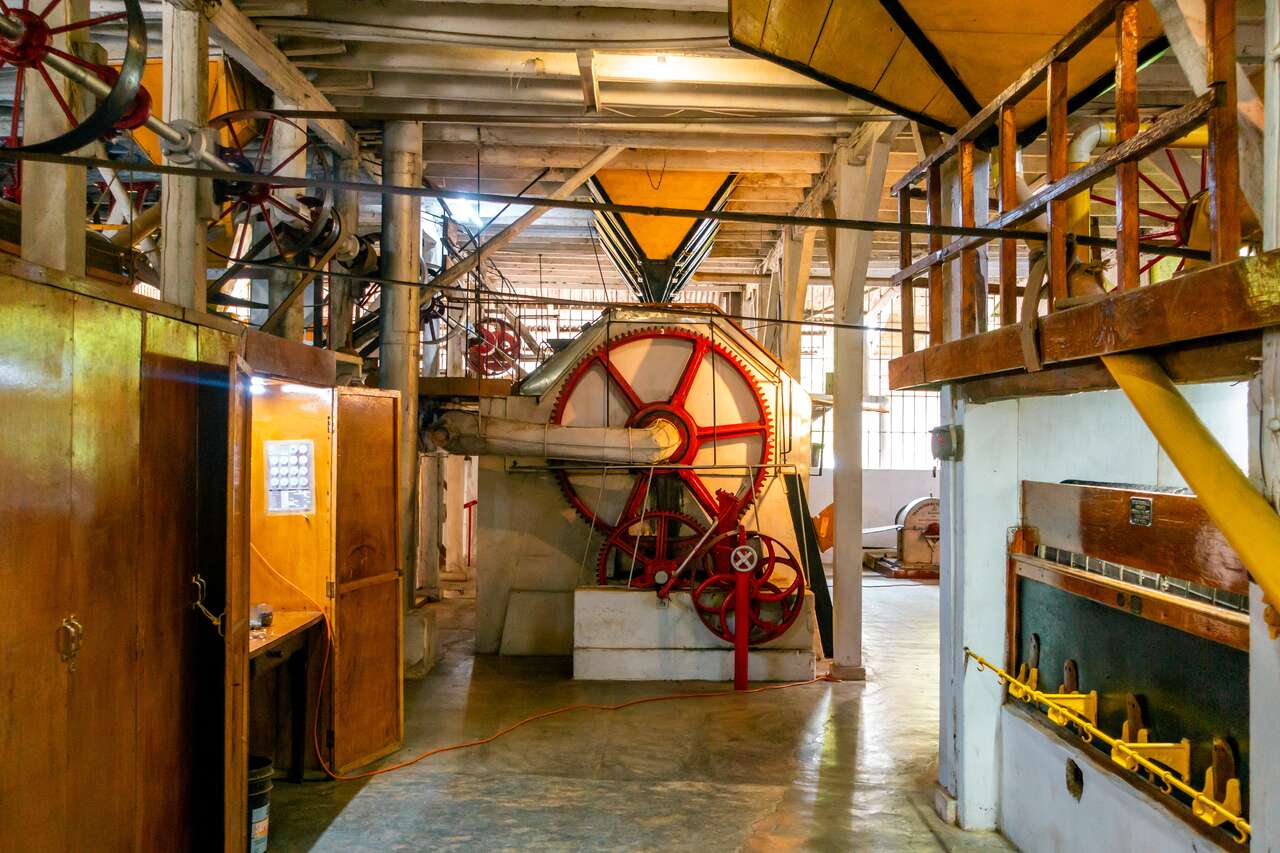
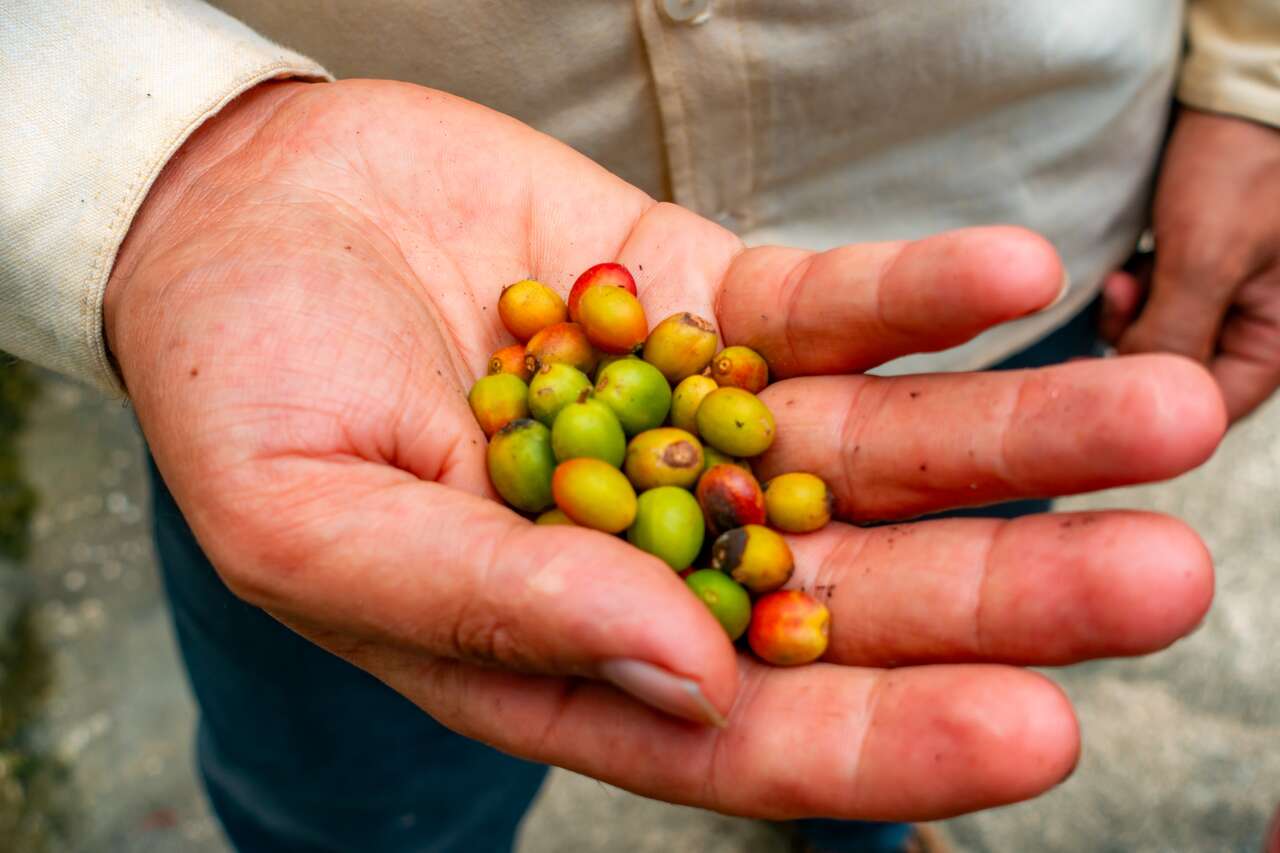
First, visit Finca Victoria coffee farm and get a dose of their finest coffee while learning about how the farm operates. Be fascinated by the fact that some of their equipment is from 1892 and the smart ways in which they operate without the use of electricity.
Once you are done, tell your moto-taxi driver to take you to the Los Pinos viewpoint, stop for a photo, and then head to Sierra Minca Hostel.
You can also stay here, but I have heard that the facilities might not be the best, which is understandable as it is very remote. So, you can choose to either stay here or in the main Minca town, as I suggested under the Where to Stay section. There will be more options when it comes to cafes and restaurants if you decide to stay in the town area.
After a night in Minca, get back to Santa Marta via the same collectivo you took before, which should be waiting for you in front of the Minca Express Supermarket.
If you are looking for more activities to do here, be sure to check out some of the available tours and day trips.
Where to Stay in Minca?
Getting From Santa Marta to The Lost City
To get to the Lost City, you will have to go on a tour. There are tours that range from 3-6 days that will take you through the jungles of the Andes to find the Lost City.
The Lost City, Colombia (4 Nights)
I was unable to do the trek due to timing, but I have met many people who enjoyed hiking the trek to the Lost City. You first have to get a tour, which should cost you about 1,150,000 pesos, and then they will provide you with places to sleep, usually hammocks, food, and guide you through the deep jungle of the Andes to the forgotten Lost City. Beware of insects and mosquitoes, as the north of Colombia can be quite tropical and the insects love that.
You can also book one online prior to your arrival in Santa Marta with this link: Book a 5-day Lost City Trek.
If you are looking for more activities to do here, be sure to check out some of the available tours and day trips.
Getting From Santa Marta to Cartagena
After you are back in Santa Marta, you can spend one more night there before going to our next destination, Cartagena. To get from Santa Marta to Cartagena, you can take an early bus from Santa Marta bus terminal to Cartagena. The trip should take no more than 5 hours and should cost you about 30,000 COP.
Cartagena, Colombia (2 Nights)
Cartagena is a colonial city on the northern coast of Colombia. It is possibly one of the most photogenic colonial towns in Colombia, hence the number of tourists you will find here. Despite that, the old town part is definitely worth a visit.
Around the old town area, you will find many beautiful colonial architectures from the Walls of Cartagena to the colorful Cartagena Cathedral. You can also sit and relax at many outdoor restaurants around Plaza Santo Domingo or shop for some souvenirs at Las Bóvedas Market.
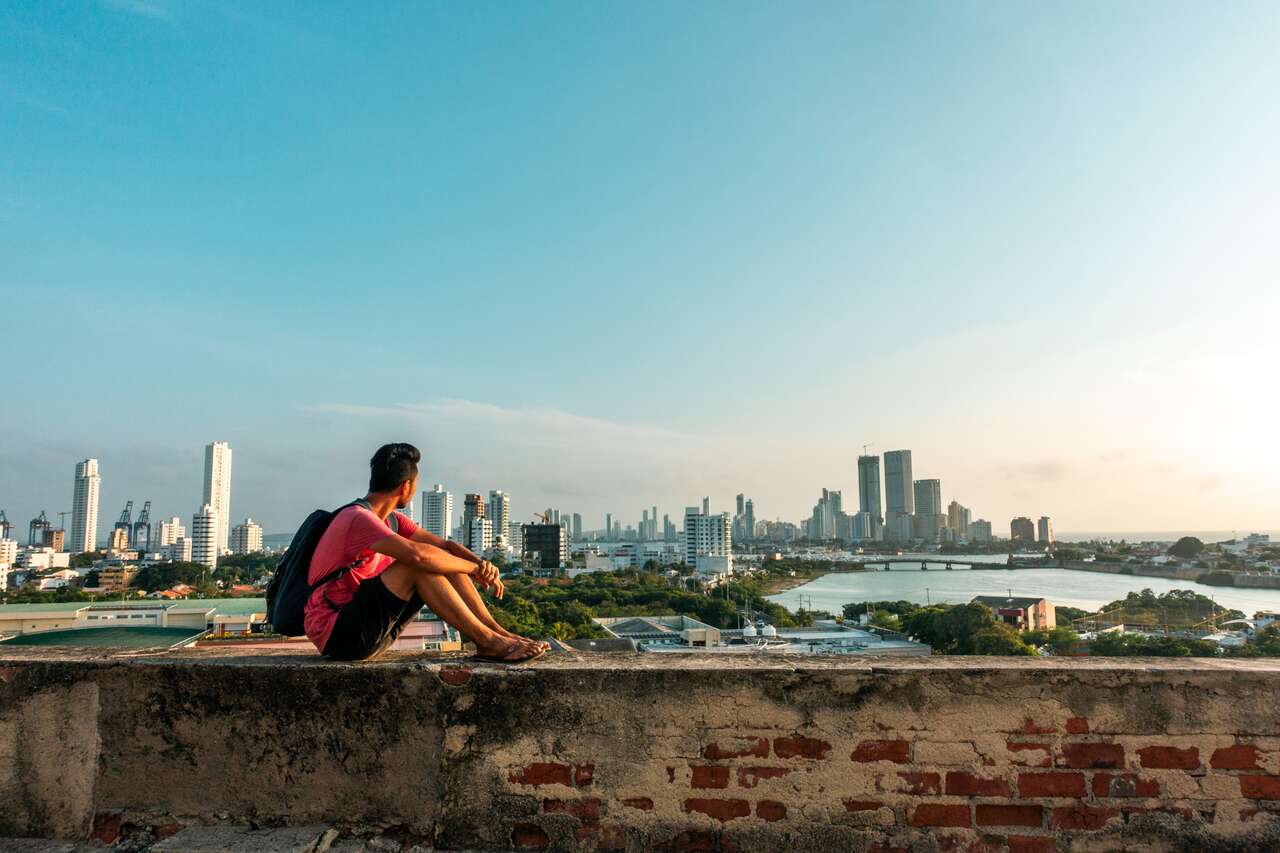
You can also experience a wonderful sunset from the top of the Castillo de San Felipe de Barajas Fortress, located just a few minutes’ drive away from the center.
If you are looking for more activities to do here, be sure to check out some of the available tours and day trips.
Where to Stay in Cartagena?
Getting From Cartagena to Medellin
To get from Cartagena to Medellin, you can find flights as low as 39 USD on Expedia, and it will save you 15 hours of a very long bus ride.
Medellin, Colombia (5 Nights)
Medellin has quite a lot to offer in terms of hiking and culture. As some of you may know, Medellin was the stage for the drug lord Pablo Escobar and his reign of terror. So, in order to understand the history of the city and where it came from, going on a Pablo Escobar tour might help you understand the truth about the conflict a little bit more.
You can also do a coffee tour in Medellin that gives you access to private properties on the hills around the city and see what sustainable living is all about. I went to one of the coffee farms and was fascinated by how they were able to grow almost everything they needed together with coffee on the same farm.
If you are there on a Tuesday or Saturday night, you can hop over to Dancefree workshop to learn free Colombian salsa dance lessons from energetic and professional instructors. You can also ask to dance with anyone you want. The best way to learn is to ask the Colombians there to teach you as you stumble your way through the dance floor. They love to help out struggling foreigners.
Parque Arví offers a great nature hike complete with guides and facilities. You can also go on a day trip to Guatape to climb the La Piedra meteorite or do some hiking around the city.
If you are looking for more activities to do here, be sure to check out some of the available tours and day trips.
Looking for a complete travel guide to Medellin?Top 10 Things To Do In Medellin
Where to Stay in Medellin?
Getting From Medellin to Salento
You can get a direct bus from Medellin’s Terminal Del Sur bus station to Salento via Flota Occidental Bus Company. The trip should take about 7 hours and cost around 47,000 COP per person.
Salento, Colombia (2 Nights)
Salento is where the adventure is at. Spend a full day hiking around the Cocora valley, where all the tall palm trees are. Get up to Finca Acaime for a nice warm coffee break and witness the hummingbirds up close.
From the finca, hike down and around the valley to complete the loop. The cool part of the valley, where you can see all the tall palm trees up close, is at the end, so be patient.
To get to Cocora Valley, you have to be in the city center early in the morning, around 8 AM, and get a jeep there. The jeep runs quite often, but the earlier you go, the less crowded it will be.
If you are looking for more activities to do here, be sure to check out some of the available tours and day trips.
Where to Stay in Salento?
Getting From Salento to Popayan
To get from Salento to Popayan, you will have to go to the Salento bus terminal and get a bus to Cali as early as possible. Then, you will have to get another bus from Cali to Popayan.
The entire trip will take about 6-7 hours, depending on how long you will have to wait for the bus from Cali to Popayan. There are several buses running from Cali to Popayan, so you should not have to wait very long. It should cost you around $20 for the entire trip.
Popayan, Colombia (3 Nights)
After quite a relaxing itinerary, it is time for a real adventure. Near Popayan, there is a volcano called Purace where you can climb. You have to take a bus at 5 AM from the terminal up to the trailhead by 8 AM before starting an 8-hour hike to the summit and back.
The trail takes you through private properties, so a guide is needed, but you can start the hike independently. When you arrive at the registration office on the trailhead, you can pay for the guide there. You can also get a hot breakfast from the office.
The trail is long and rugged, while the wind can be unbearably strong, so be sure to equip yourself with layers. The view from the trail is nothing short of spectacular.
After the first day of hiking the volcano, rest up, and you can spend the second day exploring the city, walking around the white colonial old town, and exploring the more easy-going culture of the south.
Where to Stay in Popayan?
Getting From Popayan to San Agustin
To get from Popayan to San Agustin, you have to get on a collectivo from Popayan Bus Terminal and it will take you to San Agustin through one of the bumpiest roads ever. This part will not be the highlight of your trip, but once you arrive in San Agustin, it will make it all worthwhile, I promise you. The journey takes around 5-6 long hours and should cost about 35,000 COP.
San Agustin, Colombia (2 Nights)
San Agustin is a gateway to learning about the Pre-Columbian history of this region, with plenty of stone statues scattered around the archaeological site. Parque Arqueologico is one such site, and I highly recommend taking a tour to see the others.
Since San Agustin is a small town in the middle of nowhere, transportation is hard to come by. By taking a full-day tour, you eliminate the trouble of getting from one place to another and back.
The day tour usually includes a visit to a sugar cane factory and several stunning waterfalls in the area, some of which are located on private properties.
If you are looking for more activities to do here, be sure to check out some of the available tours and day trips.
Where to Stay in San Agustin?
Getting From San Agustin to Pasto
From San Agustin, you have to make your way back to Popayan again (I’m afraid) and take an afternoon bus to Pasto, our last stop before we cross the border to Ecuador.
You should be able to take any bus from Popayan to Pasto, as there is no difference between the bus companies. Get the one with the schedule that works best for you. The Popayan to Pasto journey takes around 5 – 6 hours, which is 5 – 6 hours on top of another journey, totaling 10 – 12 hours. So, I highly recommend you start from San Agustin as early as you can.
Pasto, Colombia (1 Night)
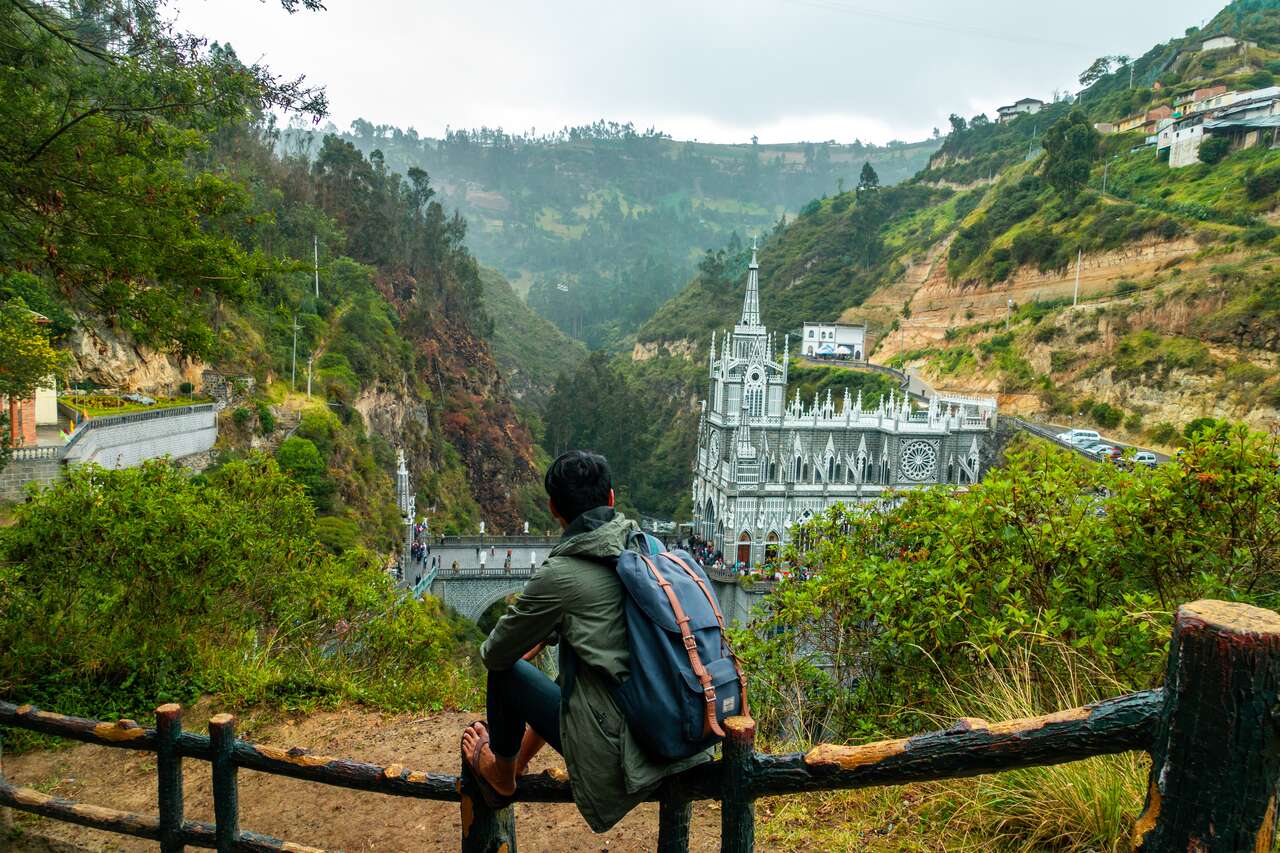
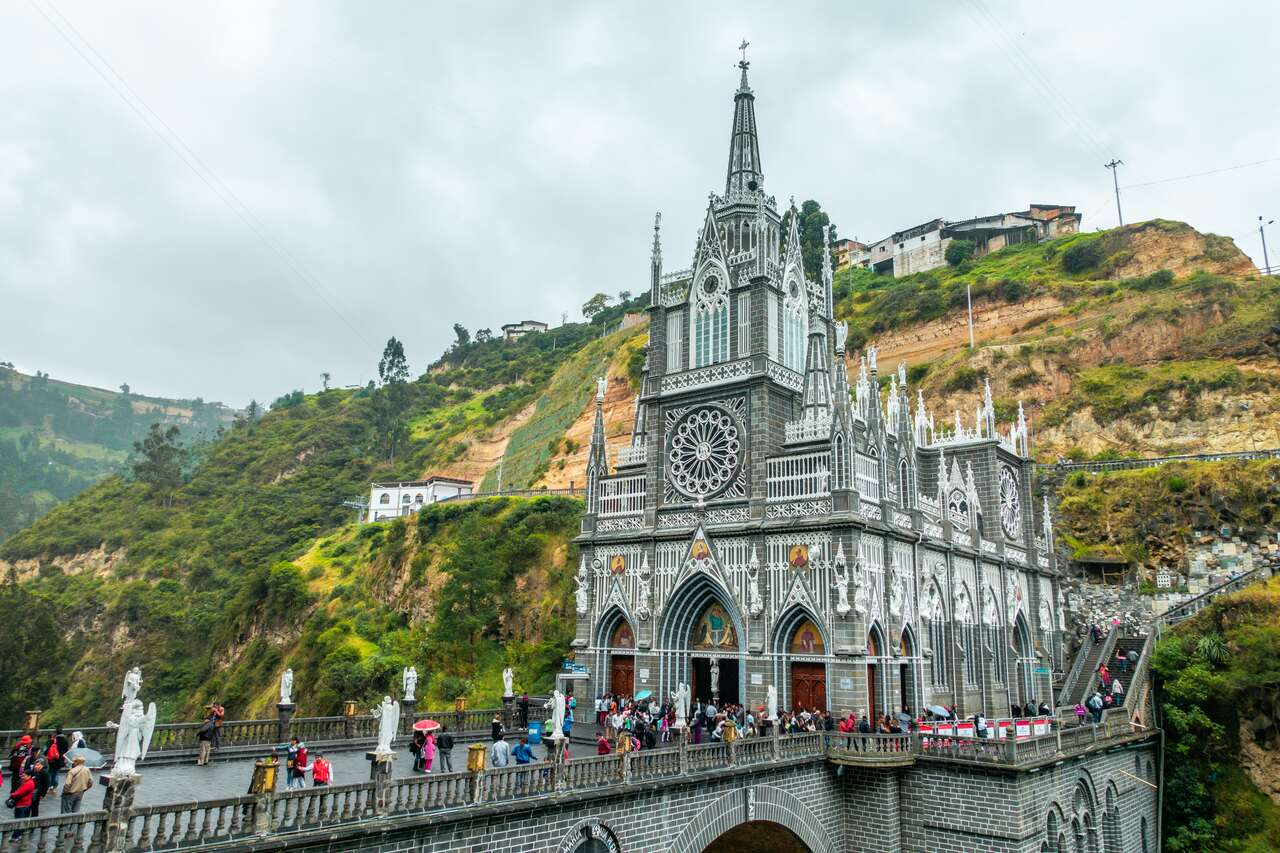
Since the ride from San Agustin to Pasto can be horrid, it is important to stop in Pasto so that you can wake up early in the morning and make your way to the border of Ecuador.
Why? Right at the border, there is a cathedral built on the side of a mountain called Las Lajas. Even though the cathedral itself is not worth a visit if you don’t plan to cross the border to Ecuador, it would be stupid not to see this magnificent cathedral on your way to Ecuador.
Take a morning bus from Pasto to Ipiales. From Ipiales, you can find plenty of taxis to take you to Las Lajas. Walk around the cathedral for a bit, and when you are ready to leave, get another taxi and tell them to drop you off at the border. From there, cross the border to Ecuador and head to Quito.
Where to Stay in Pasto?
Getting From Las Lajas to Quito
From Las Lajas to Quito, you will have to get a taxi to take you to the border, and then you will have to cross the border on foot. The taxi should then take you to Tulcan. From Tulcan, you will have to take a bus at the Tulcan bus terminal to Quito, the capital city of Ecuador.
You can find the bus to Quito when you arrive in Tulcán. There should be one that leaves at 4 PM, and you will arrive in Quito in 4-5 hours.
Quito, Ecuador (4 Nights)
After a month in Colombia, it is time to move on to our next destination: Ecuador. This country, though it looks quite small compared to its neighbors, does have a ton of things to do and see. I saw more wildlife in Ecuador than in my entire life.
Looking for a complete itinerary for Ecuador?The Perfect One Month Itinerary For Ecuador
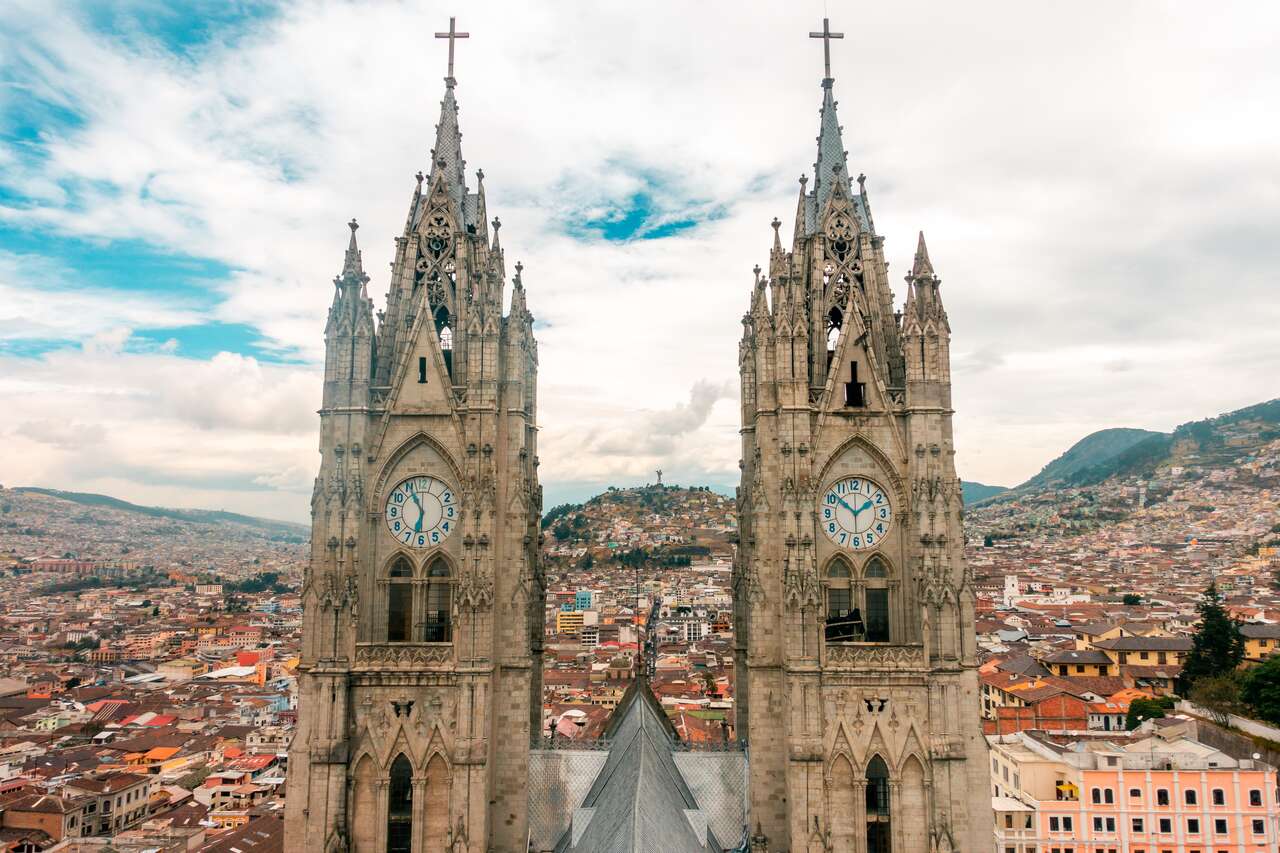
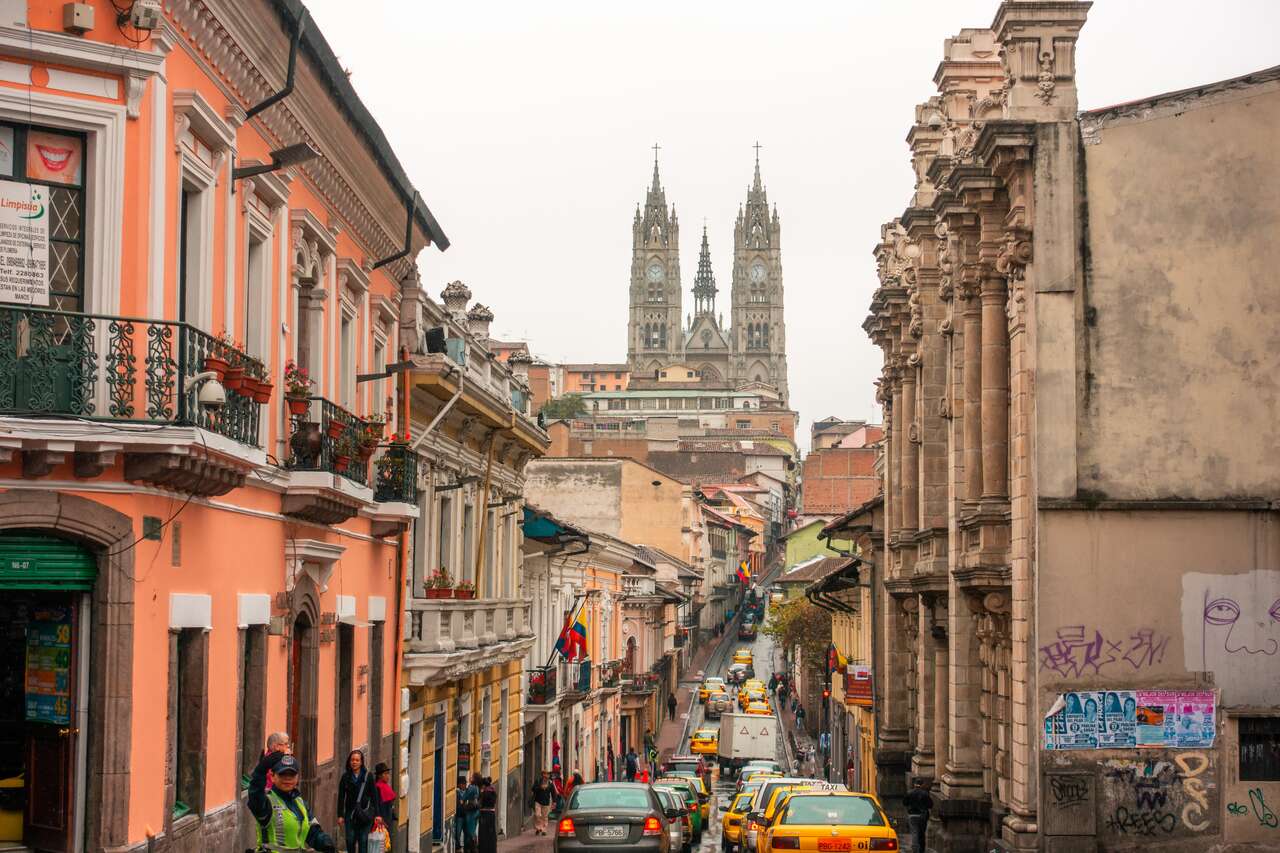
We first begin our journey in Quito, the capital city of Ecuador. As I told you, you will have to start getting used to high altitude cities in South America. Quito is 3000m above sea level, and the last thing you want to do is to go off and hike mountains around the city, so first things first, acclimatize. Walk around the old city, check out the Basílica del Voto Nacional and the square.
The key to acclimatization is to let your body get used to the altitude slowly, and what better way to do it than to walk around the city and explore the beautiful colonial part of Quito.
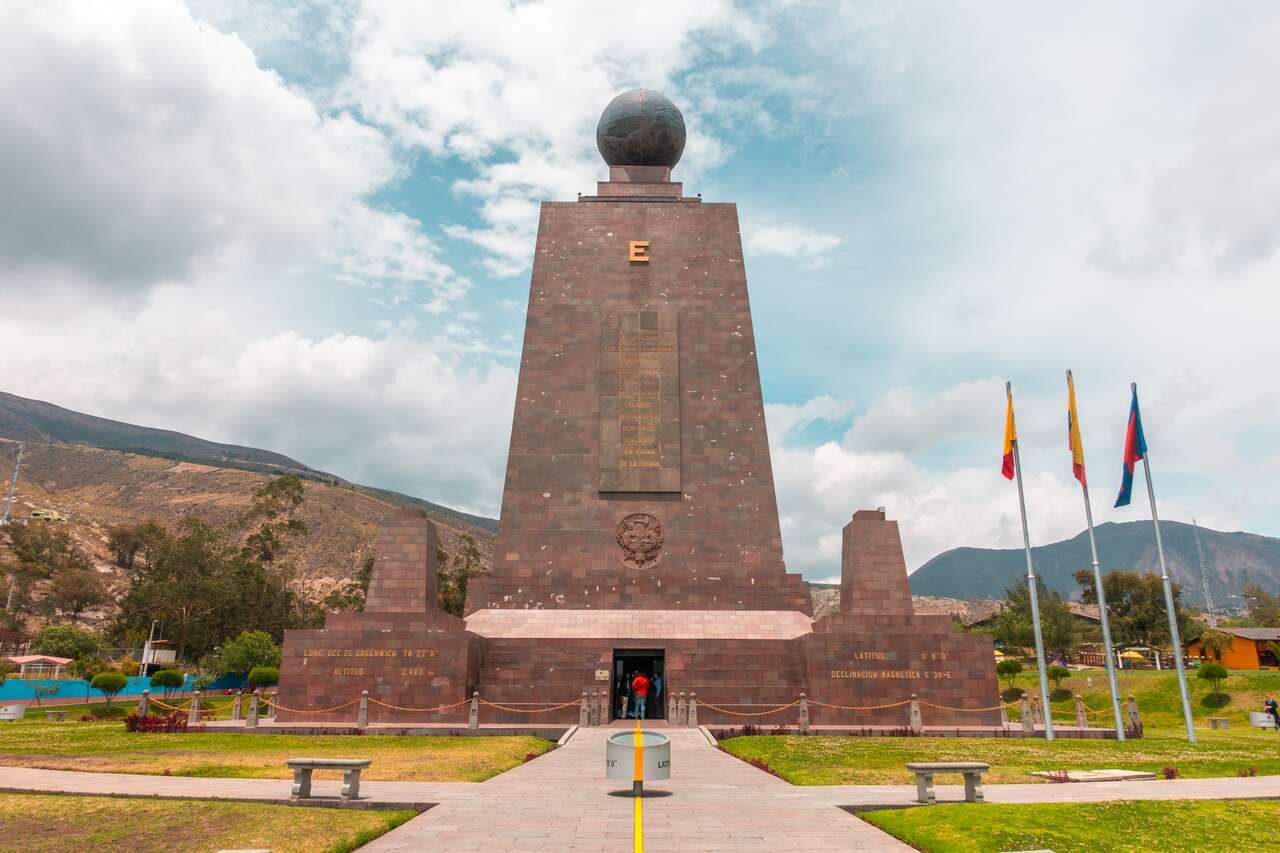
The next day, hop on the bus toward the north and go check out the Center of the World (Ciudad Mitad del Mundo). It is basically a tourist trap, but it is pretty cool to be at the Center of the World! Well, almost, at least because the real center of the world is located 240m away from the monument, where they thought the center of the world was in the 80s.
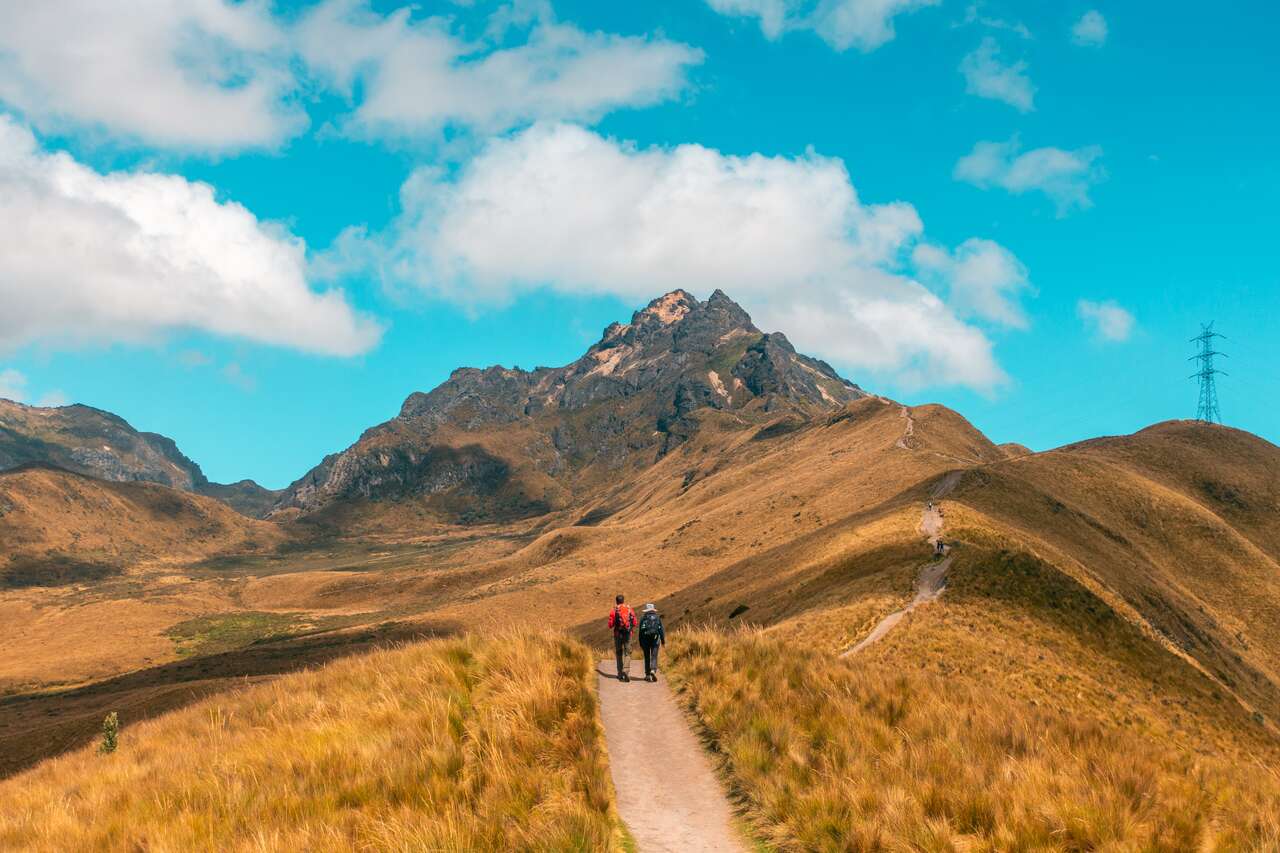
After 2 days of taking it slow, now it is time for you to climb a volcano. The Pichincha volcano trail is just a 5-minute cable car ride away from the city, followed by a 4-hour hike to the summit and a 3-hour return.
If you are looking for more activities to do here, be sure to check out some of the available tours and day trips.
Looking for a complete travel guide to Quito?Top 7 Things To Do In Quito, Ecuador
Where to Stay in Quito?
Getting From Quito to Mindo
After 3 days in Quito, we will go up north to check out the beautiful cloud forest of Mindo, home to over 500 species of birds. To get from Quito to Mindo, you will have to catch a bus at Terminal de La Ofelia which you can reach by taxi or you can take the local bus #3 to get from the main square to the bus terminal.
There are approximately 4 buses running between Quito and Mindo every day. The journey will take about 2 hours and cost 3 USD per person. The bus company that operates this route is called Flor del Valle, and you can simply go to the bus terminal and get a ticket on the spot.
Mindo, Ecuador (2 Nights)
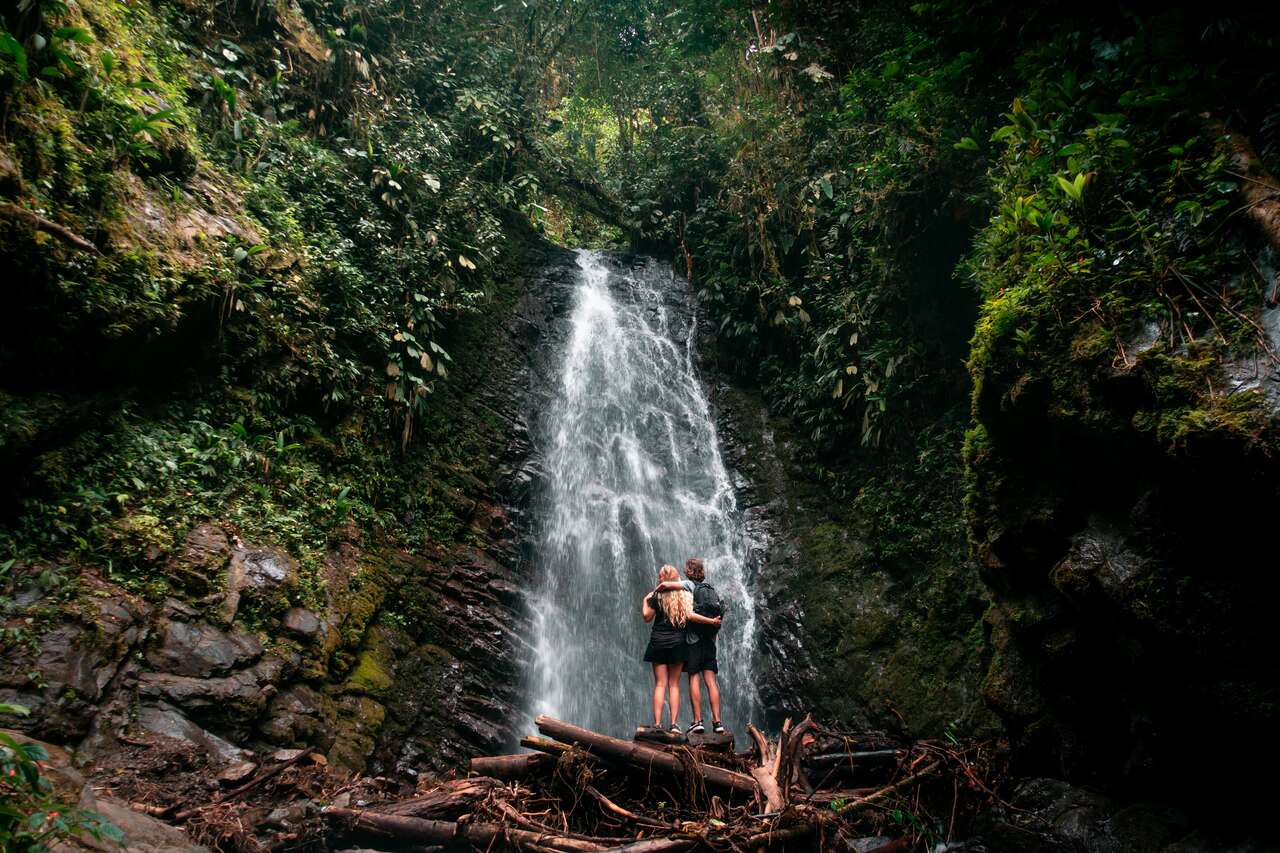
Mindo is a peaceful small town in the mountains where you can hike to one of the many waterfalls in the forest and spot some rare species of birds that can’t be seen anywhere else.
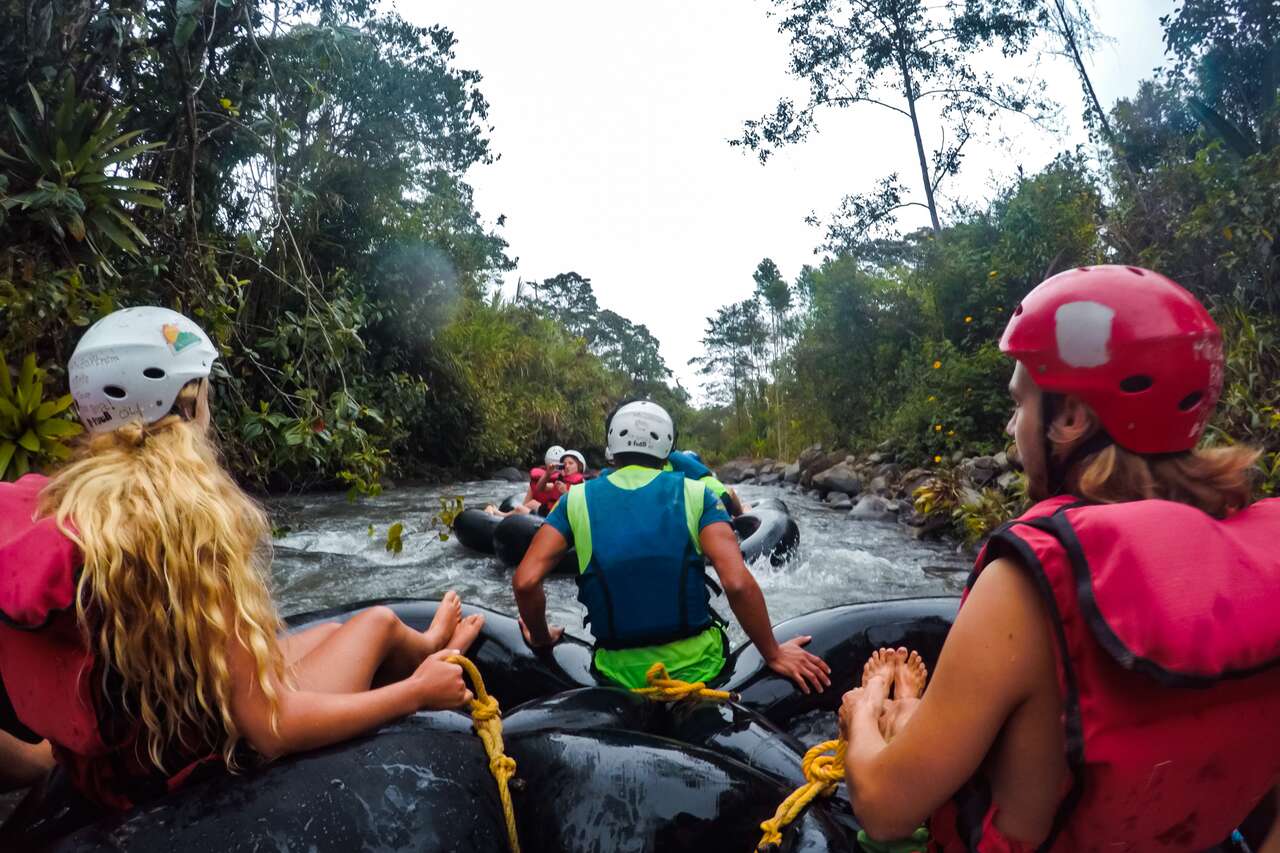
You can also go tubing, which I really enjoyed although I wish it lasted a little longer. All in all, it is a good place to get away from the crowd and enjoy a relaxing day in the cloud mountains.
If you are looking for more activities to do here, be sure to check out some of the available tours and day trips.
Where to Stay in Mindo?
Getting From Mindo to the Amazon
Next up, we will go to the Amazon, and you will have to get back to Quito via the same Flor del Valle bus you took before and buy a tour that will guide you through the Ecuadorian Amazon forest.
I did a 4-day Amazon tour with CarpeDM for 270 USD that includes everything from accommodation to food to transportation for the entire duration, and I had a blast with them. Be sure to check the CarpeDM Adventures agency in Quito so they can explain more about the tour.
The Amazon, Ecuador (4 Nights)
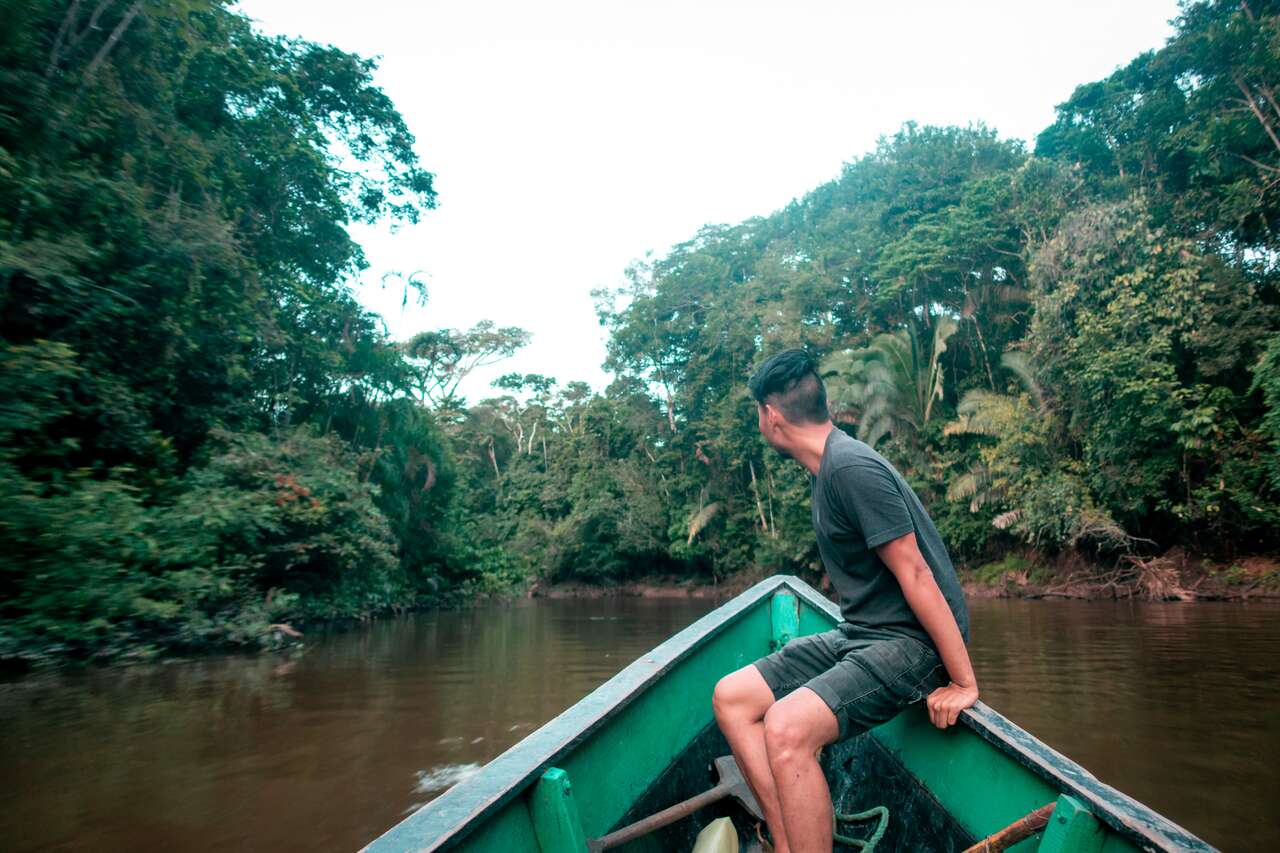
To be able to go bushwhacking around the Amazon, see an actual anaconda eating birds, and learn about the Amazon culture of the indigenous people living off this untamed rainforest is one of the best things you can do while you are in South America.
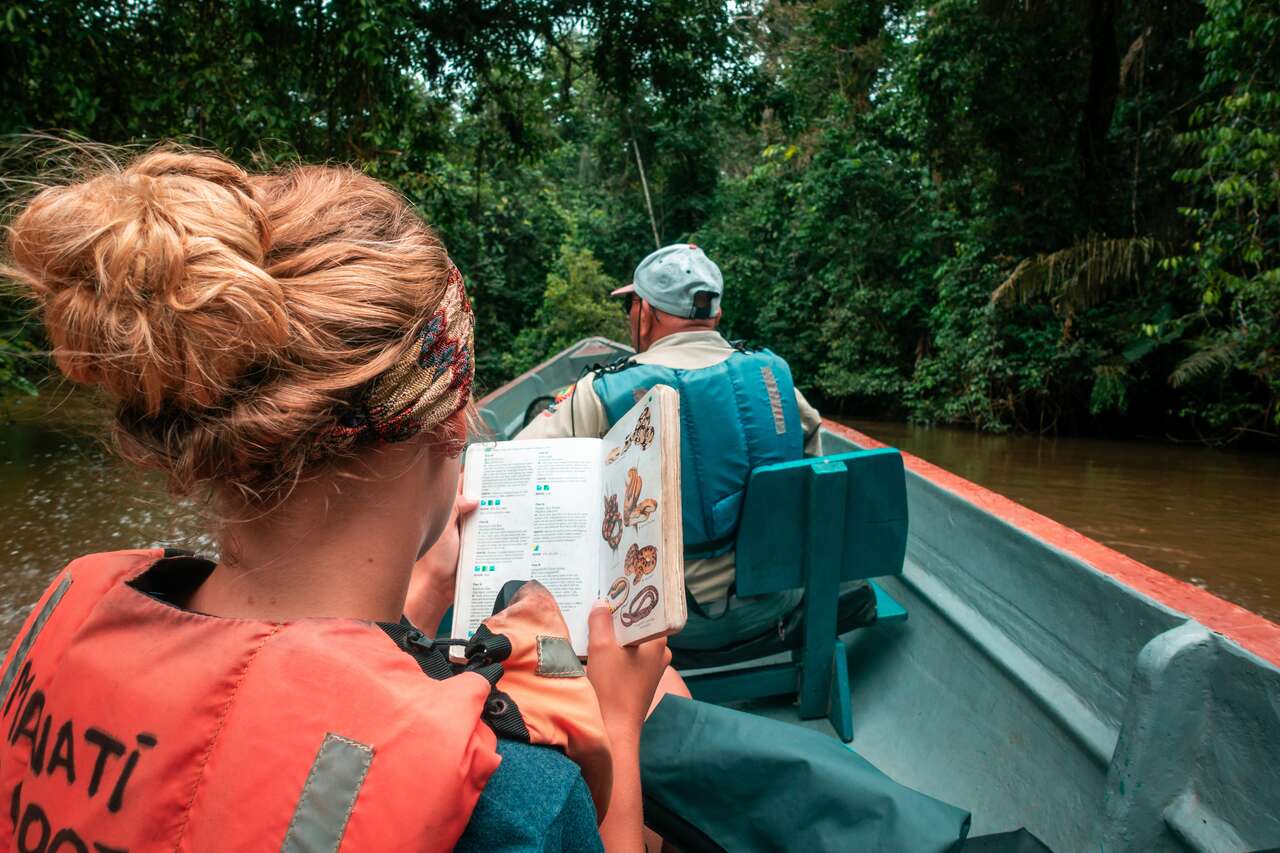
If you go with CarpeDM, the tour will take you to the Amazon area called Cuyabeno. You will be exploring the rainforest on a boat, tracking down pink dolphins, swimming in the lagoon, and being guided through one of the most unforgiving places on Earth. I had a great time with CarpeDM, so I highly recommend going with them for this tour.
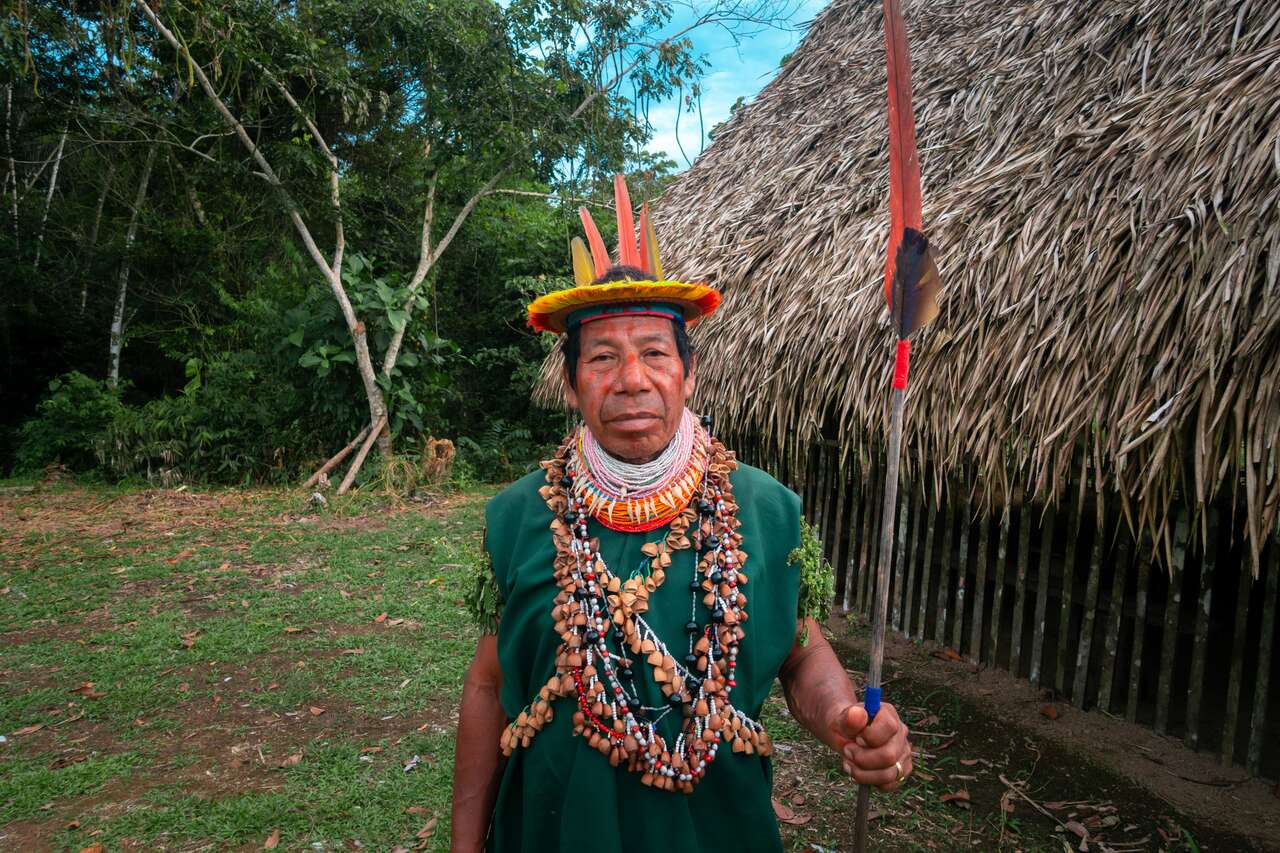
You will also get to meet some indigenous people who were allowed to live off the land in the reserve. See their rituals and try out some of their delicacies.
The tour itself is really good, and the guide was amazing, but don’t expect to spend 4 full days exploring the forest. In reality, you will only be exploring for 2 days, with a lot of sleeping in the hammock on your first and last day.
If you are looking for more activities to do here, be sure to check out some of the available tours and day trips.
Getting From Quito to Cotopaxi
After the Amazon, you will be back in Quito where you can take a taxi to Quitumbe Bus Terminal in the southern part of the city and catch a bus to Cotopaxi.
At the bus terminal, get on a bus with a sign labeled Cotopaxi, and be sure to tell the bus driver to drop you off at the entrance of Cotopaxi. From there, you will find plenty of local trucks waiting along the street. Wait until more people arrive and hire them to guide you up and down the mountain for $25 USD.
Once you are done, the truck will drop you off at the main road, where you can then flag down the onward bus to go to Latacunga, where you will be spending the night.
Where to Stay in the Amazon (Cuyabeno)?
Cotopaxi, Ecuador (1 Night In Latacunga)
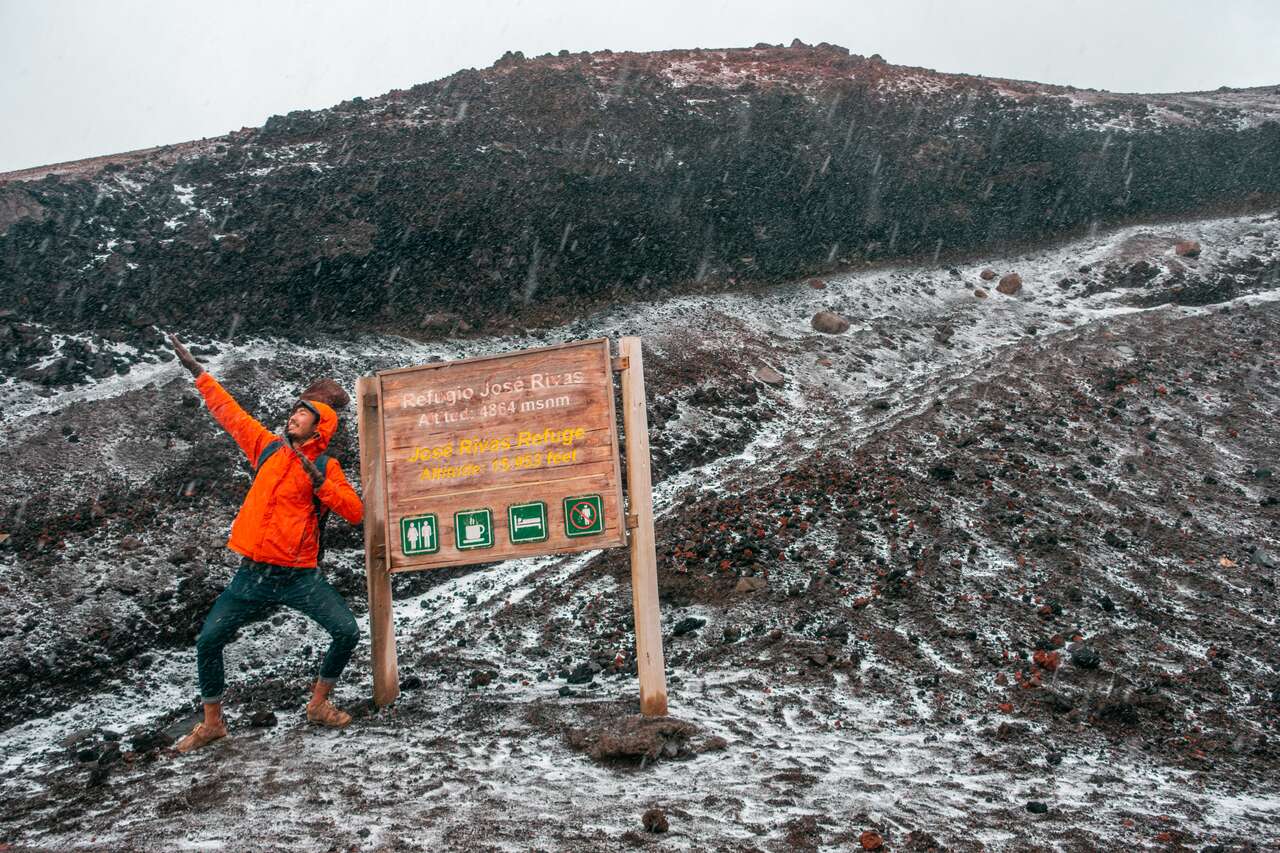
Cotopaxi is an active stratovolcano in the Andes Mountains and the second highest mountain in Ecuador, reaching a height of 5,897 m. You can climb it, but only to a certain point, as the terrain becomes too treacherous to continue without proper climbing gear. That is where we will be going today.
With the pick-up truck and a guide you picked up at the entrance of Cotopaxi, the driver will take you around the area to check out different attractions before heading up to the trailhead. There, you will be hiking for about an hour or two to reach the mountain hut where you can see Cotopaxi summit up close.
You can rest, relax, and have hot cocoa at the mountain hut before heading down to the highway again. The entire trip should take around half a day, and you can then continue on your journey to Latacunga by flagging any bus going south to take you there. You will be spending the night in Latacunga.
If you are looking for more activities to do here, be sure to check out some of the available tours and day trips.
Where to Stay in Latacunga?
Getting From Latacunga to Quitotoa
From Latacunga, you can easily find a bus to Quilotoa Laguna, our next destination at Latacunga Bus Terminal. At the bus terminal, simply look out for a kiosk with the QUILOTOA sign in front of it, and you can get the ticket from there.
The bus runs almost every hour, so you should have no trouble getting a ticket right on the spot. The bus should take about 2 hours and cost around 2 USD per person.
Quilotoa Laguna, Ecuador (1 Night)
Quilotoa is a beautiful water-filled caldera where you can hike up to a lookout point and see the emerald-colored, 3-kilometer-wide lake from the ridge. Some people may opt for a 4-day trek called Quilotoa Loop, which will take you around the area, but you don’t really have to do the 4-day trek to see this lookout point if you don’t want to.
Quilotoa is quite high up (almost 4000m), so take it slow as you hike to the ridge and be sure to prepare layers as it can get quite cold at night. Stay one night in Quilotoa town and then continue our journey to the next destination by getting down to the main road.
If you are looking for more activities to do here, be sure to check out some of the available tours and day trips.
Where to Stay in Quilotoa?
Getting From Quilotoa to Banos
From Quilotoa, you can take a bus or hitchhike down to the main road where you can then ask your driver to drop you off at a bus stop. Once you arrive, there will be many buses passing through the area.
Be sure to flag down the one that goes to Banos, and you will be on your way. Ask your driver when they stop if they are going to Banos or not, just to be sure.
Banos, Ecuador (2 Nights)
You may have seen a photo of a person swinging off a cliff overlooking an erupting volcano somewhere on the Internet before, but did you know that the volcano is Mt. Tungurahua and the photo was taken in Baños, Ecuador? I didn’t know that and was happily surprised when I arrived in Baños and saw the swing, the treehouse, and the volcano with my own eyes.
Banos is where you will find many of these photogenic spots, as well as other outdoor activities you can partake in, from zip lining to hiking. You can see everything in a day by starting off early, hiking up to Mirador Bellavista to get a view of the city from the top.
From there, you can walk to the main road and catch a bus to La Casa del Arbol, where the “Swing at the Edge of the World” is located. Make sure to check the bus schedule for that route and plan your time carefully. Otherwise, you might have to hitchhike like I did.
Sorry, your browser doesn’t support embedded videos.
You can also go ziplining, where you will be swinging yourself across 2 mountains, along rivers, and waterfalls. I did it for 25 USD with the Putzan Canopy.
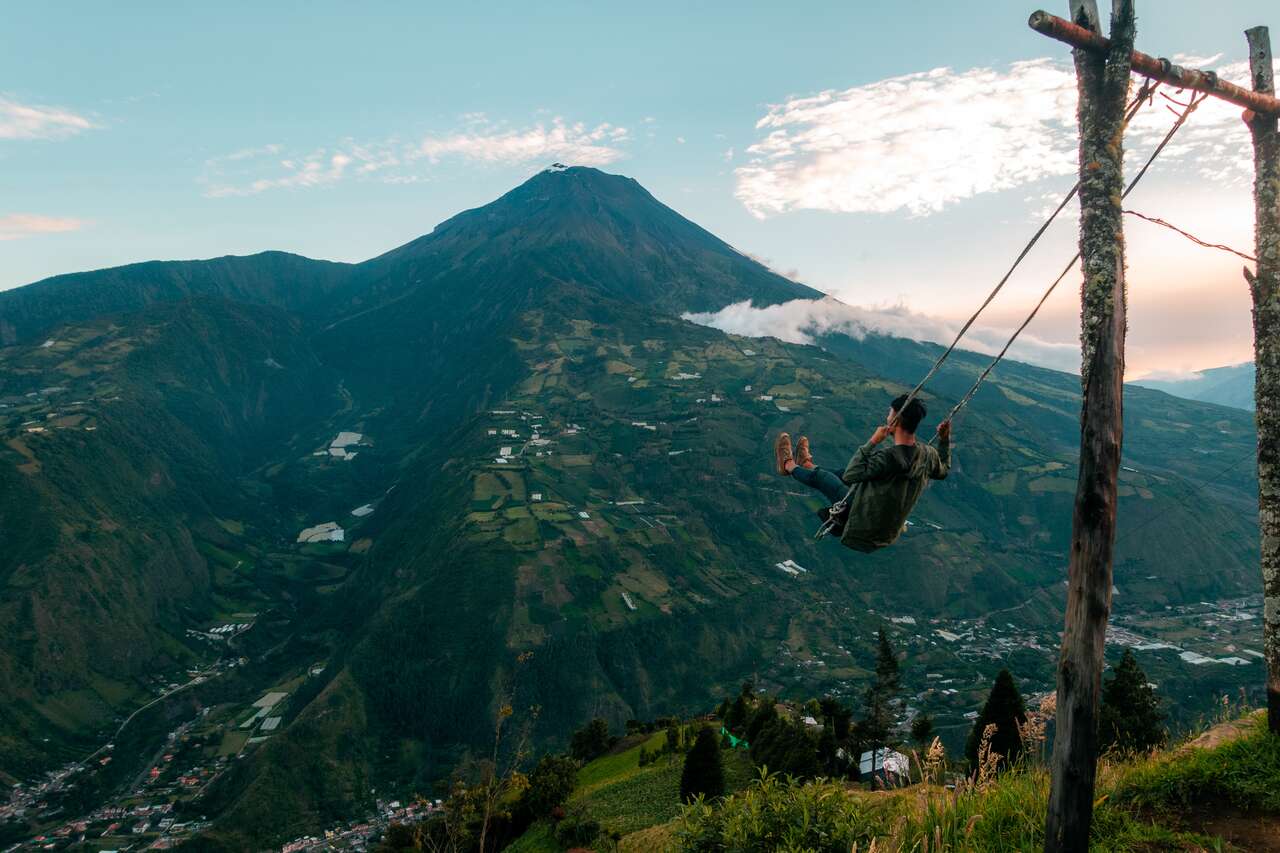
After zip-lining, take a taxi to Mirador Las Antenas and watch the sunset behind Chimborazo volcano while swinging off another cliff overlooking Volcán Tungurahua. To be honest, this is a better place to get a nice swing shot than the famous La Casa del Arbol.
If you are looking for more activities to do here, be sure to check out some of the available tours and day trips.
Looking for a complete travel guide to Banos?5 Most Adventurous Things To Do In Baños, Ecuador
Where to Stay in Banos?
Getting From Banos to Guayaquil
From Baños to Guayaquil, you can take a direct bus from Baños Terminal to Guayaquil bus terminal in the early morning, as the trip can be as long as 6-7 hours. The journey will cost you about 10 USD per person.
Guayaquil, Ecuador (1 Night)
There is not much to see in Guayaquil, but it is a good base to fly off to the Galapagos Islands as it is cheaper than from Quito. You can spend this day relaxing and chilling out before we get on a flight to one of the greatest adventures of your life: a visit to the Galapagos Islands.
If you are looking for more activities to do here, be sure to check out some of the available tours and day trips.
Where to Stay in Guayaquil?
Getting From Guayaquil to Galapagos
From Guayaquil to Galapagos, you will have to fly either via LATAM or TAM airlines, and the round-trip cost is often fixed at 351 USD. However, sometimes, if you book way in advance, you might be able to get it cheaper.
To book a flight to the Galapagos, be sure to check for the latest price at the link here: Book A Flight From Guayaquil to Galapagos.
Galapagos, Ecuador (10 Nights)
Visiting the Galapagos will be one of the best trips you will ever take in your life. It is expensive, but trust me, you will not regret it. There is no place in the world that is quite like the Galapagos.
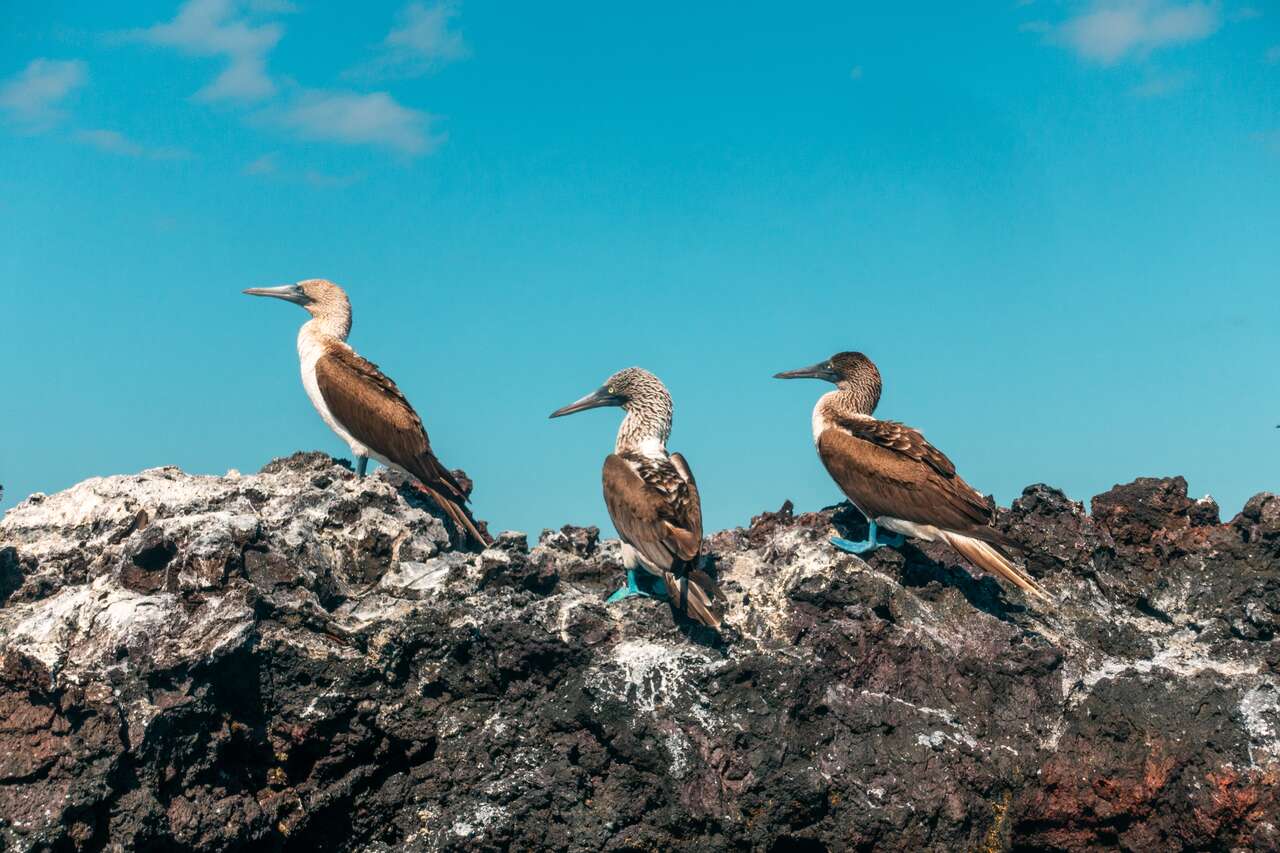
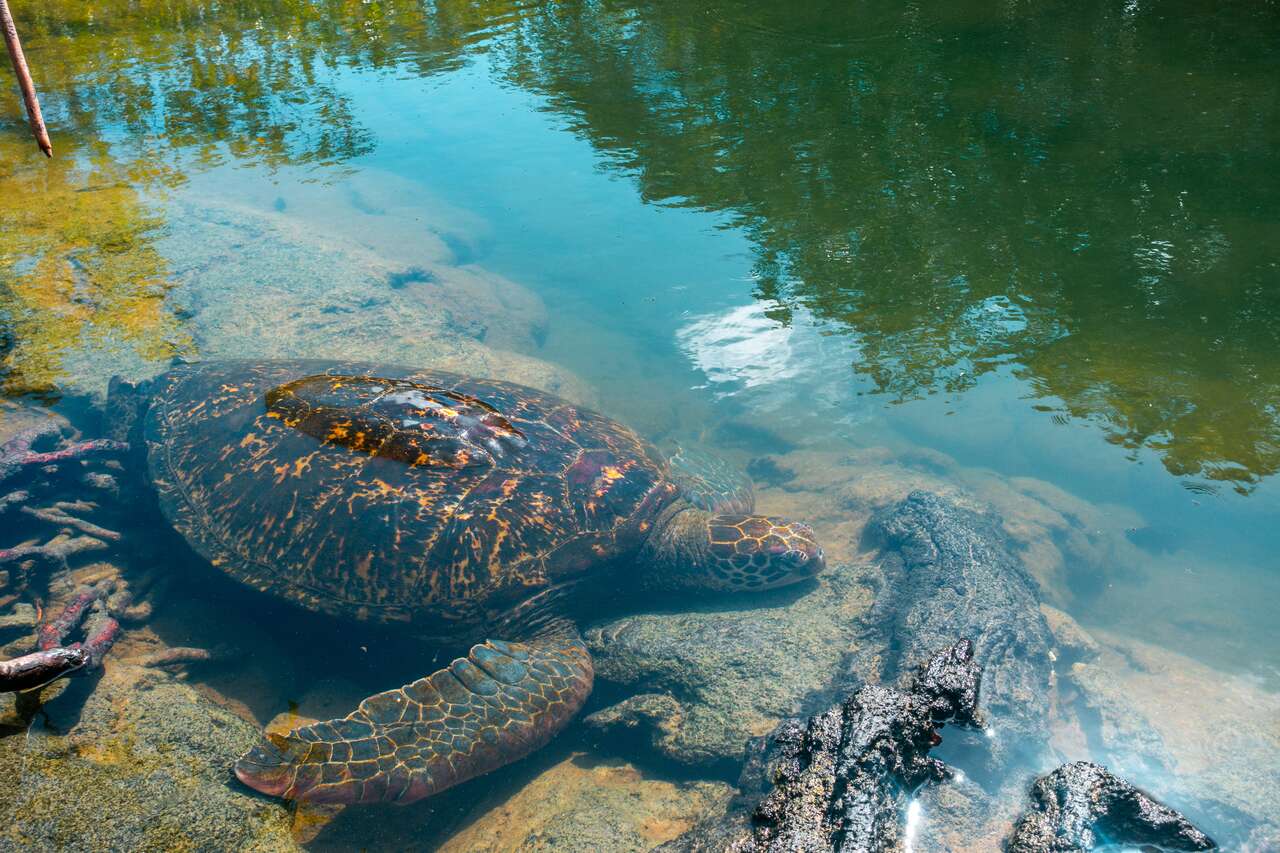
You will be swimming with sea turtles, seals, and sharks while walking around an island full of birds and iguanas. Get up close with nature without these wonderful animals running away.
They are so accustomed to the perfect condition of the Galapagos that the sight of humans strolling around them does not scare them anymore, which is something that you don’t see every day.
The first day when you arrive in Puerto Aroya, go for a walk around the tourist street and shop for a last-minute cruise. There will be many options with different price ranges and routes, so decide carefully.
What I found most reasonable is a 6-day cruise that goes to Puerto Villamil, around Isla Isabela, with a stop at Isla Fernandina, visiting the black and red sand beaches along the way, crossing the equator line and going around Volcan Wolf, and making a last stop at North Seymour island before going back to Puerto Aroya, all for 1100 USD.
With this plan, I was able to see the remotest part of the Galapagos where you can’t do them independently, all in one go, and I got to do things like snorkeling with sea turtles, sharks, and seals.
If you are looking for more activities to do here, be sure to check out some of the available tours and day trips.
Looking for a complete travel guide to Galapagos?The Cheapest Way To Travel To Galapagos
Where to Stay on Galapagos?
Getting From Galapagos to Cuenca
From Galapagos, you will have to fly back to Guayaquil, and from there, you can continue your journey south towards Cuenca. Not too far from the airport, you can get a collectivo or a shared van from Bahia Norte bus stop. Don’t forget to book the flight!
It’s only a 10-15 minute walk from the airport. The van leaves when it’s full. The journey should take around 3.5 hours and cost about 12 USD per person.
Cuenca, Ecuador (2 Nights)
Although it is relatively comfortable to do a cruise in Galapagos, you might feel like you want to relax afterward. Cuenca is the perfect place for that. Take it slow and walk around this wonderful city. The city has one of the most photogenic cathedrals in Ecuador.
Walking around Cuenca reminded me of the time I was in Seville, Spain. This city is beautiful with a relaxed vibe that you can’t find anywhere else in Ecuador. Cuenca is possibly my favorite big city in South America.
If you are looking for more activities to do here, be sure to check out some of the available tours and day trips.
Where to Stay in Cuenca?
Getting From Cuenca to Vilcabamba
To get from Cuenca to Vilcabamba, you will have to catch a bus from Cuenca Bus Terminal to Loja, a big bus hub in the area, and then you can get another bus to Vilcabamba. There are around 5 buses connecting Cuenca to Loja from 7:45 AM to midnight operated by Ejecutivo San Luis. The journey from Cuenca to Loja should take about 4 hours and cost 7.5 USD.
After you arrive at the Loja bus terminal, you can easily catch a bus with a sign that says “Vilcabamba”, which will take another 45 minutes before you arrive in Vilcabamba.
Vilcabamba, Ecuador (2 Nights)
Finally, we arrived at our last destination in Ecuador, Vilcabamba, a quiet town in the Andes mountains, with a charming little community, and a few nice hikes you can do.
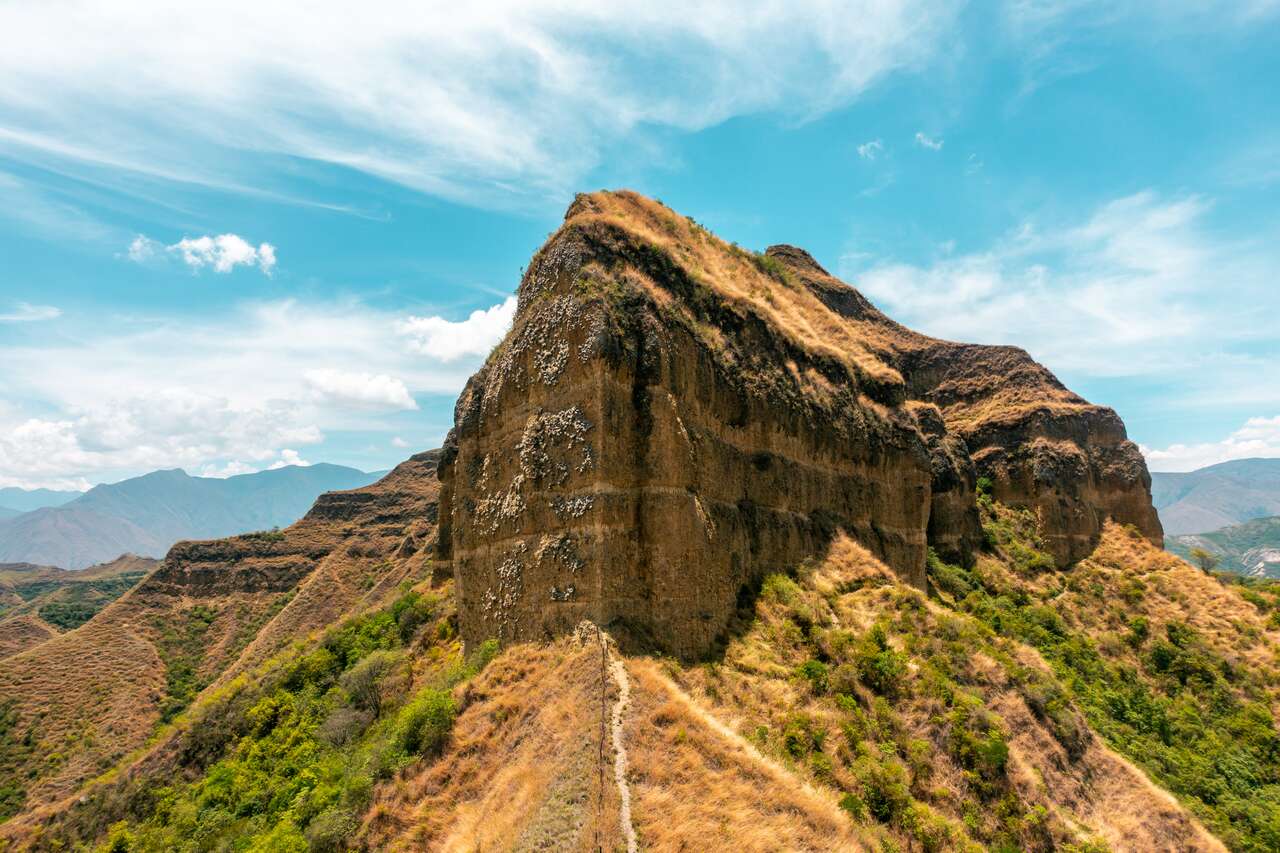
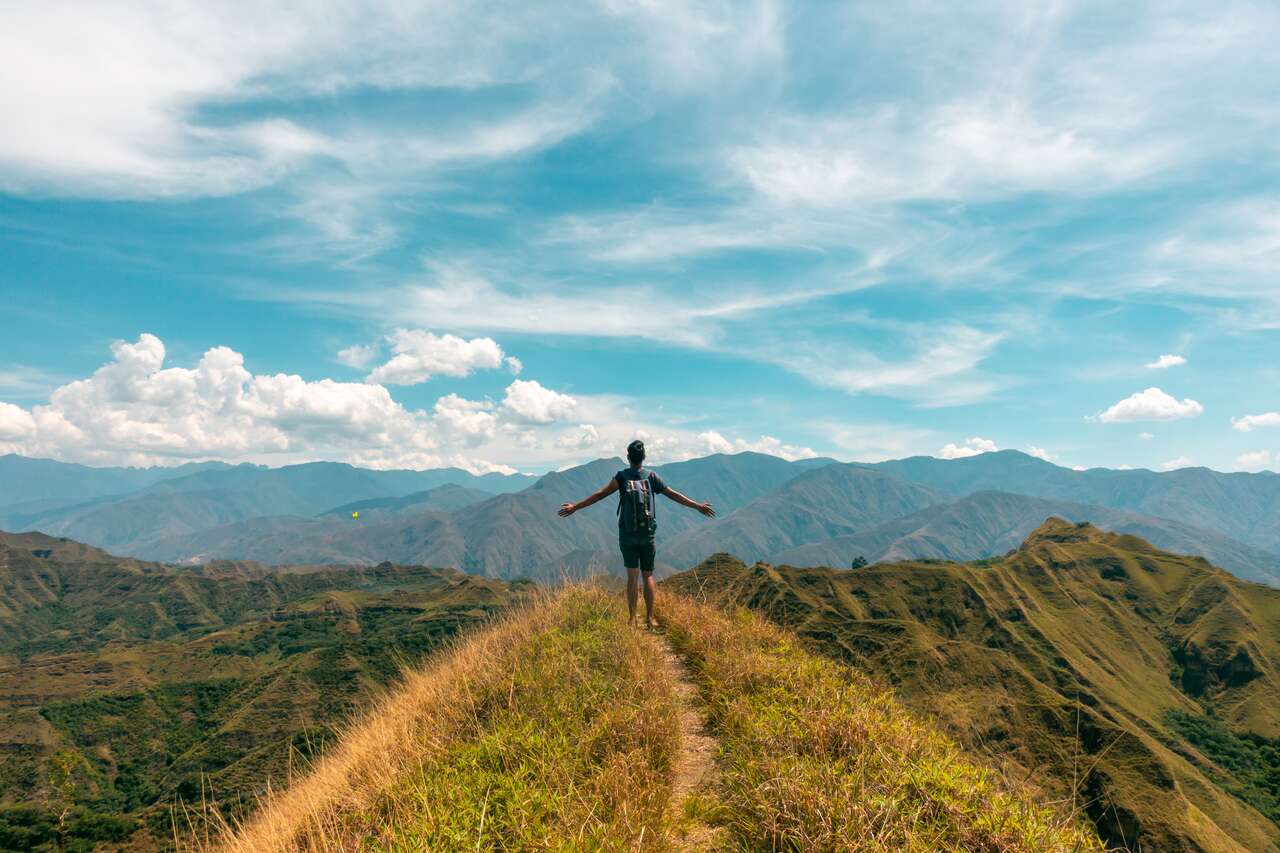
The first order of business here is to go hike the Mandango trail where you will get to see and hike the Mandango Rock, which is the landmark of Vilcabamba. The whole hike will take you around 3-4 hours as you walk in a circuit, and you get to see the beautiful landscape around the area.
Once you get down, do treat yourself to a nice falafel at the United Falafel Organization (UFO) restaurant near the church in the square and spend the rest of the day relaxing in the quaint vibe of Vilcabamba.
Where to Stay in Vilcabamba?
Getting From Vilcabamba to Huanchaco
From Vilcabamba, if you want to cross the border to Peru, you will have to start off early and get yourself to Loja. Then, you can either take the afternoon direct bus to Piura, Peru.
If you were unlucky like me and found yourself in Loja with no bus leaving at 1 PM like it used to, you can do it independently quite easily. First, get a bus from Loja to Macara and take a taxi across the border.
Once you have crossed the border, you can get some money exchanged at the small restaurant on your left and get a collectivo (shared taxi) from the border to Sullana, Peru and ask the collectivo driver to drop you off at the bus station in Piura, where you can catch a night bus to Trujillo. I highly recommend you go with the Linea bus operator for the Piura to Trujillo route.
There are plenty of buses going from Loja to Macara and from Sullana to Piura, so do not worry that you might be stuck somewhere in between. There will also be people looking to fill up the collectivo as fast as they can at the border, so no need to worry about that too.
All in all, the experience was easier than I thought, and it was better than waiting a whole day for another bus. You will be spending a night on the bus today, so be sure to prepare accordingly. The good news is that buses in Peru are so comfortable that you might not even realize that you have already arrived in Trujillo in the morning.
From Trujillo, you can then walk out of the bus terminal (Peru has a different bus system where every company has its own bus terminal in different locations) and catch a local bus that goes to Huanchaco.
If you use the Linea bus operator (which I highly recommend) from Piura to Trujillo, you will be dropped off at Linea Terminal where you can simply go out of the terminal to the nearest bus stop and flag down the bus with the Huanchaco sign in the front window. The bus should cost about 1.5 SOL.
Huanchaco, Peru (2 Nights)
Huanchaco is a great first stop after traveling through Ecuador. With a change in scenery from mountains to beaches, you will appreciate what Huanchaco has to offer.
The long, beautiful beaches, culture, and many historically significant sights you can visit, along with the close proximity to the city of Trujillo, make Huanchaco the perfect place for you to learn a bit more about Peru and get ready for another month in one of the best countries in South America.
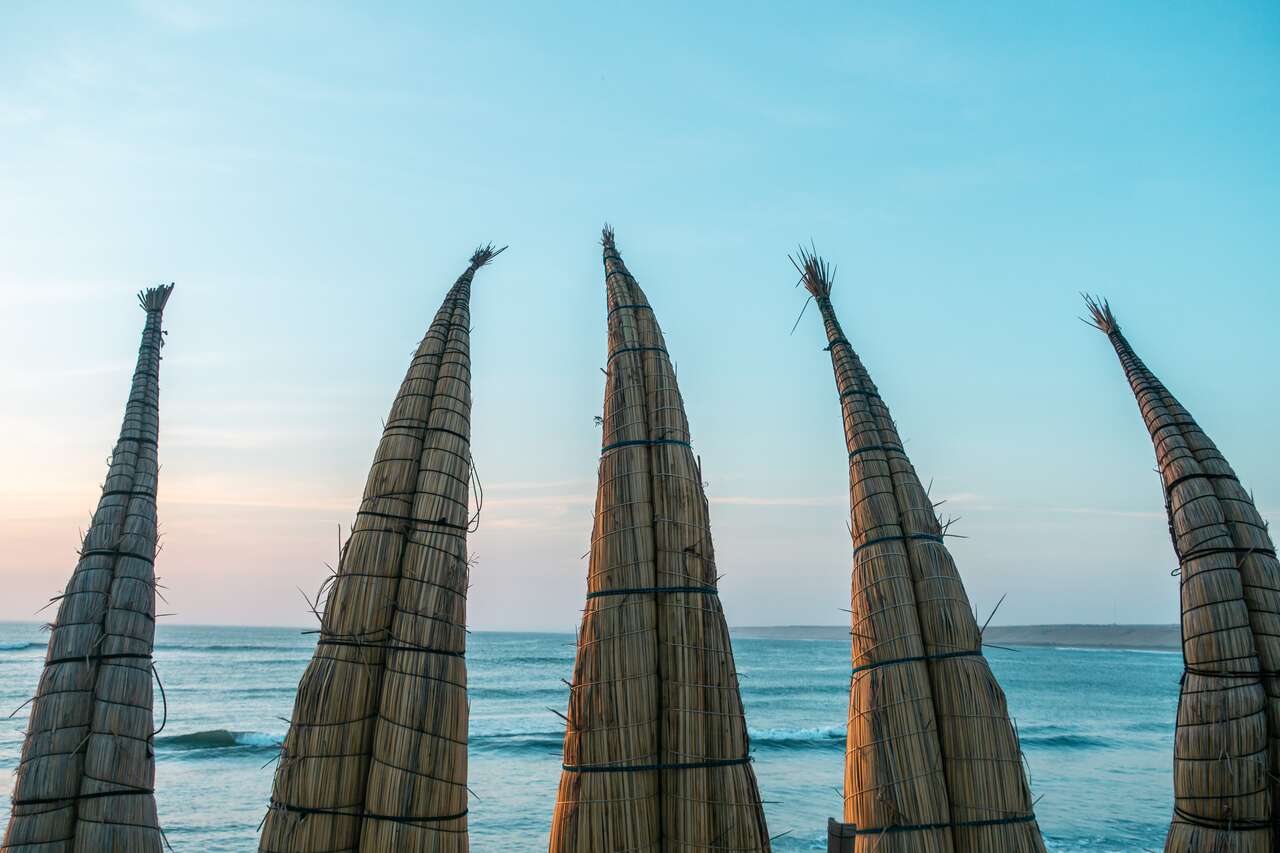
On your arrival day, take it easy and walk around the beach of Huanchaco. Take in the culture or go surf into the sunset. In the evening, go find a nice restaurant with a view over the ocean and order ceviche, a seafood dish popular in Peru, and enjoy the sunset the Peruvian way.
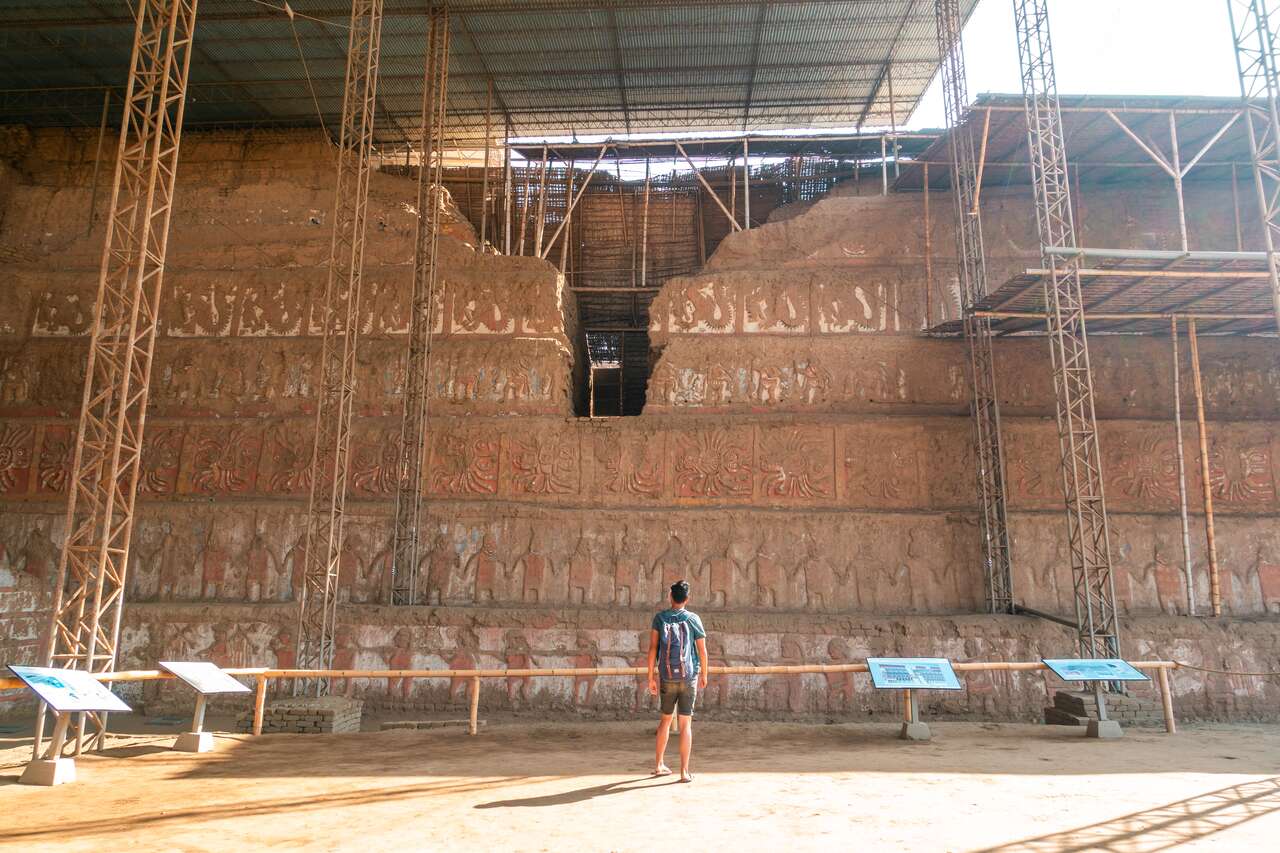
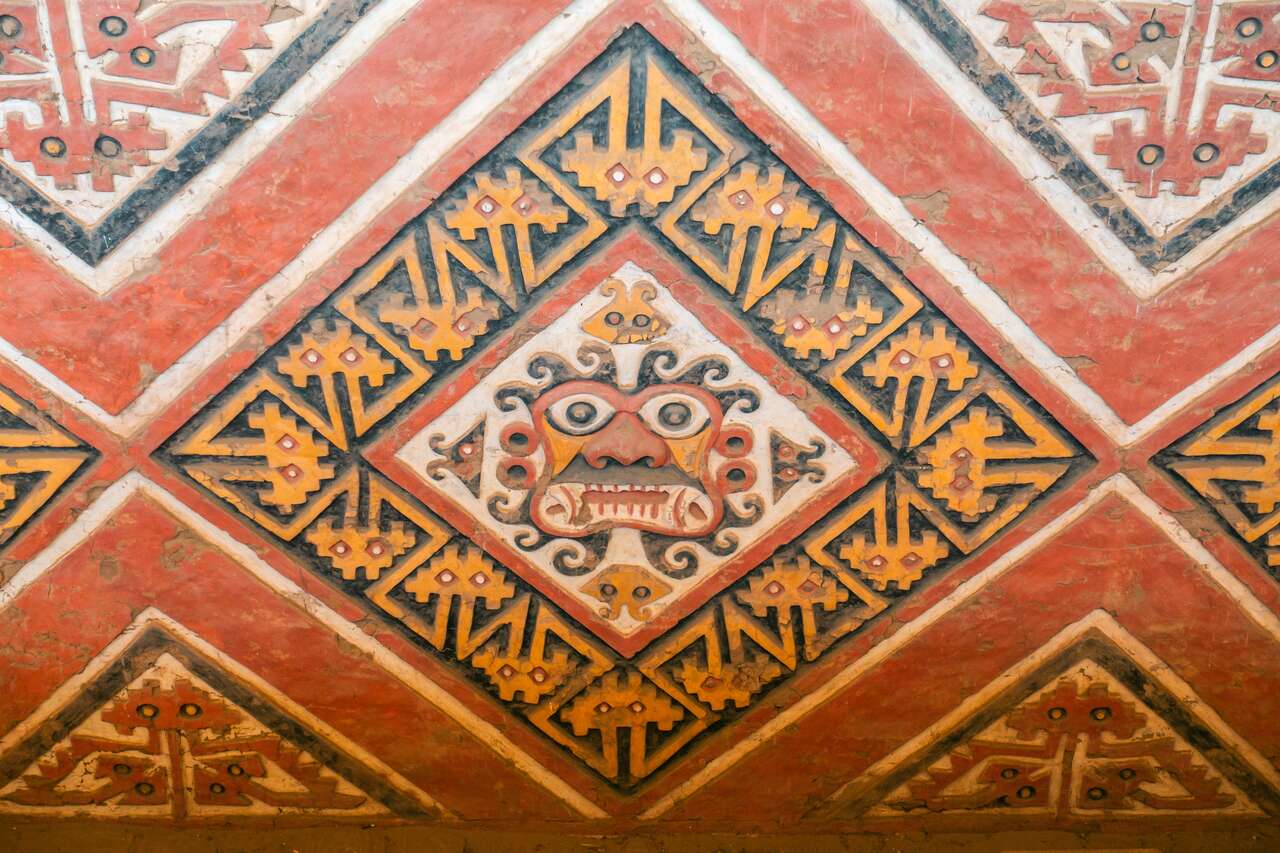
On your second day, go on a bus to Trujillo and get a collectivo to the Moon Temple (Huaca de La Luna). In the Moon Temple, you will learn about the pre-Colombian people that lived in this area called the Moche and be fascinated by what they had accomplished during their reign, especially the city wall shown above. Be sure to also visit the museum near the Moon temple to learn more about the Moche people.
Once you have laid the groundwork of your Moche knowledge, head back to Huanchaco. And on your way back, ask the bus driver to drop you off at the Chan Chan entrance and explore the ruins to learn more about the Moche.
If you are looking for more activities to do here, be sure to check out some of the available tours and day trips.
Looking for a complete backpacking itinerary to Peru?One Month Backpacking Guide For Peru
Where to Stay in Huanchaco?
Getting From Huanchaco to Huaraz
After Huanchaco, we will go to Huaraz, the hiking capital of Peru. To get from Huanchaco to Huaraz, you will have to prebook your overnight bus via Linea (which I recommend) or Movil Bus Companies. Once you have the ticket, you will then have to go to one of these specific bus terminals in Trujillo.
To get to Trujillo, you just have to take the same bus you took to get to Huanchaco when you arrive at the drop off at Linea Bus Terminal again. There is one Linea bus leaving at 9:30 PM, and you should arrive in Huaraz by 6 AM. The bus ticket should cost about 50 SOL.
Huaraz, Peru (9 – 12 Nights)
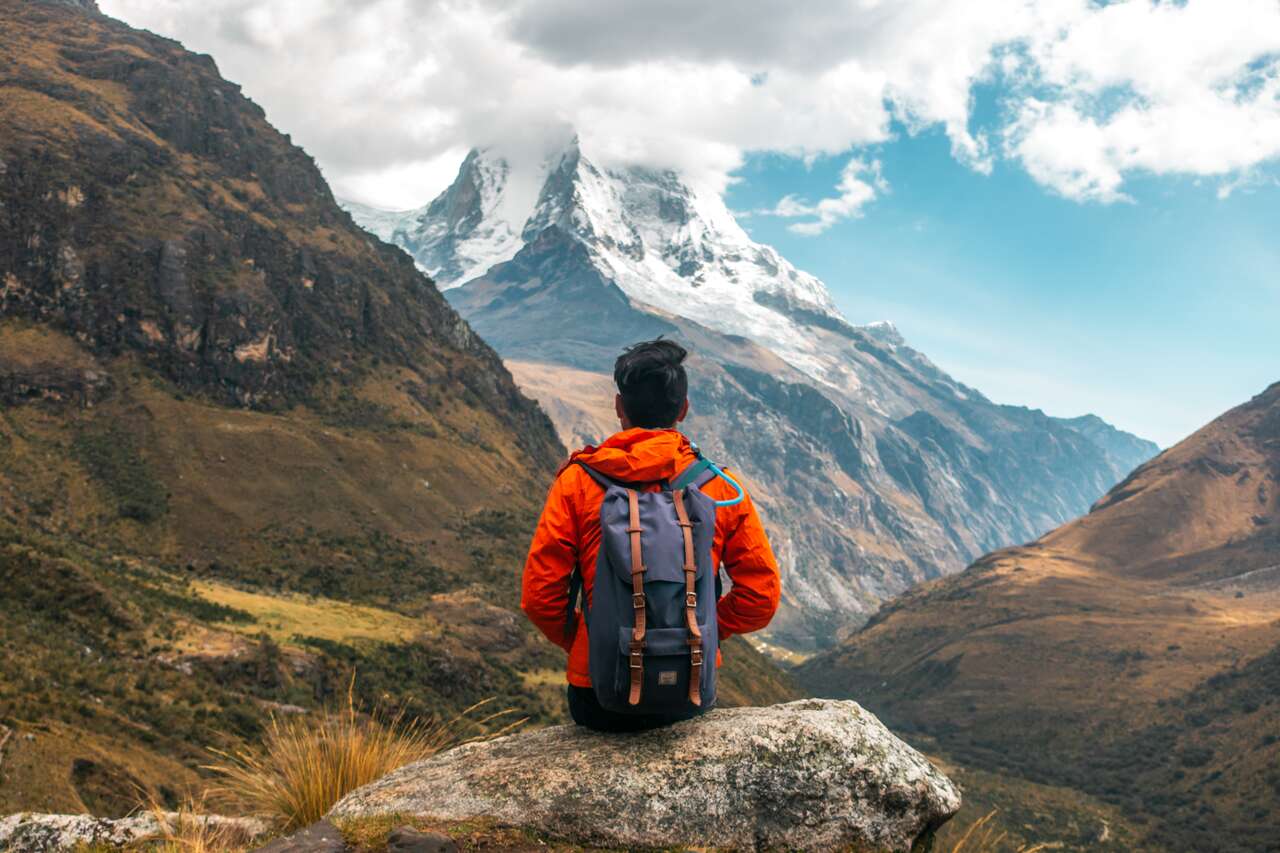
Huaraz is my favorite place in South America, hands down. The best part of the Andes is located here, and if you are into hiking like me, you will find plenty of things to do here.
On your first full day, go into the city center and acquaint yourself with the city and the altitude. The city is located 3000m above sea level, so you will need these first few days to rest before engaging in any physical activities.
On your second day, do some research on the hikes you can do by asking the hostel you are staying at or going to places like the California cafe to have their finest coffees, talk to people, and find partners to do rock climbing or trekking with. Right before you head back, book a transfer to the trailhead of the famous Laguna 69 the next day.
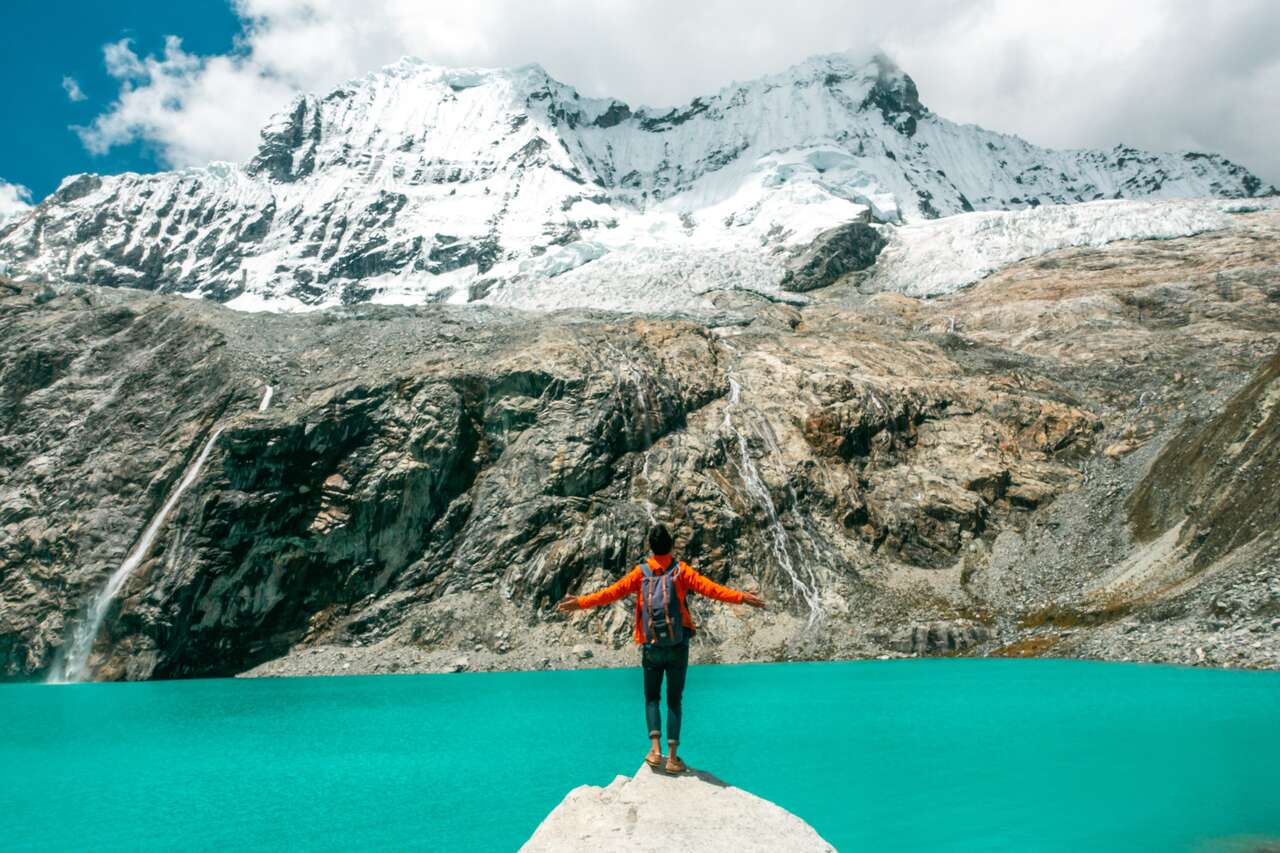
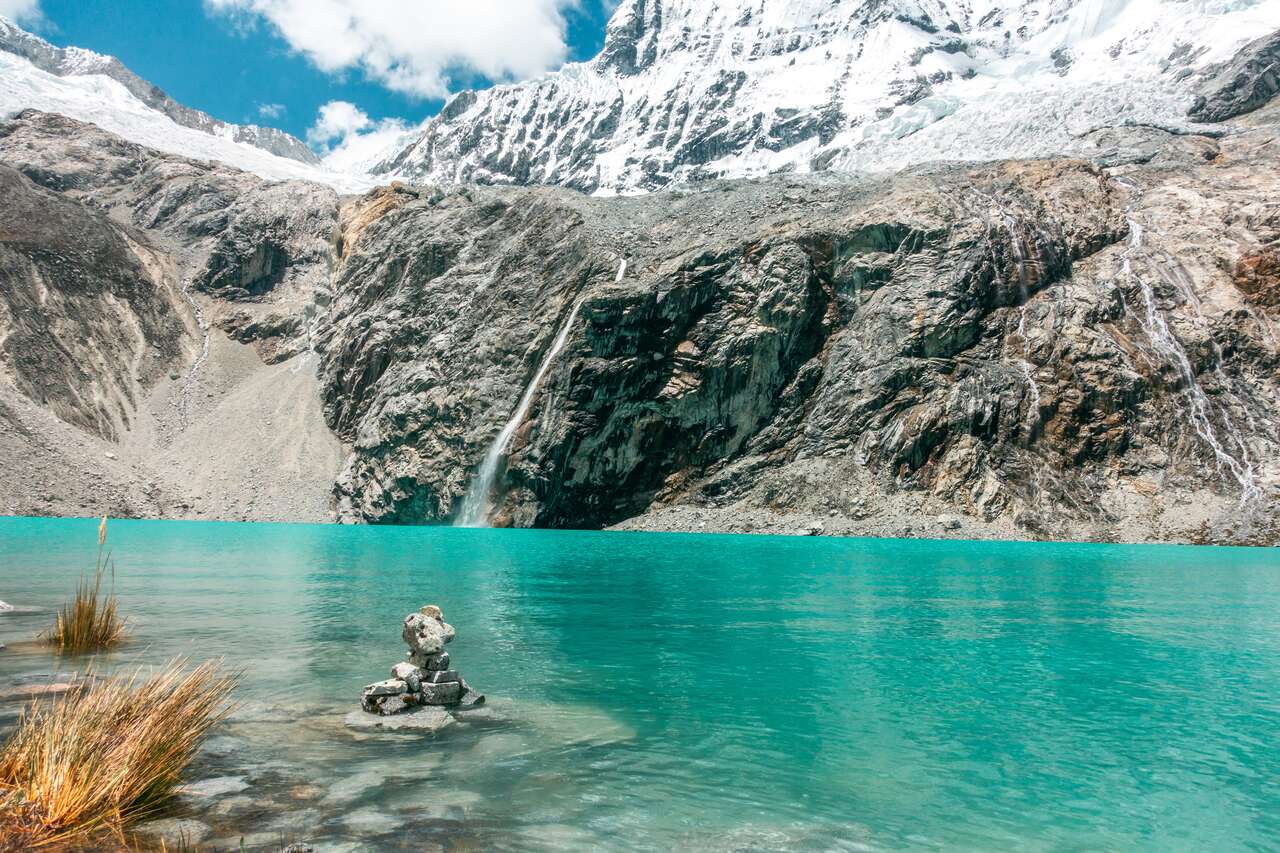
On your third day, do the Laguna 69 hike and see if your body is equipped for the altitude or not. The hike is about 6 – 8 hours long, and the trail consists of flat landscapes at first and becomes quite steep at the first lake. It then becomes flat again for an hour or so before going straight up all the way to Laguna 69.
Keep in mind that, with an altitude of 4000+ m, hiking can be quite challenging. Walk slowly and breathe enough to ensure you don’t get altitude sickness when hiking in Huaraz.
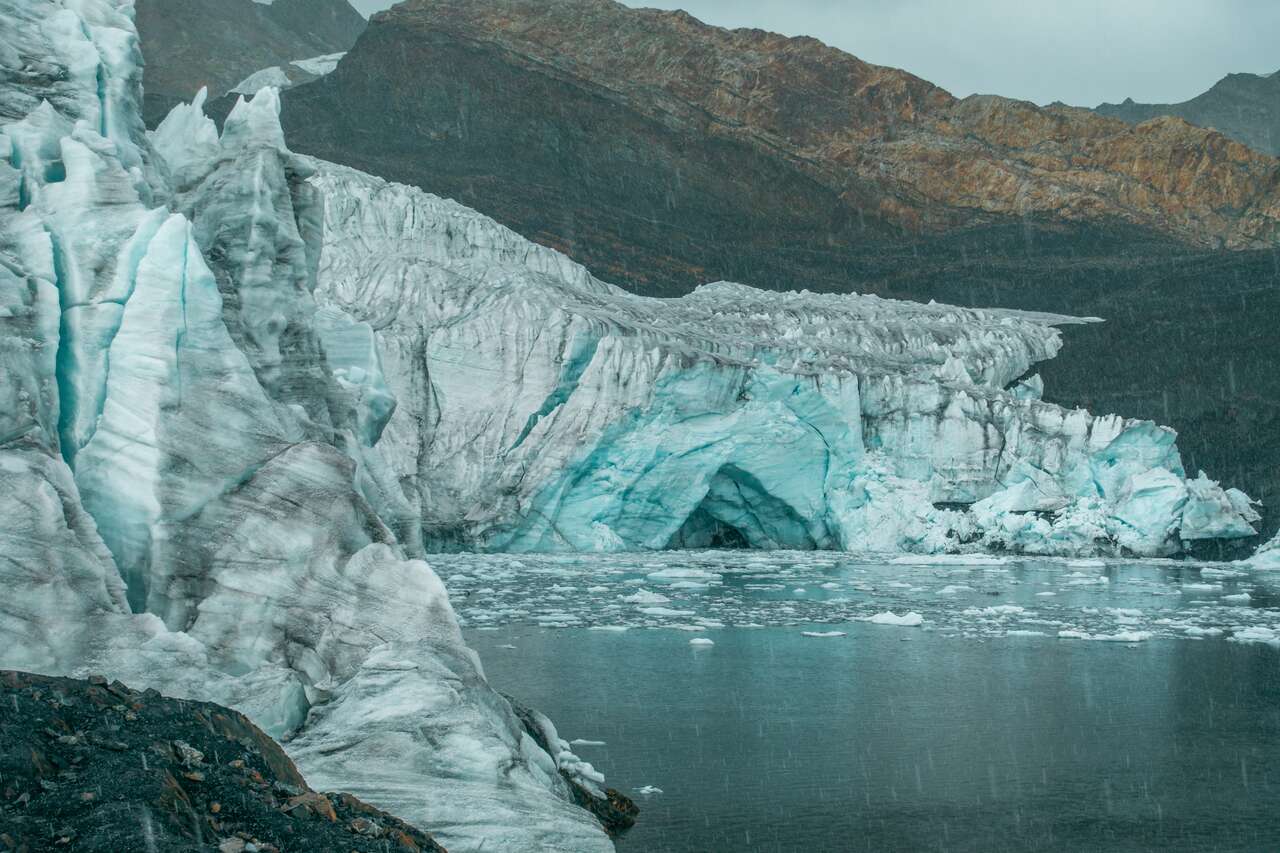
On your fourth or fifth day, you can either rest a bit or go on a Pastoruri Glacier tour. This tour doesn’t require you to be super active, but it does go up to an elevation of 5000+ m and you have to walk for one hour to see the glacier at that altitude. The trail is not much of a climb, but the altitude can really take its toll.
Looking for a complete travel guide to Huaraz?The Ultimate Backpacking Guide to Huaraz
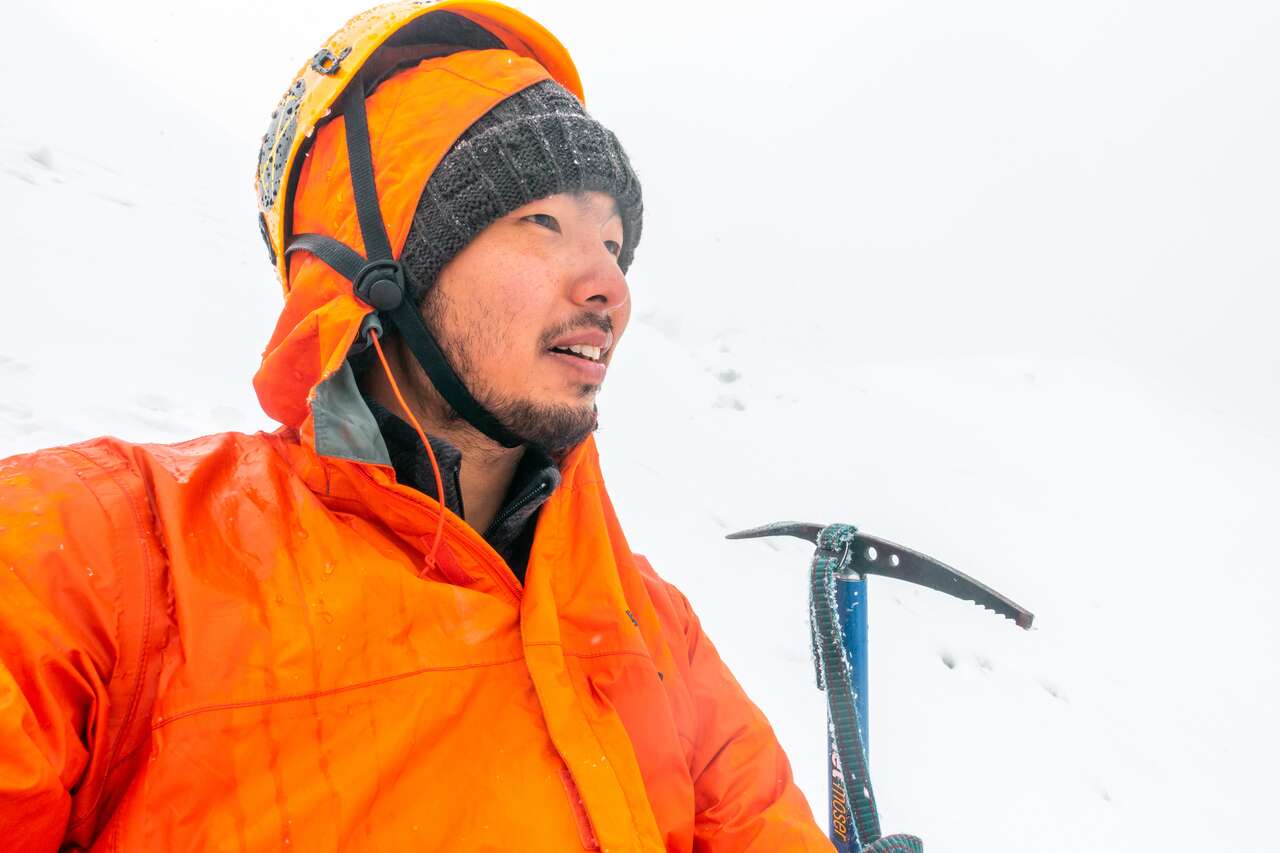
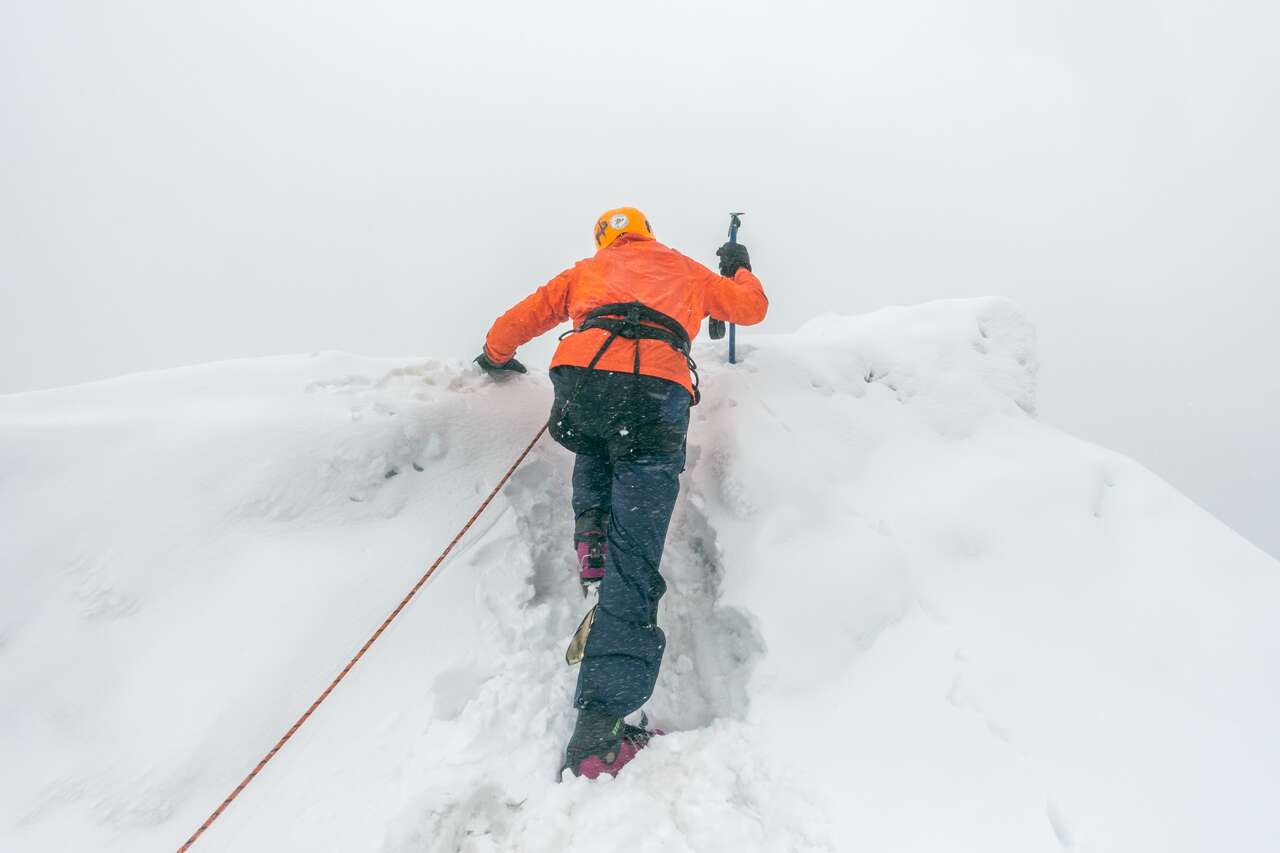
If you don’t have experience with alpine mountaineering and are looking to learn at some point, Huaraz is the best place to do that. It is relatively cheap to go on a small ice climbing trip, and with the altitude only second to the Himalayas, Huaraz offers the best experience with stunning views, all for an affordable price. This is your chance!
I highly recommend going on a mountaineering excursion to the summit of Nevado Mateo, a 5000+ m peak where you will have to ice climb through slopes with ropes and crampons provided by the tour.
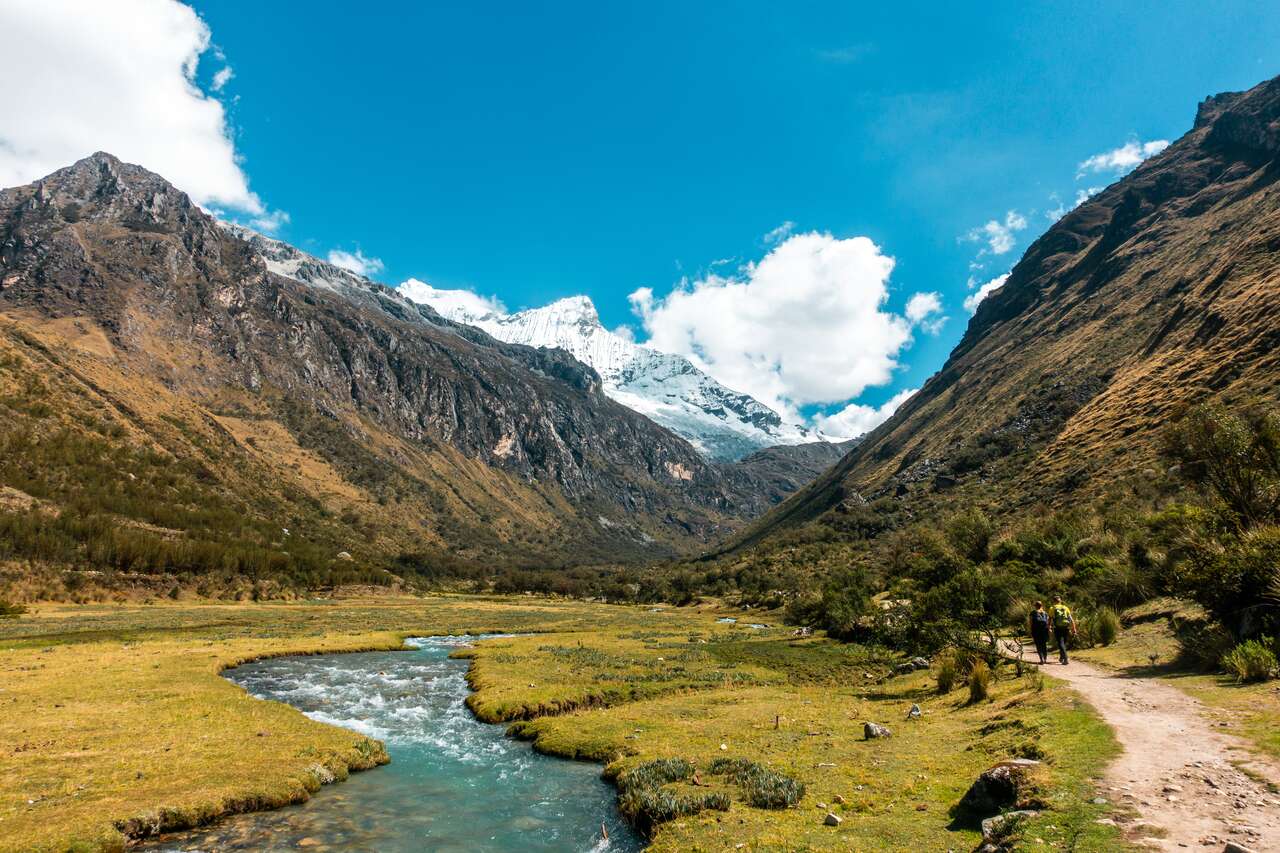
The next day, get some rest and start planning for the next big trek, Santa Cruz. Go into the city and rent a tent, sleeping bags, sleeping mat, food, stove, gas, etc. for your 4-day sabbatical into the Andes. Santa Cruz is a 4-day trek that will take you from 3000m to 4750m through the Punta Union pass and back down again while hauling your 15kg backpack all the time.
The trail is stunning through and through, and by keeping this trek in the end, it makes it the perfect closure to your trip in Huaraz.
If you are looking for more activities to do here, be sure to check out some of the available tours and day trips.
Where to Stay in Huaraz?
Getting From Huaraz to Lima
From Huaraz, you can take a bus from Huaraz Cruz del Sur terminal to Lima via Cruz del Sur. There are 6 buses per day from Huaraz to Lima, running from 11 AM to 11 PM. The journey will take about 7 hours and cost around 30 SOL per person.
Lima, Peru (2 Nights)
If you seek a nice place to rest from a very demanding trip in Huaraz, Miraflores in Lima offers you any convenience you would ever need. In between that, you can go to the main square and check out the Cathedral de Lima and the Basílica y Convento de San Francisco de Lima.
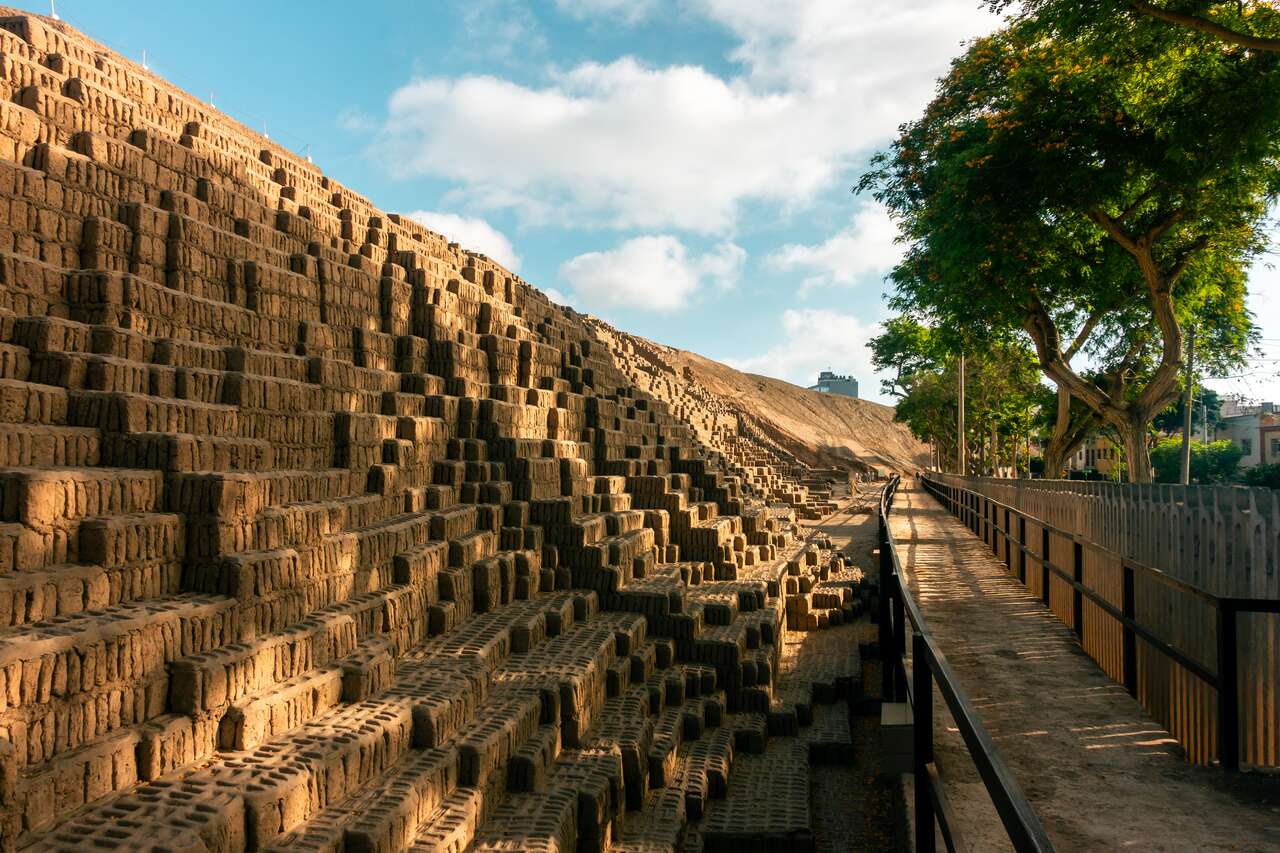
Did you know that there is a pyramid in Lima? During the day, drop by the Huaca Pucllana, a small pyramid located in the middle of the city. The tour itself is not that impressive, but this unique-looking pyramid is quite interesting in itself.
In the evening, enjoy the sunset at Parque del Amor, near the coast west of Miraflores.
If you are looking for more activities to do here, be sure to check out some of the available tours and day trips.
Where to Stay in Lima?
Getting From Lima to Ica
From Lima, you can take one of the many daily buses operated by Cruz del Sur or Oltursa at their designated bus terminal. I went with Cruz del Sur and the bus left from Cruz del Sur terminal and dropped me off at the Cruz del Sur terminal in Ica. The journey should take about 5 hours and cost around 15 USD per person.
Ica, Peru (2 Nights)
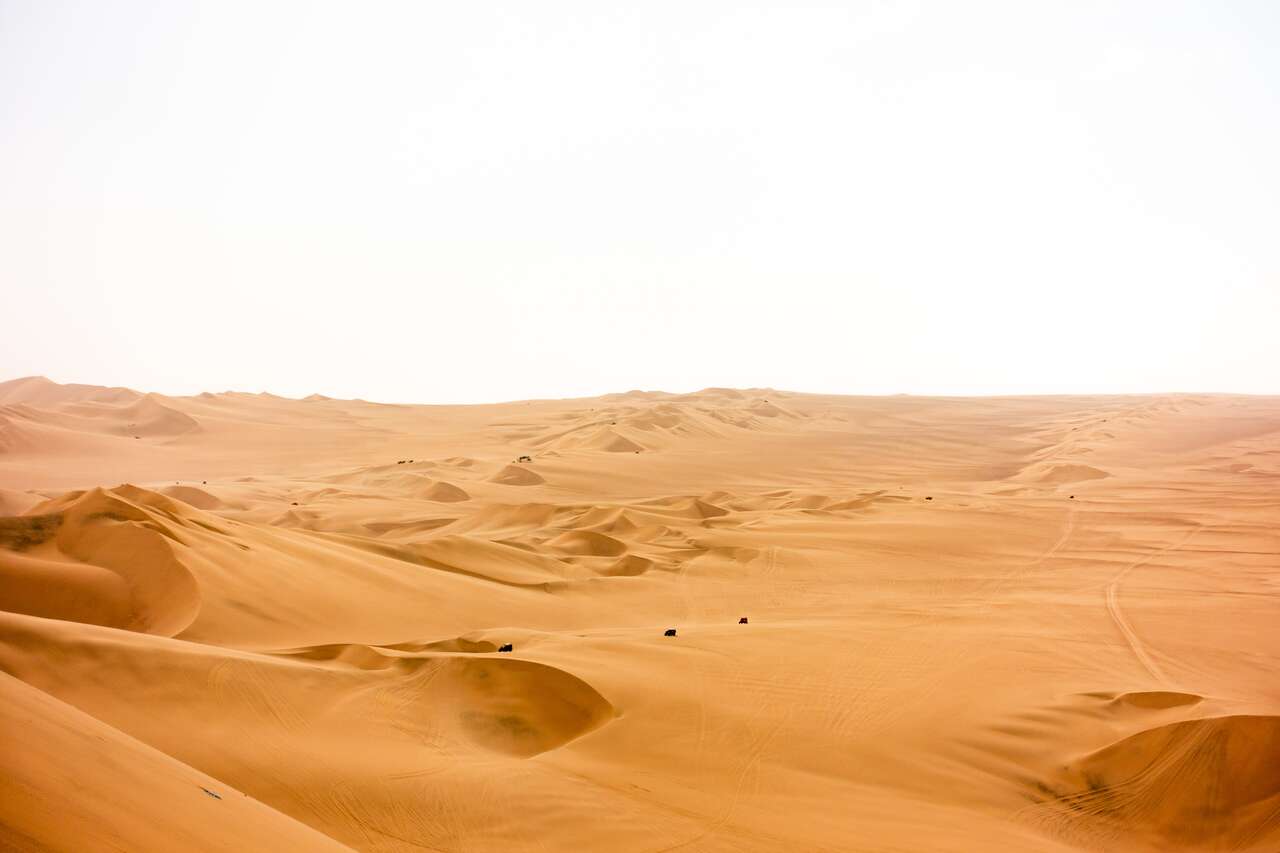
The city of Ica itself is not the main highlight of visiting Ica. The main highlight is Huacachina, an oasis-like town located a few kilometers away from the city center.
You can paddle the boat, get on a bungee car and ride around the sand dunes, or climb up one of the sand dunes and watch the sunset, as I did.
If you are looking for more activities to do here, be sure to check out some of the available tours and day trips.
Where to Stay in Ica?
Getting From Ica to Nazca
From Ica, you can make your way early in the morning to catch a bus to Nazca. From there, take a taxi to the Nazca Airport to take a tour and check out the Nazca Lines from the air.
There are several buses from Ica to Nazca, just like from Lima to Ica, so you can choose whichever one has the schedule that works best for your itinerary. The journey should take about 2.5 hours and cost around 13 USD.
Nazca, Peru (0 Night)
Nazca and the Nazca lines can be seen in a half-day, so there is no need to stay in Nazca. At the airport, you can buy a tour to fly above Nazca and see the lines from above.
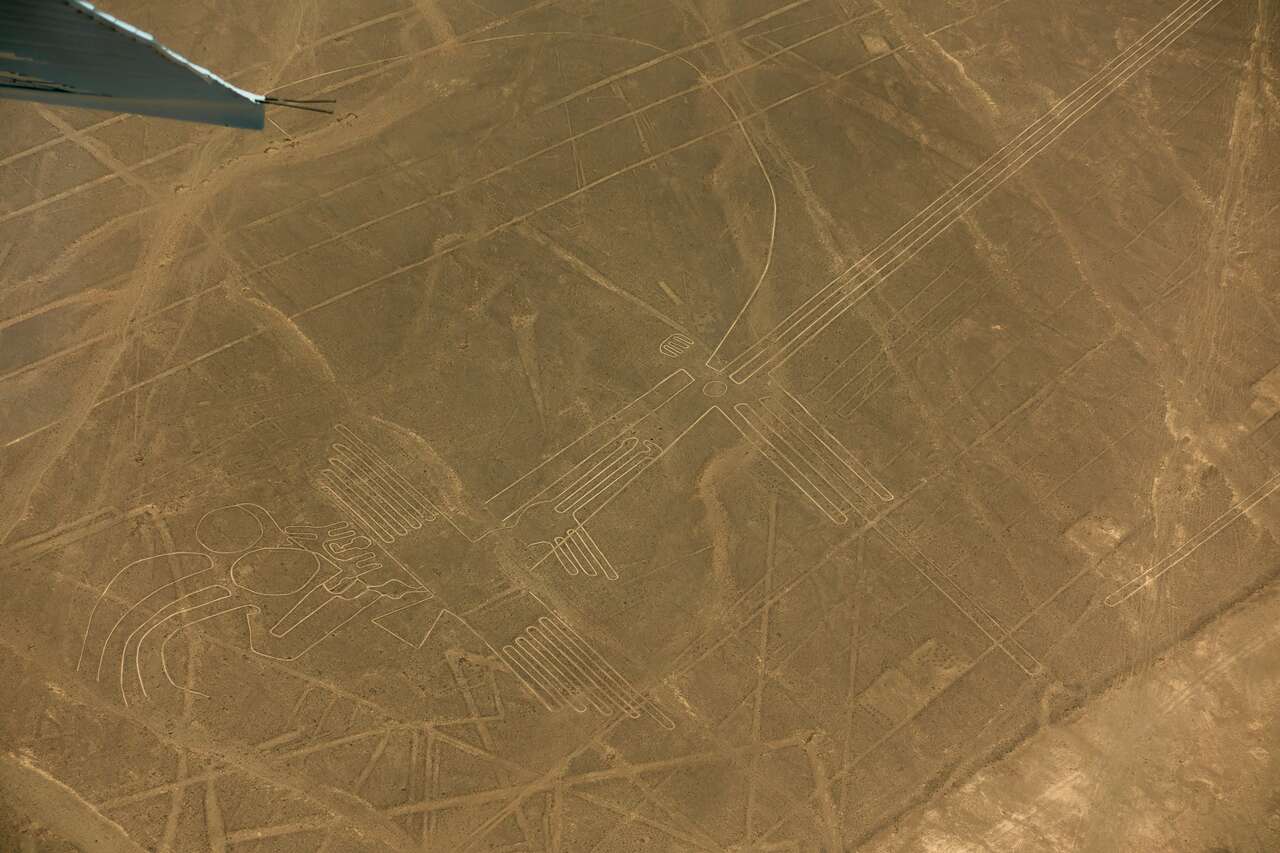
The flight takes only around 20 minutes, and the tour itself was nothing spectacular. However, some of the nicer Nazca lines are only accessible by air, so it is a must if you want to see more.
You can also pre-book a flight online from one of the many Nazca tours available on GetYourGuide if you prefer an experience that is catered more to your needs. They also seem to fly longer with these tours, so be sure to check them out.
If you are looking for more activities to do here, be sure to check out some of the available tours and day trips.
Getting From Nazca to Cusco
To get from Nazca to Cusco, you will have to take an overnight bus via Cruz del Sur. They have around 3 overnight buses leaving between 7:20 PM and 11:50 PM, and they leave from the Cruz del Sur bus terminal in Nazca.
Be prepared as the journey will take about 15 hours, one of the longest bus rides you will take in South America. Thankfully, the Cruz del Sur buses are quite comfortable, so it should not be too bad. The bus ticket costs about 150 SOL per person, and they will drop you off at Cruz del Sur terminal in Cusco.
Cusco and Machu Picchu, Peru (3 Nights)
Cusco is one stunning city and a hell of a ride to get to and from. It will take you over 15 hours before you arrive in Cusco, so on the first day, go slow and explore the main square (Plaza De Armas) and walk around the crisscrossing streets up the San Cristobal church on the hill to see the city from above.
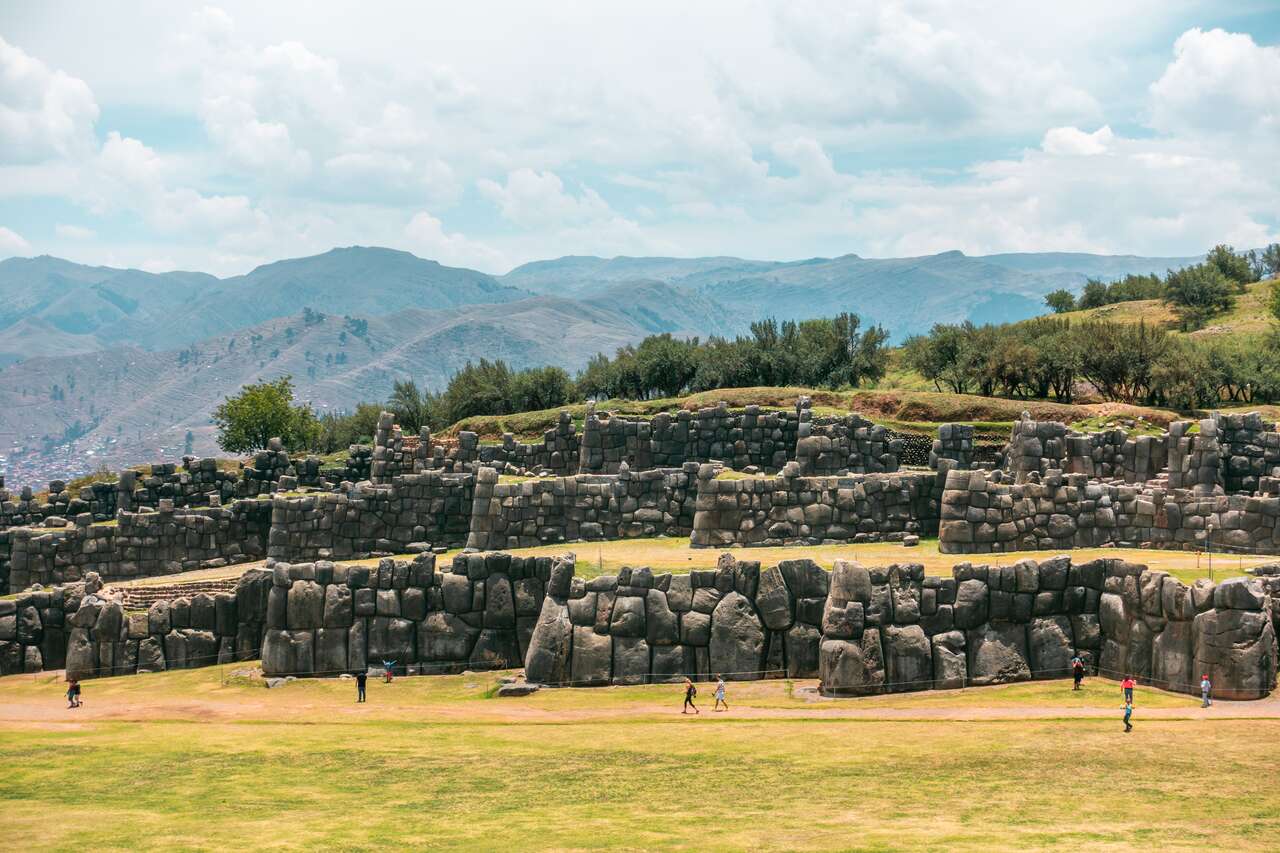
You can also go a little further to Saqsaywaman Ruin, but personally, I think it was not worth it since it was very expensive to get in, and you will be seeing Machu Picchu soon anyway.
On your first day, take your time to look around the tour agencies and find ways to get to Machu Picchu the next day. For the train, be sure to book it 2 days prior to the day you want to go as it is usually fully booked 2 days in advance.
Machu Picchu can be reached via trains, short treks, or the Inca trail. Trains are the easiest, most convenient, and quite cheap (210 USD all included), whereas the short trek requires you to walk through the forest for 2-3 days, with activities for you to do throughout the trek (230-250 USD). The Inca trail is the most expensive and the most difficult to do since you have to book many weeks prior to arrival.
As for me, I went on the train to give myself more flexibility over how much time I could spend on Machu Picchu, and it was well worth it. I was able to wait it out for the weather to clear up and the crowds to fade, and both happened that evening!
On your last day, book a trip to hike the Rainbow Mountain. The whole trip will take you up to 5000m again to the viewpoint to see the Rainbow mountain. The hike itself is quite easy and takes around 5 – 6 hours to complete, but the altitude can really affect your body up there, so prepare accordingly.
If you are looking for more activities to do here, be sure to check out some of the available tours and day trips.
Where to Stay in Cusco?
Getting From Cusco to Arequipa
From Cusco, you can get to Arequipa via an overnight bus operated by Cruz del Sur from their bus terminal. They have buses running at 20:00 and 20:30 daily. The journey will take about 10 hours and cost around 40 SOL per person.
Arequipa, Peru (2 – 4 Nights)
Arequipa is a nice, cozy place with a stunning main square, a laid-back vibe, and great food. You can go for a walk around the main square and be fascinated by the beautiful colonial architecture.
After that, drop by at the Monasterio de Santa Catalina and walk along the colorful corridors of this important religious site. If you still have enough energy left, go on a 2-day, 1-night hike in the Colca Valley and stay at the oasis in the canyon.
If you are looking for more activities to do here, be sure to check out some of the available tours and day trips.
Where to Stay in Arequipa?
Getting From Arequipa to Copacabana
From Arequipa, you can take one of the 3 daily buses from Cruz del Sur Bus Terminal in Arequipa to get to Puno, a border town between Bolivia along Lake Titicaca. These buses leave from 08:30 to 22:30, which will take about 6 hours and cost around 30 SOL per person.
Depending on the time you arrive, you might have to stay one night in Puno before getting on a bus to cross the border into Copacabana, Bolivia. There are more things to do in Copacabana, so I recommend you stay only one night in Puno and head straight to Copacabana to do some hiking.
To get from Puno to Copacabana, you can book a bus via your accommodation or browse through available options on Busbud.com. With the border-crossing bus, you will have a chance to exchange money before you arrive in Bolivia, so there’s no need to worry about that.
Copacabana, Bolivia (2 Nights)
From Peru to Bolivia, Copacabana makes a great rest stop before heading into La Paz. Located on the other side of Lake Titicaca, opposite Puno, Peru, Copacabana gives you access to hiking trails that you don’t get from the Peruvian side.
Isla del Sol and the Isla de la Luna are a must-do when you are here, as you will be able to enjoy the white beach, the fresh air of the lake, and experience the authentic lives of people around the lake. You can either stay on the island overnight or do a one-day tour from Copacabana via a tour agency.
If you are looking for more activities to do here, be sure to check out some of the available tours and day trips.
Looking for a complete backpacking itinerary to Bolivia?One Week Backpacking Guide To Bolivia
Where to Stay in Copacabana?
Getting From Copacabana to La Paz
To get from Copacabana to La Paz, you can take one of the many buses leaving for La Paz daily at the Copacabana Bus Terminal. Be sure to get the ticket directly at the bus company’s ticket office and not through the travel agencies, or you can just get your .
The journey will take about 4 hours, and you will have to get off the bus while they ferry the bus across a small portion of Lake Titicaca onto the main road heading towards La Paz. The price of the bus should be around 4 USD.
La Paz, Bolivia (3 Nights)
At first glance, La Paz might not be as attractive as Lima or Quito, but a little time spent walking around the main square and socializing with the overly friendly locals, the more you will fall in love with La Paz.
You can spend your first day walking around the main square, and dropping by the witch market to see some really strange stuff on sale along the street. Even if you are not into witchcraft (!), you might be able to find your South American souvenir here at a cheaper price than any other country around here.
The next day, go on a mountain bike tour to tackle the infamous Death Road bike trail down the side of a mountain. It can be a little bit touristy at some points on the road, but I still think the experience is well worth the crowds. The first part of the biking trip is the most photogenic, so prepare your camera accordingly!
You don’t really have to be very physically fit since you are mostly going downhill a mountain, but you do have to know how to ride a bike on rough terrain.
If you are looking for more activities to do here, be sure to check out some of the available tours and day trips.
Where to Stay in La Paz?
Getting From La Paz to Potosi
From La Paz to Potosi, you will have to take an overnight bus from La Paz bus terminal. The bus runs once per day at around 9 PM or 10 PM, and the journey will take about 8 hours to reach there. The bus ticket should cost around 100 BOB.
I recommend you go for either El Dorado or Trans Copacabana buses as they are considered to be a little more comfortable than the others. You can also book your ticket online here.
Potosi, Bolivia (2 Nights)
In Potosi, if you are interested in how a mind works and how dangerous it is to work in a mind, I do suggest you go on a day tour into the deep part of the Cerro Rico, or more infamously known as “the mountain that eats men”.
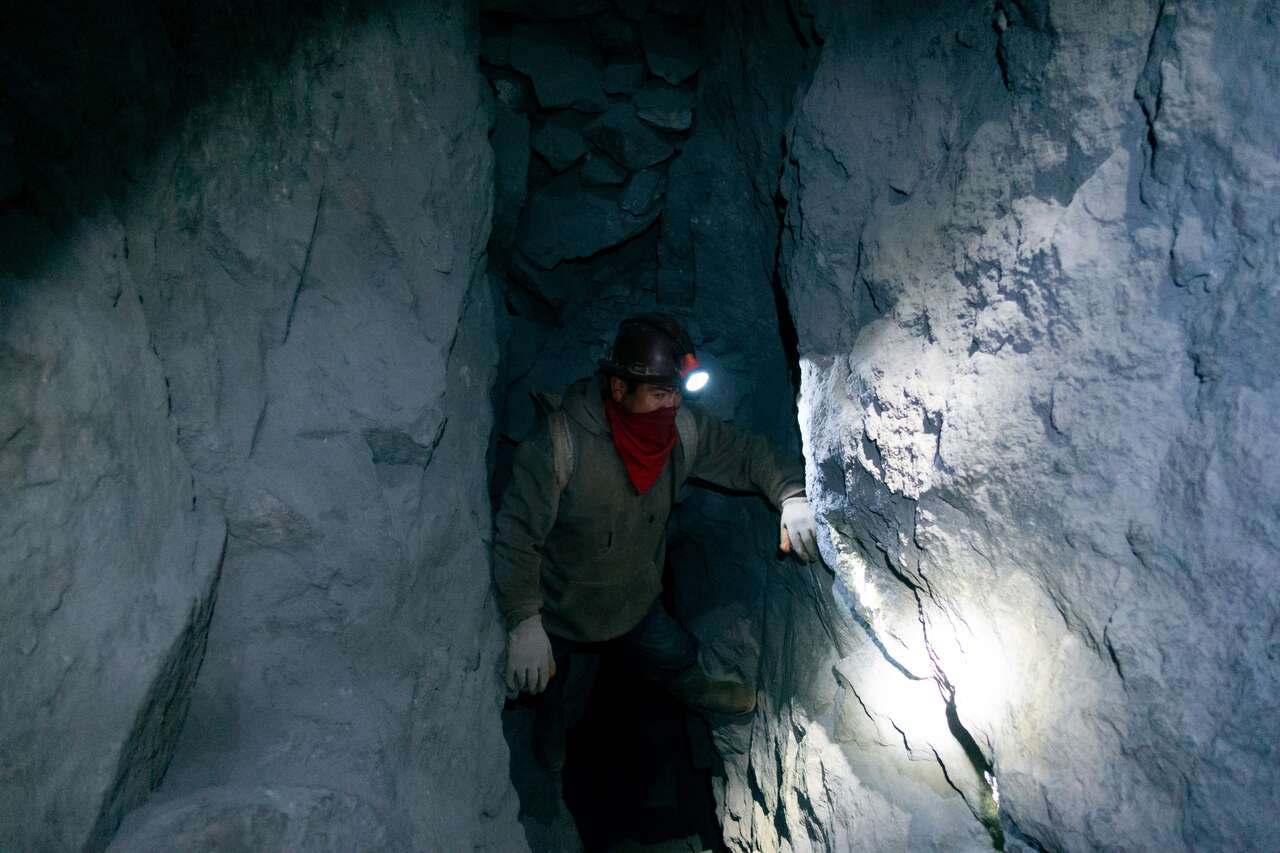
Why? Well, it goes way back to when the Spanish arrived in Bolivia 400 years ago and employed slaves from all over the world to mine the silver within Cerro Rico. Four hundred years later, with 8 million deaths, the mine is still functioning and people are still going in and out, working their way to live above poverty as if nothing happened.
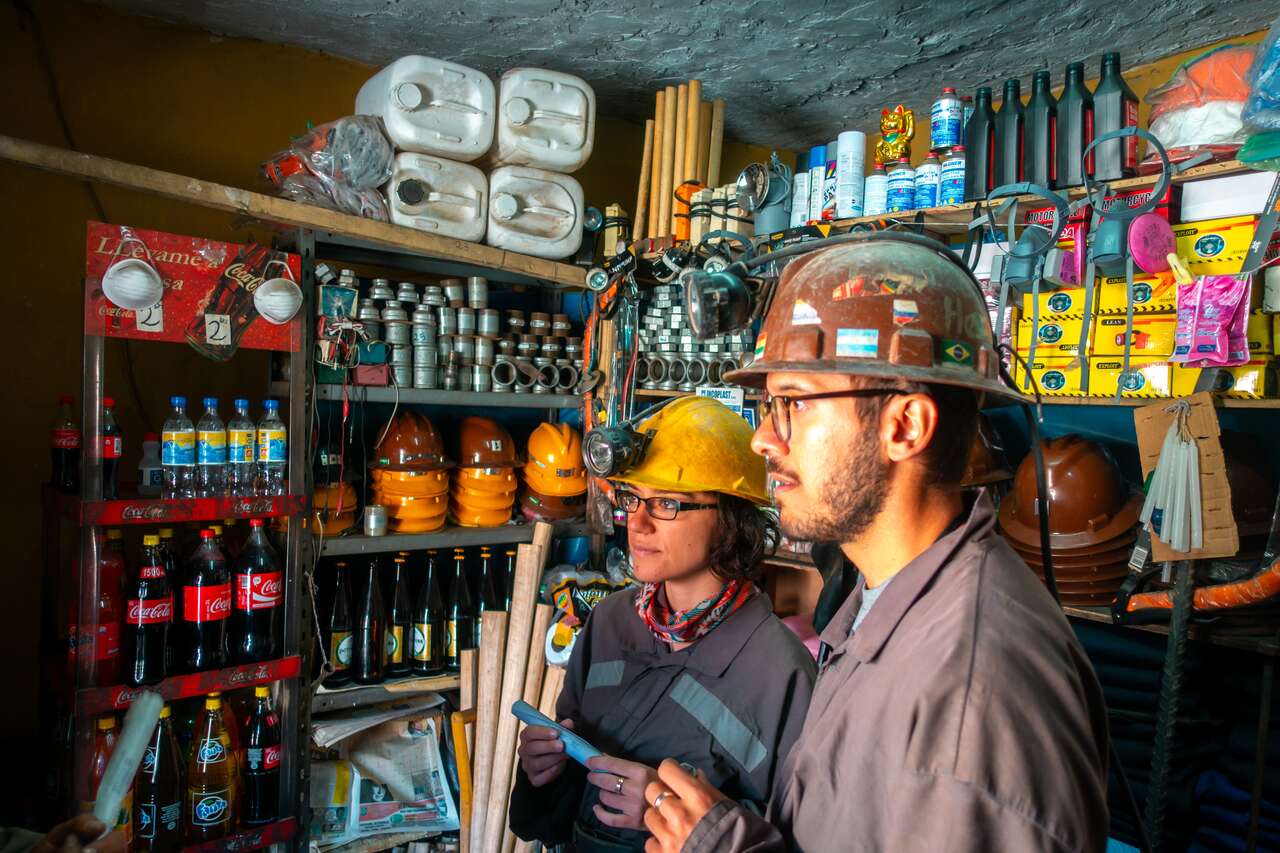
Fun Fact: You can legally buy coca leaves, 90% alcohol, and dynamite (yes, you read that right!) in many mining stores around town.
Where to Stay in Potosi?
Getting From Potosi to Uyuni
To get from Potosi to Uyuni, you will have to catch a regular bus from the new Potosi bus terminal. There are three daily buses operated by Expresso 11 de Julio at 9 AM, 9:30 AM, 4:30 PM, and 5:30 PM (subject to change).
The journey will take about 4 hours and cost 60 BOB per person. You can book your ticket or check the bus schedule online here.
Salar de Uyuni, Bolivia (3 Nights)
And now we arrive at the frontier town before we go out and explore Salar de Uyuni, the largest salt flat in the world. Spend the day you arrive in Uyuni and look for a 3-day tour to join for the next day or you can book a Salar de Uyuni tour online from here.
Since we will cross the border into Chile next, make sure you tell your tour operator to drop you off at the border at the end of your Salar de Uyuni tour so that you don’t have to travel back and forth.
On the 3-day tour, we visited a locomotive graveyard, hiked around a cactus island, and had ample time to take some really cool perspective photos of the Salt Flat.
We also went on to see many psychedelic landscapes that seem almost as if they were from an alien planet. From the Dali-inspired psychedelic landscapes to the red-colored lake full of flamingos, traveling around Uyuni is another highlight of South America, all the effort in the world to get you there.
If you are looking for more activities to do here, be sure to check out some of the available tours and day trips.
Where to Stay in Uyuni?
Getting From Salar de Uyuni to San Pedro de Atacama
Your Salar de Uyuni tour should be able to drop you off at the border where you can then cross into Chile on foot and catch another bus to San Pedro de Atacama. The transfer should include the price of the tour, so you do not have to manage anything here. Sit back, relax, and enjoy the view.
San Pedro de Atacama, Chile (3 Nights)
San Pedro de Atacama is the first place in Chile that you will experience. This is where you have to get used to the new culture and a more expensive price point that you might not be familiar with after traveling in places like Peru and Colombia.
Everything in Chile and Argentina is almost as expensive as in Europe, so do not be surprised when your first night at a hostel costs 20 USD instead of 6 USD.
On your first day, go and walk around the town square and in the evening, rent a bike and go up the Valle de la Luna for a beautiful sunset. At night, go on an Astronomical Tour and gaze at the stars in one of the clearest skies you will ever see.
The next morning, you can go on a Geyser tour that starts at 4 AM to catch the sunrise at Geysers del Tatio, one of the largest geyser sites in the world. Be prepared for the cold since you will be going up to 4,200m above sea level. You will be back by the afternoon so you can take this time to rest.
The final day, go on a day tour to Lagunas Altiplanicas, the Chilean version of the salt flat. The stunning landscape all around offers a chance to spot flamingos in their natural habitats.
If you are looking for more activities to do here, be sure to check out some of the available tours and day trips.
Looking for a complete itinerary for Chile and Argentina?2 Months Chile And Argentina Itinerary
Where to Stay in San Pedro de Atacama?
Getting From San Pedro de Atacama to Antofagasta
There are around 2 buses leaving from San Pedro de Atacama to Antofagasta starting around 4 PM – 6 PM from Atacama Bus Station. The journey should take around 4 – 5 hours and cost about 23 USD.
If there is no direct bus from San Pedro de Atacama to Antofagasta on the day you are traveling (there are fewer buses in winter), you can travel to Calama first via KTUR Bus Operator, TurBus, or Frontera del Norte where they will drop you off at their designated bus terminal, and you will find more buses going to Antofagasta from there.
The journey from Atacama to Calama takes around 1.5 hours and costs 3,000 CPS, while from Calama to Antofagasta takes around 2.5 hours and costs around 8 USD.
Antofagasta, Chile (2 Nights)
One of the most surreal experiences in Chile was seeing the Hand of the Desert, an art installation built in the middle of nowhere in the Atacama desert. However, getting here was not so easy. First, you have to base yourself in Antofagasta, where you will need to rent a car and drive 30 minutes out of the city to see the statue.
After that, you can drive down a little further and visit the Very Large Telescope, a telescope facility operated by the European Southern Observatory on Cerro Paranal. If you are in Antofagasta during the weekend, you can get a full-day tour that would include both a visit to the Hand and the observatory.
If you are looking for more activities to do here, be sure to check out some of the available tours and day trips.
Where to Stay in Antofagasta?
Getting From Antofagasta to La Serena
From Antofagasta, you can catch a bus to La Serena from Antofagasta Bus Terminal. There are several overnight buses from 11 AM to 11 PM operated by companies like Pullman Bus, which I recommend. The journey will take you 12 hours and cost about 30 USD.
La Serena, Chile (3 Nights)
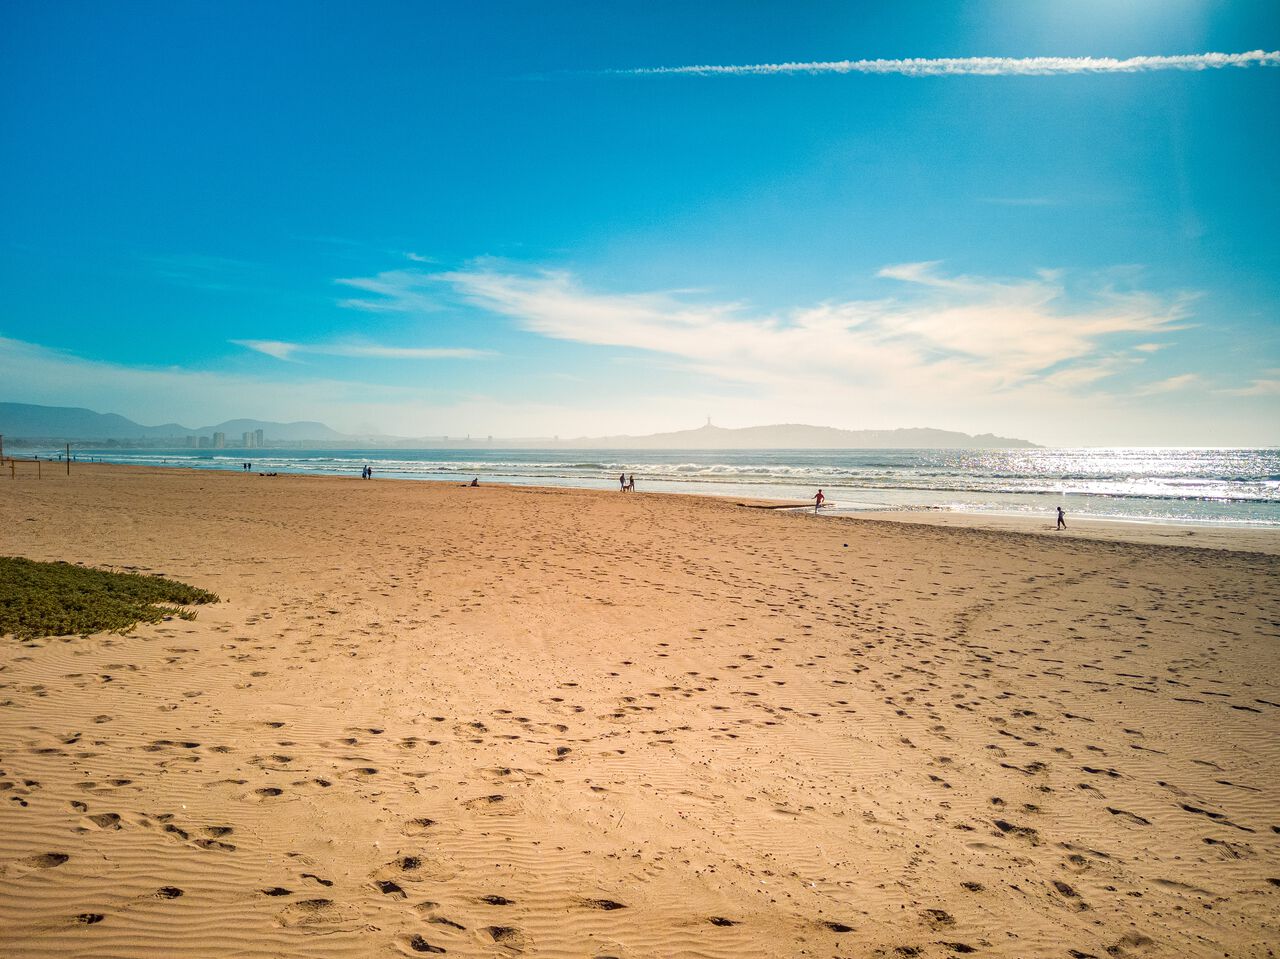
La Serena is the second oldest city in Chile, second only to Santiago. Here, you can easily spend three days exploring the valleys and beaches surrounding La Serena. On your first day, take some time to absorb the unique old town of La Serena, followed by a rest day at the beach.
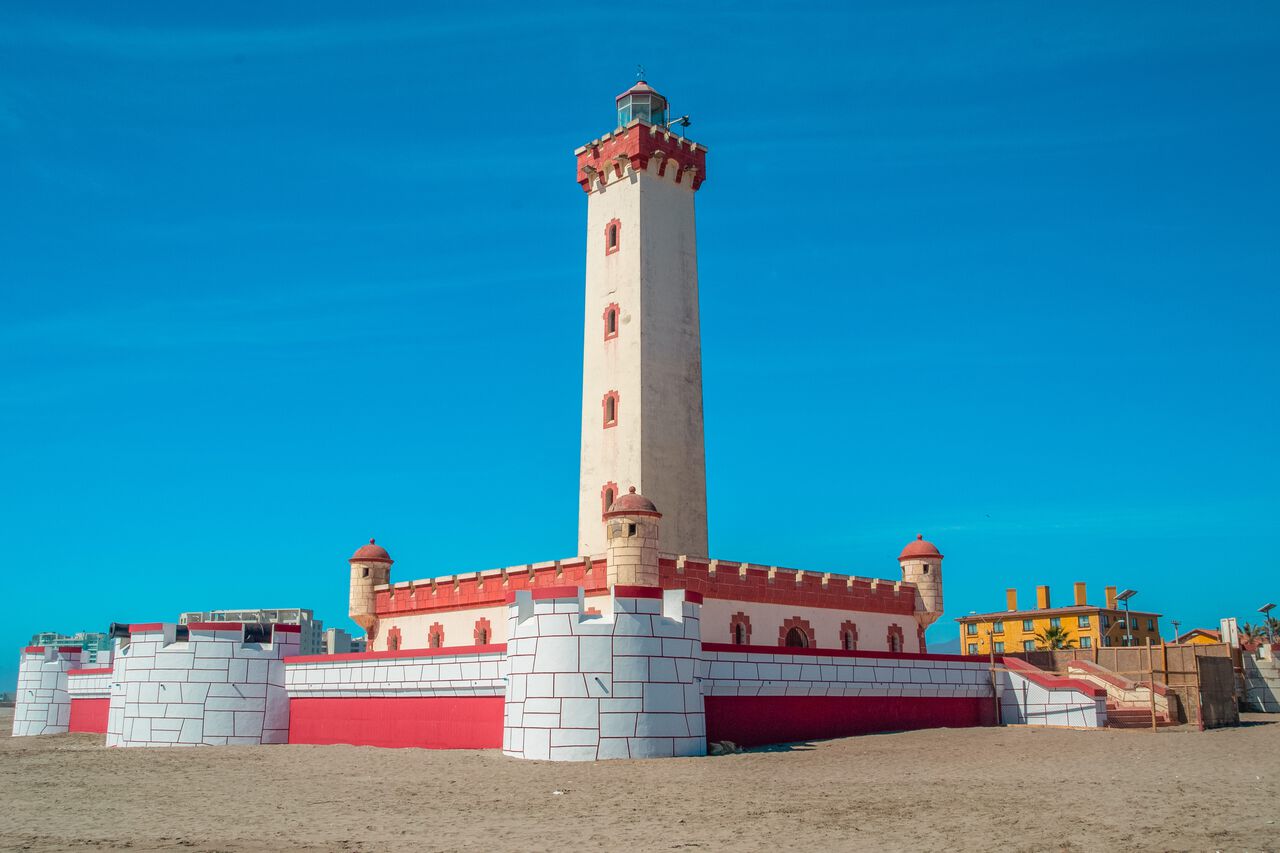
On the last day, you can go on a day tour to explore the beautiful nature around the Elqui valley.
If you are looking for more activities to do here, be sure to check out some of the available tours and day trips.
Where to Stay in La Serena?
Getting From La Serena to Valparaiso
To get from La Serena to Valparaiso, you can catch another overnight bus from La Serena Bus Terminal that leaves at 11:30 PM and arrives in Valparaiso at 6:30 AM the next day. The journey takes around 7 hours and costs around 29 USD.
Valparaíso, Chile (2 Nights)
Valparaiso is known for its colorful street art, and that is the thing you should do on your full day in the city. You can take a tour, but I preferred walking around and discovering each work of street art at my own pace.
There are many beautiful graffiti scattered all over the hills of Valparaiso, and in between are small cozy cafes where you can indulge yourself in the finest coffee while overlooking the colorful streets of Valparaiso.
If you are looking for more activities to do here, be sure to check out some of the available tours and day trips.
Where to Stay in Valparaiso?
Getting From Valparaiso to Santiago
Again, Pullman Bus also operates this route as well, and you can get from Valparaiso to Santiago via one of their daily buses from 5:50 AM to 4:45 PM. The journey will take around 2 hours and cost 9 USD.
Santiago, Chile (4 Nights)
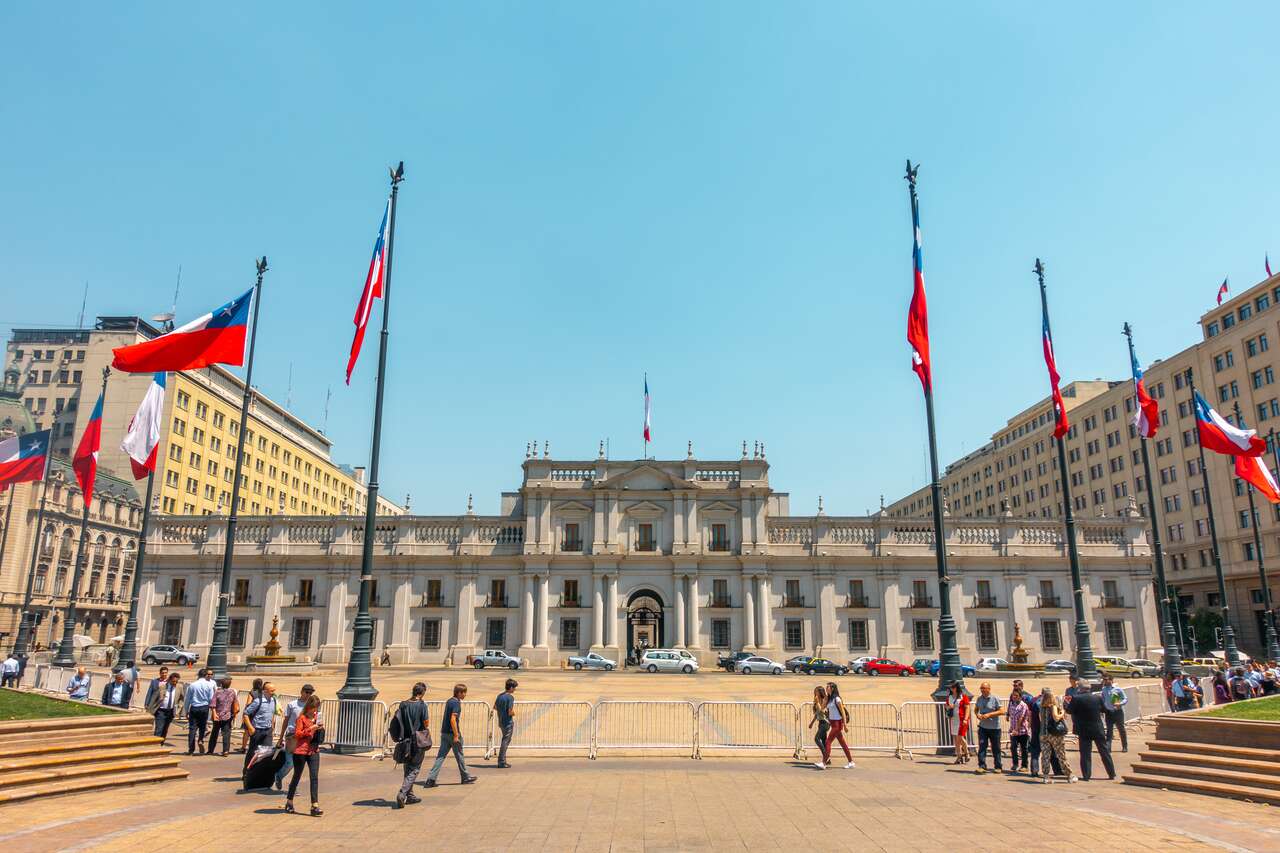
Santiago is one of the safest capital cities in South America, and it is easily one of my favorite places to spend time in.
There are quite a few must-see places in Santiago, such as the view from San Cristóbal Hill, the Museum of Memory and Human Rights, the Santiago Metropolitan Cathedral, and Huerfanos Street in downtown Santiago. Spend a few days learning the history of Chile in the museum and explore the nightlife the city has to offer.
If you are looking for more activities to do here, be sure to check out some of the available tours and day trips.
Where to Stay in Santiago?
Getting From Santiago to Easter Island
Getting to Easter Island won’t be cheap, as LATAM, the airline that has the monopoly on the route, has set the round-trip flight at a whopping 1,300 USD. So, if you want to see Easter Island, you will have to bite the bullet and pay it. Personally, I think it was worth every penny. I had one of the best times of my life on the island. You can book the flight here.
Easter Island, Chile (6 Nights)
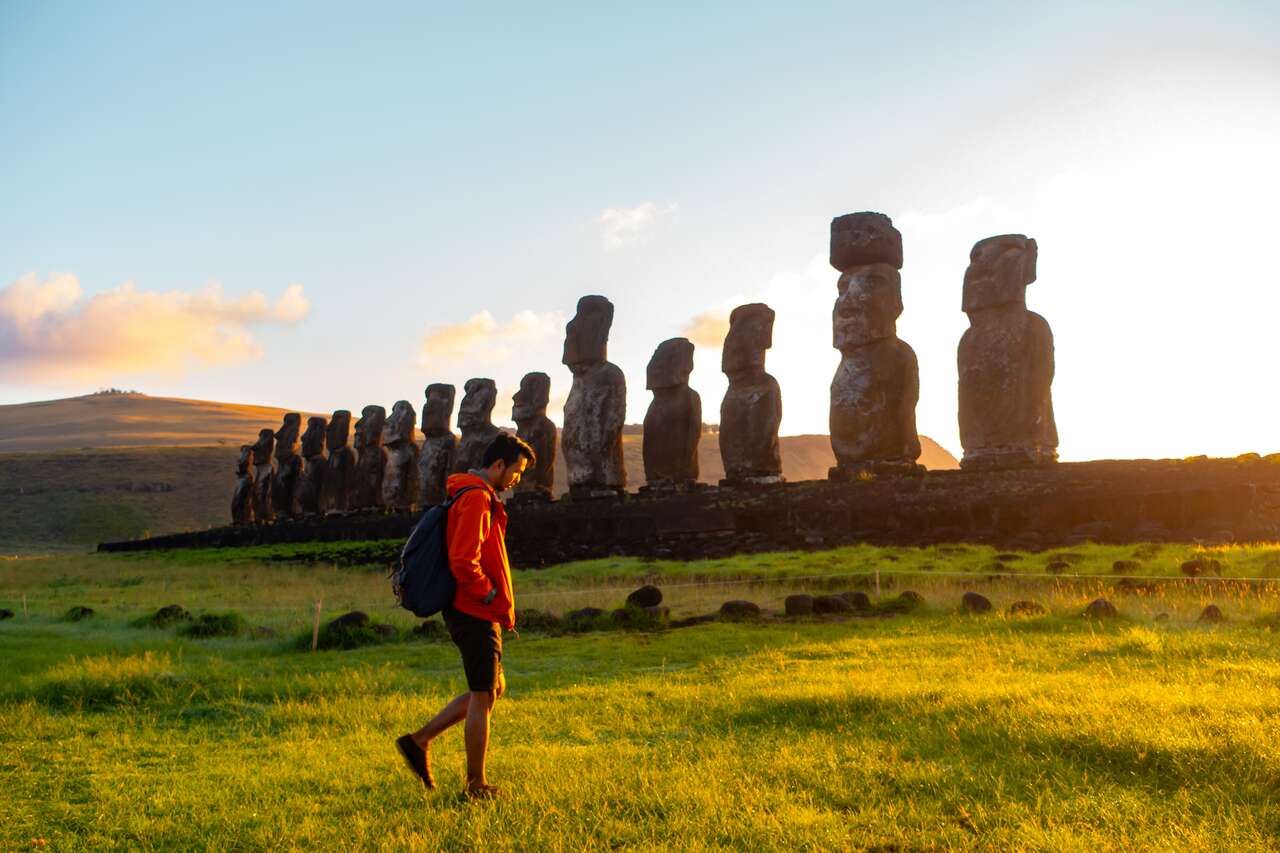
“Easter Island” is the highlight of my trip to Chile. There are many things you can do on this little island, starting with learning about the history of the Rapa Nui people by visiting the “Father Sebastian Englert Anthropological Museum”.
There are also many natural wonders on the island, such as the Orongo Crater, or man-made attractions like the statues of Ahu Tongariki, the best sunrise spot on the island, and Rano Raraku, where all the moai heads were made.
Sorry, your browser doesn’t support embedded videos.
Since it is an island, you can’t go without visiting a white sandy beach such as the Anakena beach for a nice relaxing swim in the early morning. And if you arrive here at the end of January, you will get a chance to witness the Tapati festival and enjoy the music and dance performed by the locals.
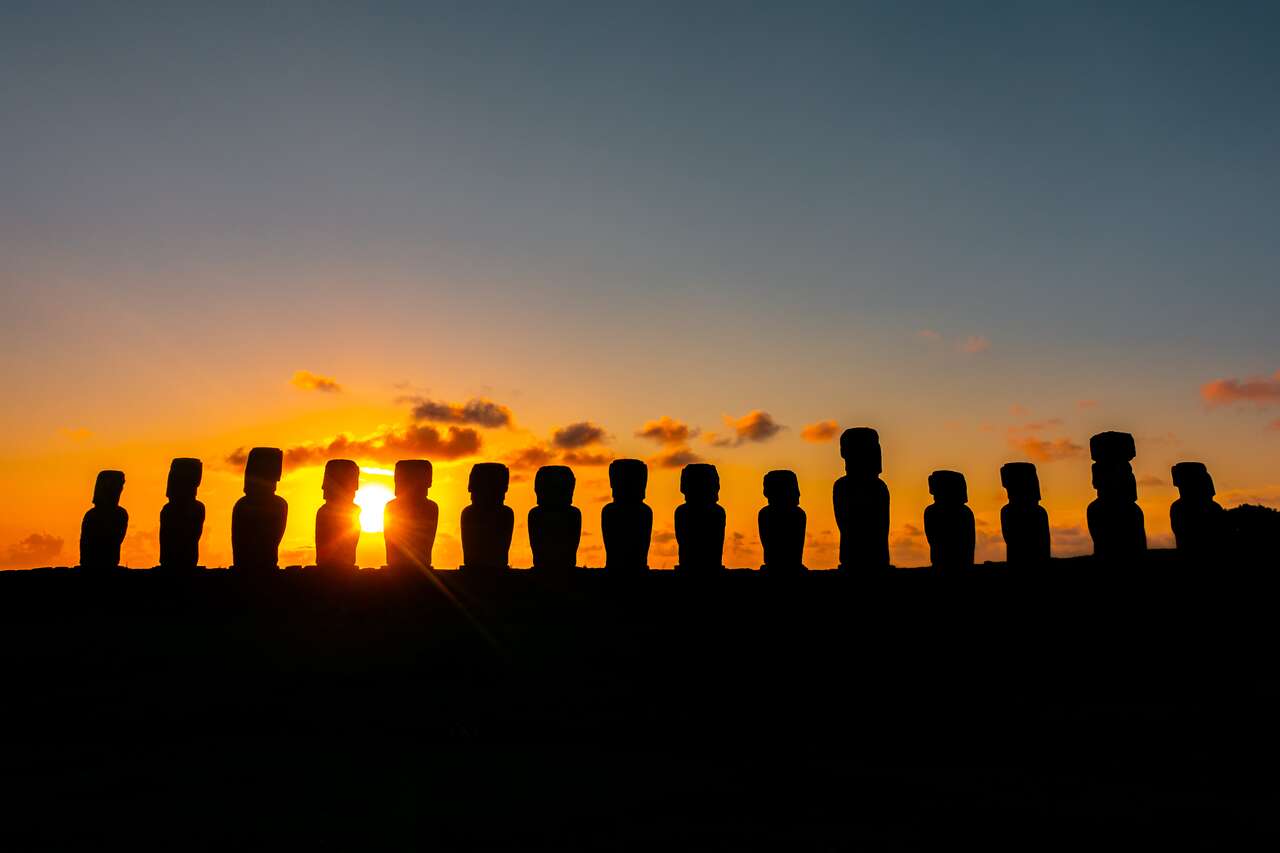
You can rent a quad bike and explore around the island as you please. Make sure to go out at night during moonless nights for the best stargazing experience you will ever have.
If you are looking for more activities to do here, be sure to check out some of the available tours and day trips.
Looking for a complete travel guide to Easter Island?5 Days Itinerary For Easter Island
Where to Stay on Easter Island?
Getting From Santiago to Pucon
Once you get back from Easter Island, you can then take a bus from Terminal Alameda Santiago Bus Terminal to Pucón. The journey will take about 10-12 hours and cost around 18-21 USD. Pullman and Jet Sur buses are highly recommended for this route.
Pucon, Chile (3 Nights)
When you are in Pucon, if the weather permits, I highly recommend you take a Pucon Climbing Volcano tour and summit the Villarrica volcano to spot spewing lava inside the crater.
The tour operator will provide you with all the necessary gear to traverse the snow-capped volcano, so you do not have to prepare your equipment beforehand. It takes around 4 hours to climb up, so you need to be in shape. Additionally, you will have the chance to slide down the snowy volcano with a sled!
If you are looking for more activities to do here, be sure to check out some of the available tours and day trips.
Where to Stay in Pucon?
Getting From Pucon to San Carlos De Bariloche
To get from Pucon, Chile to San Carlos de Bariloche, you can take a direct bus operated by Andesmar. It will take you to Osorno, cross the border, and drop you off at the San Carlos De Bariloche Bus Terminal.
The entire journey will take around 8 hours and cost about 18 – 40 USD per person. They only run this route 3 times a week, so if you happen to be there on the days they do not run, you can easily do it yourself and get on a bus to Osorno and from there, there will be plenty of buses to take you across the border to Bariloche.
San Carlos De Bariloche, Argentina (3 Nights)
Bariloche is like a little Switzerland in Argentina. The city is located by a beautiful lake with many mountains surrounding it, so naturally, I would recommend that you go up. You can either hike or take the cable car up to Cerro Campanario and appreciate what Bariloche has to offer.
You can also cruise across the Lago Nahuel Huapi, see the Black Glacier, explore the caves of the old volcano, or simply walk around the city center and see why it is like Switzerland.
If you are looking for more activities to do here, be sure to check out some of the available tours and day trips.
Where to Stay in San Carlos de Bariloche?
Getting From San Carlos De Bariloche to El Chalten
From Bariloche, the fastest way to get to El Chalten is to fly, or you can go by bus which takes around 20 hours. Personally, I flew because at that point, I was done with long buses, and by the time you reach this point in the itinerary, you will probably feel the same.
From Bariloche Airport, you will have to fly into El Calafate Airport where you can take the shuttle that connects El Calafate with El Chalten from the airport, and they will take you to El Chalten.
The flight should take around 2 hours and cost around 150 – 300 USD. From the airport, you can get the airport shuttle bus for 18 – 22 USD, and it will take around 3 hours to get to El Chalten. To book a flight, be sure to check out on Skyscanner or Expedia.
El Chalten, Argentina (3 Nights)
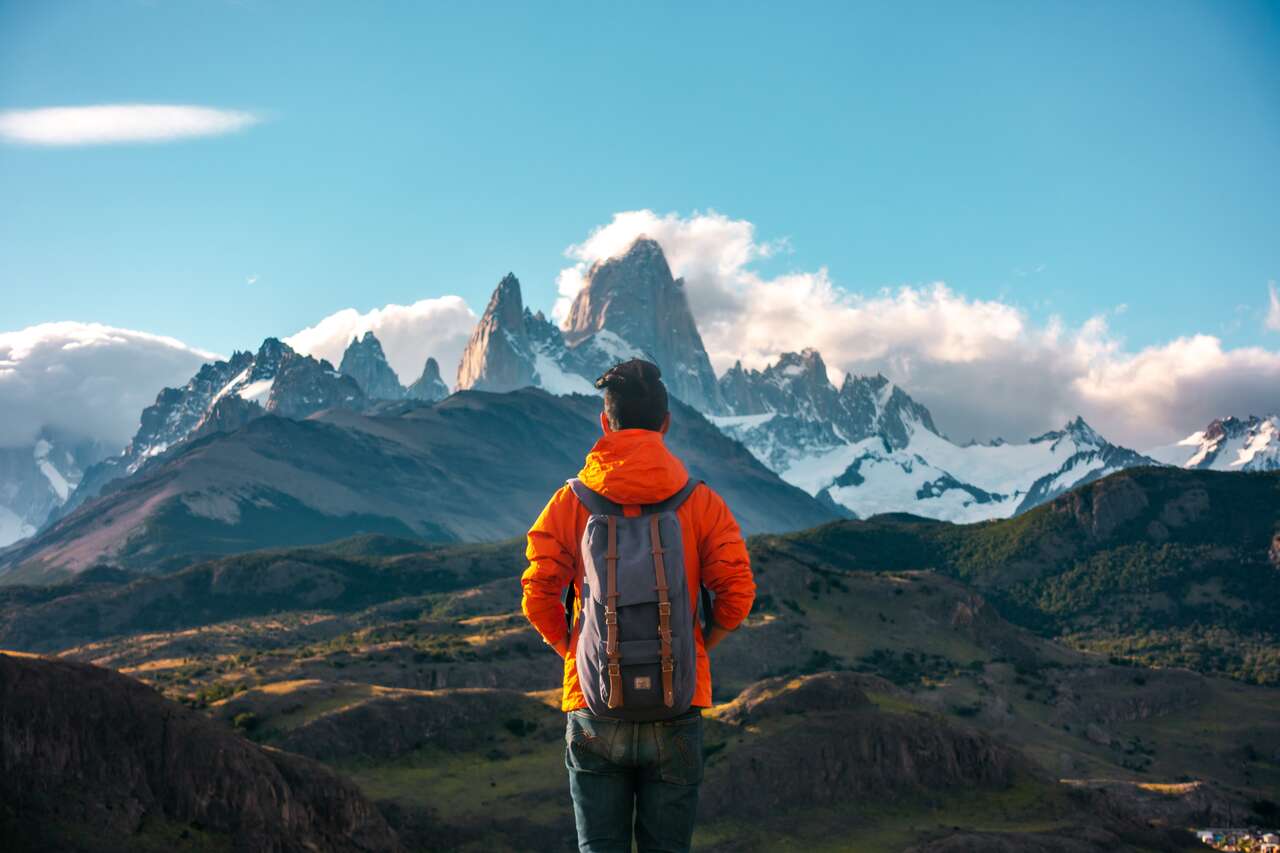
El Chalten is a hippie mountain town with a view of Fitz Roy’s peak, one of the most well-known peaks in Patagonia. You can hike to a lookout point 30 minutes away from El Chalten and watch the sunset, or you can spend 8-10 hours hiking the Laguna de Los Tres trail to see Fitz Roy peak up close.
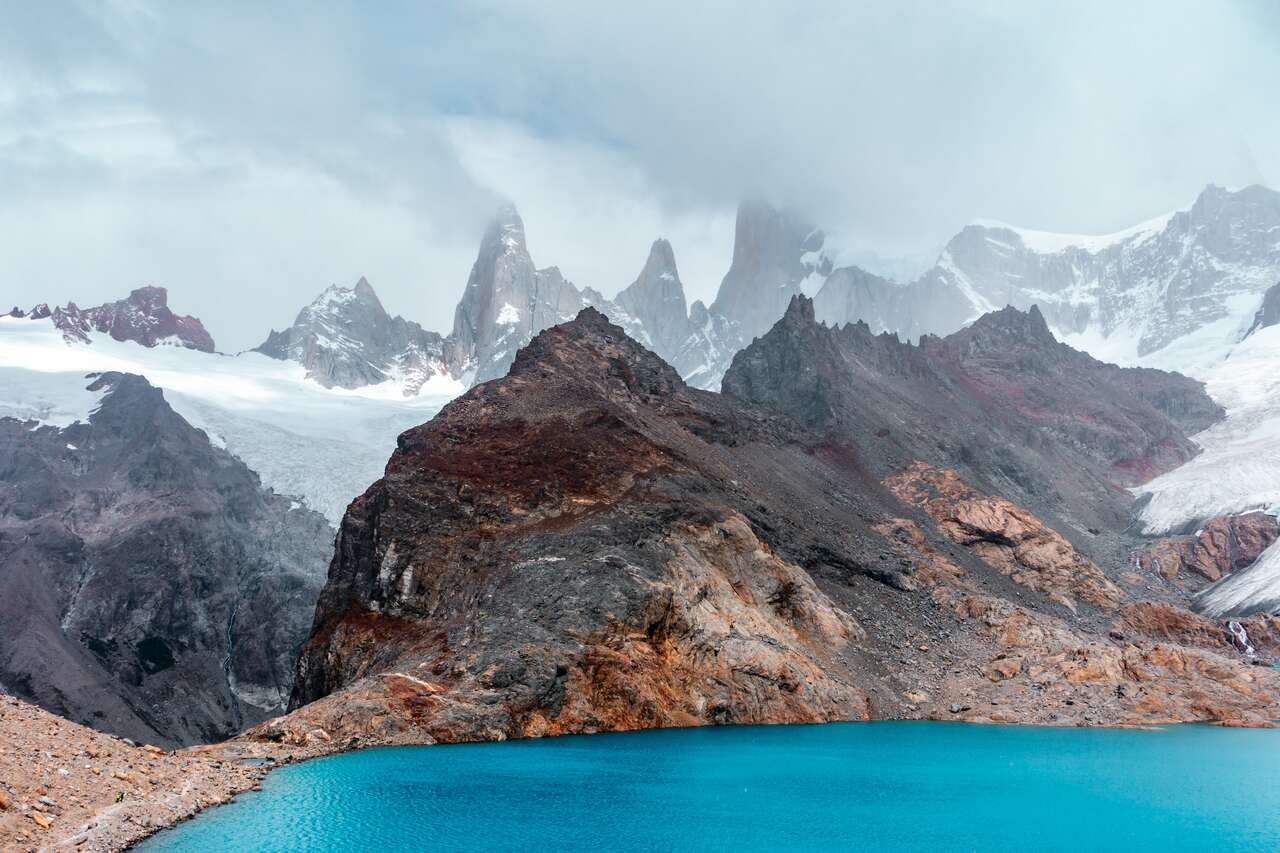
You can also camp at the base of the trail for a night and hike to the lake to see Fitz Roy at your own time. Another recommended trail to hike is Laguna Torre, which takes around 6-7 hours. As impressive as the Laguna de Los Tres trail.
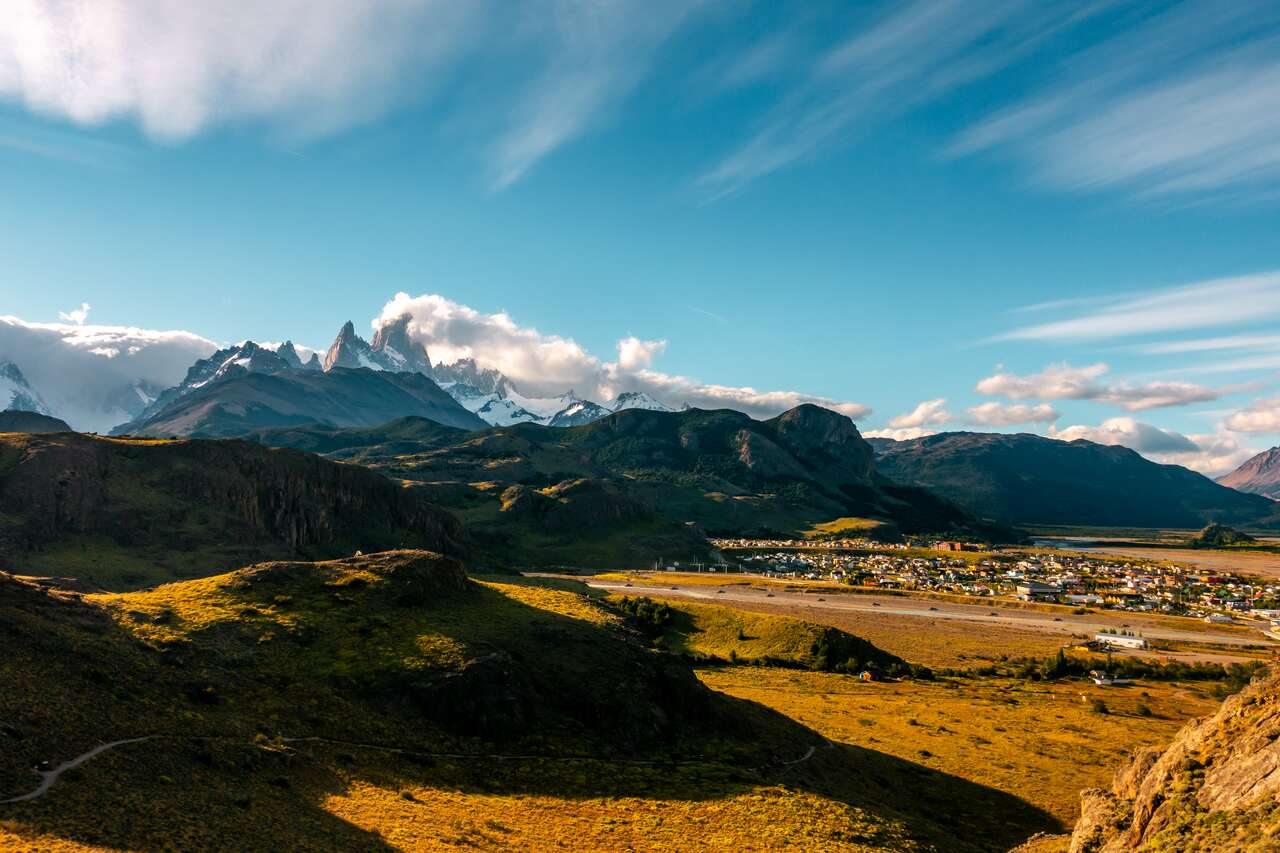
Note: Internet access, ATMs, and credit cards are unusable here, so please prepare enough money before you arrive.
If you are looking for more activities to do here, be sure to check out some of the available tours and day trips.
Looking for a complete travel guide to Patagonia?2 Weeks Itinerary For Patagonia
Where to Stay in El Chalten?
Getting From El Chalten to El Calafate
To get from El Chalten to El Calafate, you can take the same shuttle bus that you took from the airport. They run both ways, so the shuttle will stop at the airport and you can continue on with them to El Calafate. This route gets booked fast, so be sure to get your ticket the day before or ideally get your departure ticket on the day you arrive. Check out the official schedule of the shuttle bus here.
El Calafate, Argentina (3 Nights)
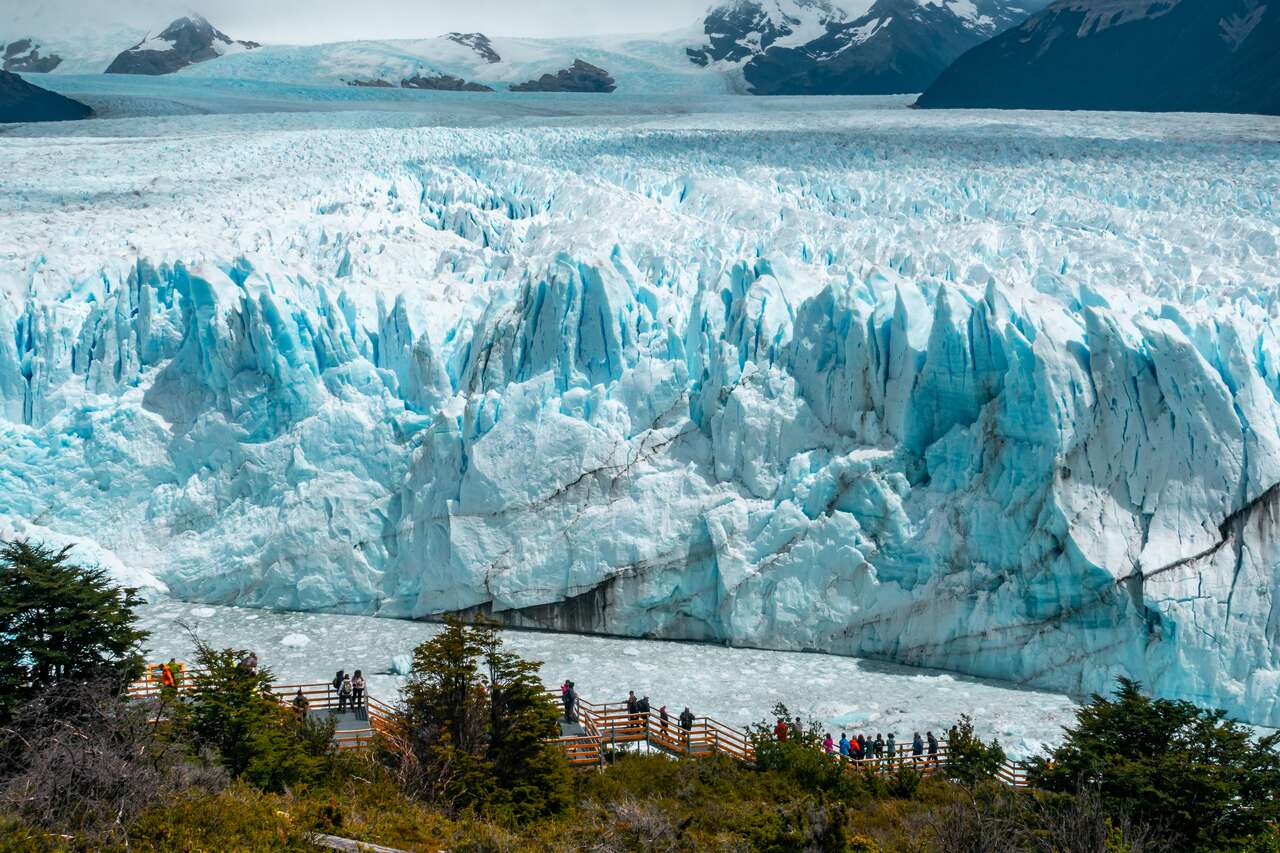
El Calafate is home to the largest glaciers that you can see in your life. The glacier stretches out as far as the eyes can see. Once you arrive in El Calafate, get a tour to see the famous Perito Moreno glacier and spend a day walking around the park.
Sorry, your browser doesn’t support embedded videos.
The massive scale of the glacier is best appreciated from all angles. If you have an extra day, you can also do a glacier walk on the Perito Moreno glacier itself and explore the ice cave, which is only accessible by foot.
If you are looking for more activities to do here, be sure to check out some of the available tours and day trips.
Where to Stay in El Calafate?
Getting From El Calafate to Puerto Natales
From El Calafate, you will have to take the bus from El Calafate Bus Terminal to cross the border and return to Chile in order to reach Puerto Natales.
Bus-Sur operates this route, and they have one bus leaving at 8 AM and arriving in Puerto Natales by 2 PM. The bus ticket costs 22 USD per person.
Puerto Natales, Chile (2 – 5 Nights)
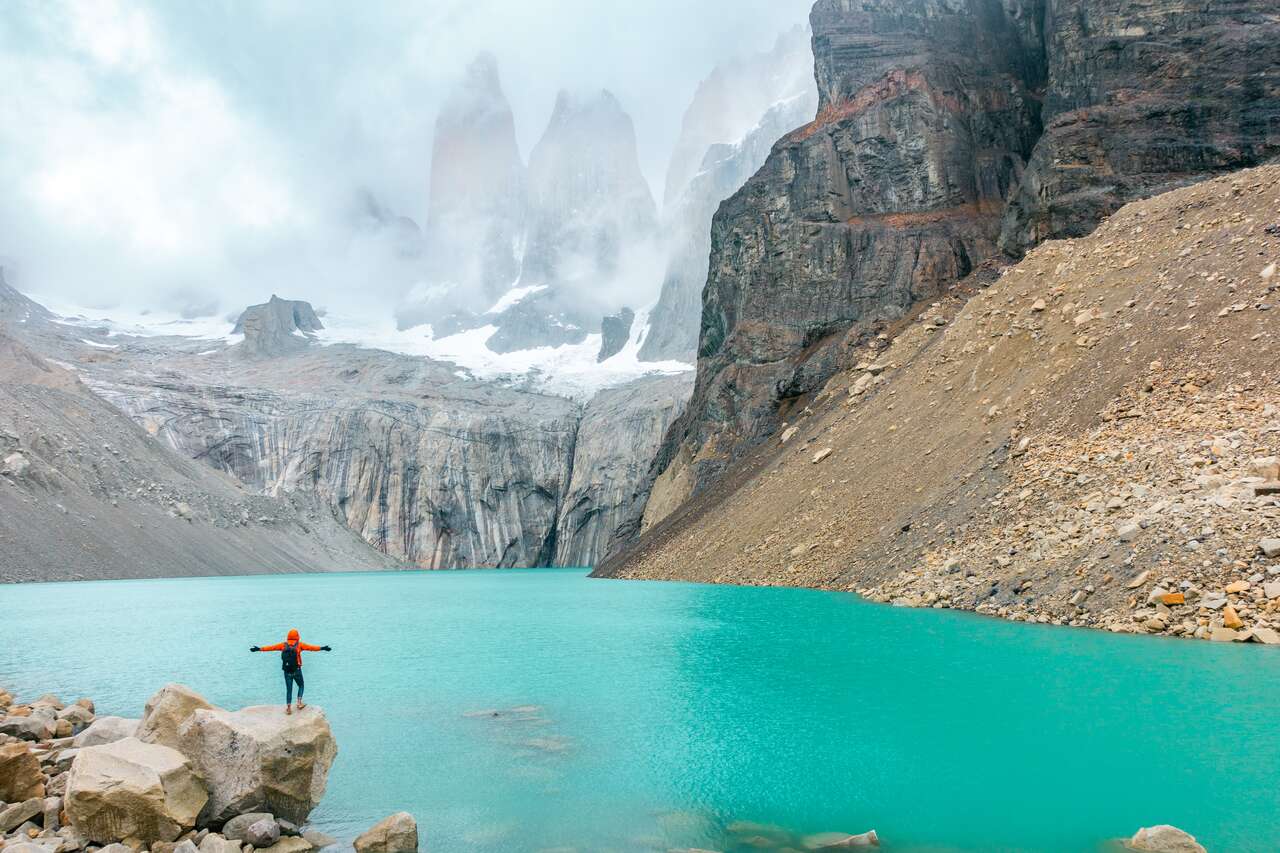
Puerto Natales is a base to launch yourself into Torres del Paine park. The city itself is nothing to brag about, so I would suggest you go straight to the national park.
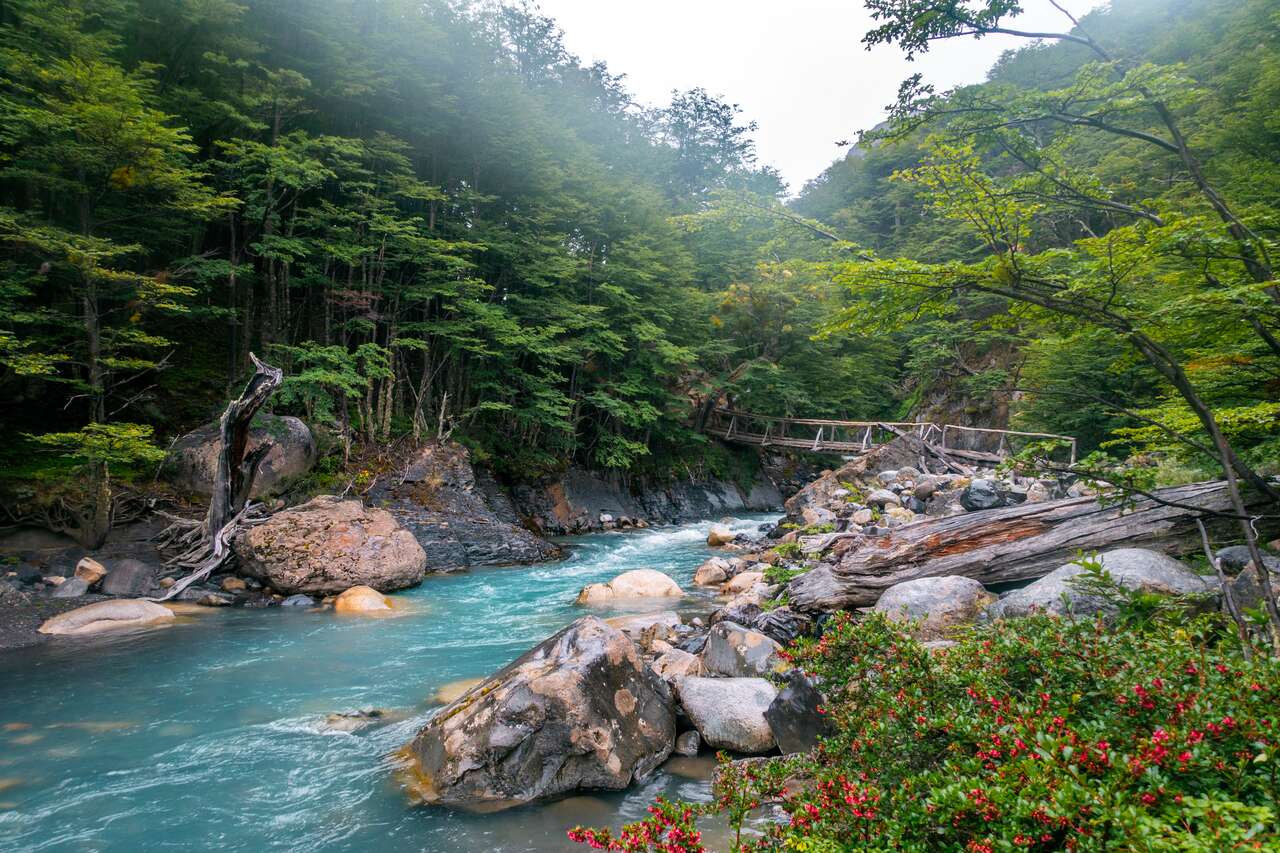
Doing the W-trek through the Torres del Paine National Park is highly recommended if you have a chance to do it. It takes 4 – 5 days to complete the loop, and you will be sleeping in mountain huts provided by the park.
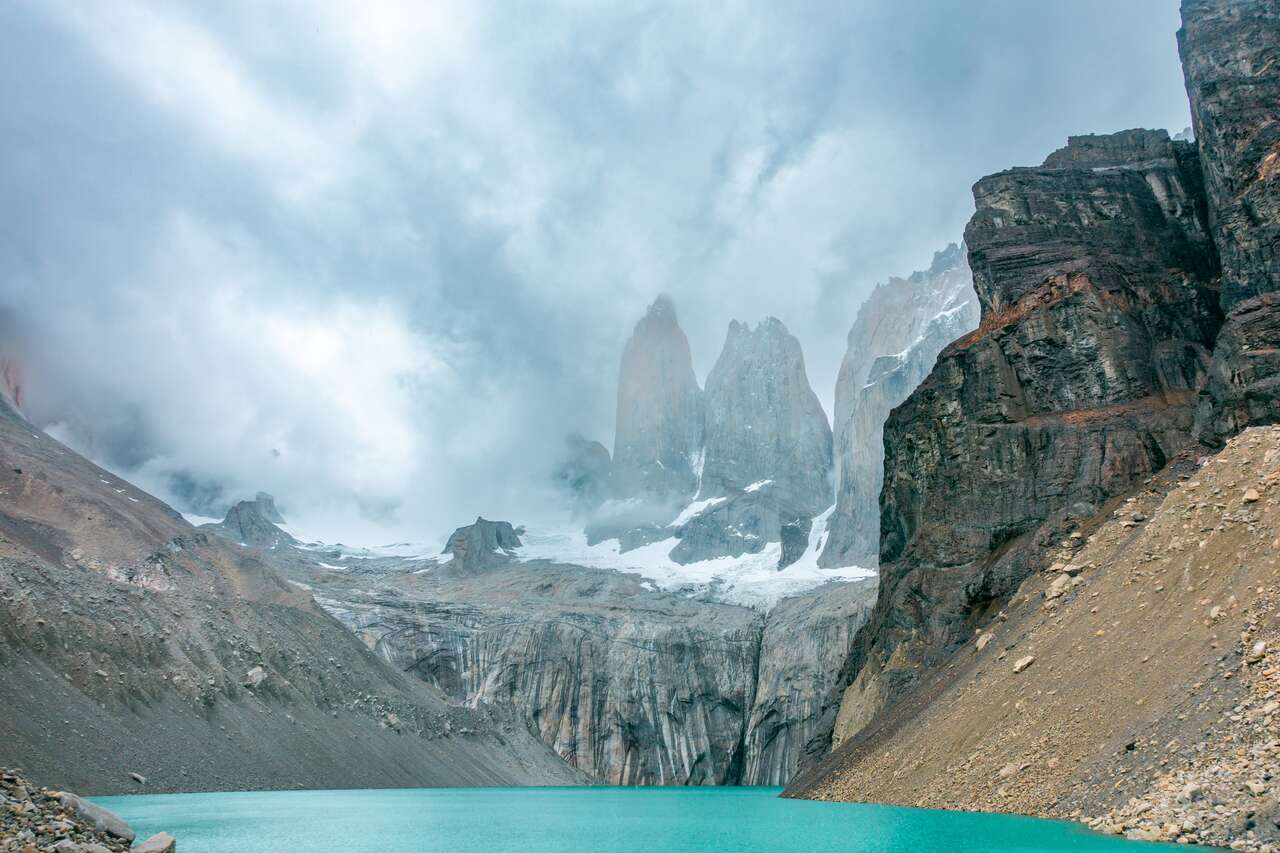
You will have to book these huts several weeks in advance, though, so please plan before you arrive. If you cannot book these huts in time, you can hike to Cordillera Paine independently and see the best of Torres del Paine without staying overnight.
If you are looking for more activities to do here, be sure to check out some of the available tours and day trips.
Looking for a complete travel guide to Torres del Paine?How To Hike Torres Del Paine Independently
Where to Stay in Puerto Natales?
Getting From Puerto Natales to Ushuaia
To get from Puerto Natales to Ushuaia, it will be another long bus ride that requires you to change buses at Punta Arenas. Big Sur does operate the route between Puerto Natales and Punta Arenas, and it runs twice per day so you can catch the 7 AM one from Puerto Natales Terminal.
The first leg of this journey will take about 3 hours and cost 10 USD.
Depending on the day you arrive in Punta Arenas, you may have to stay overnight there before you can catch a bus from Punta Arenas to Ushuaia. There are 2 bus operators that run this route, Bus-Sur and Buses Pacheco, and luckily the bus office is located near each other so you can check both places if there is any bus to Ushuaia that day.
This journey will take you 12 hours, cost 46 USD, and only one bus runs daily.
Ushuaia, Argentina (3 Nights)
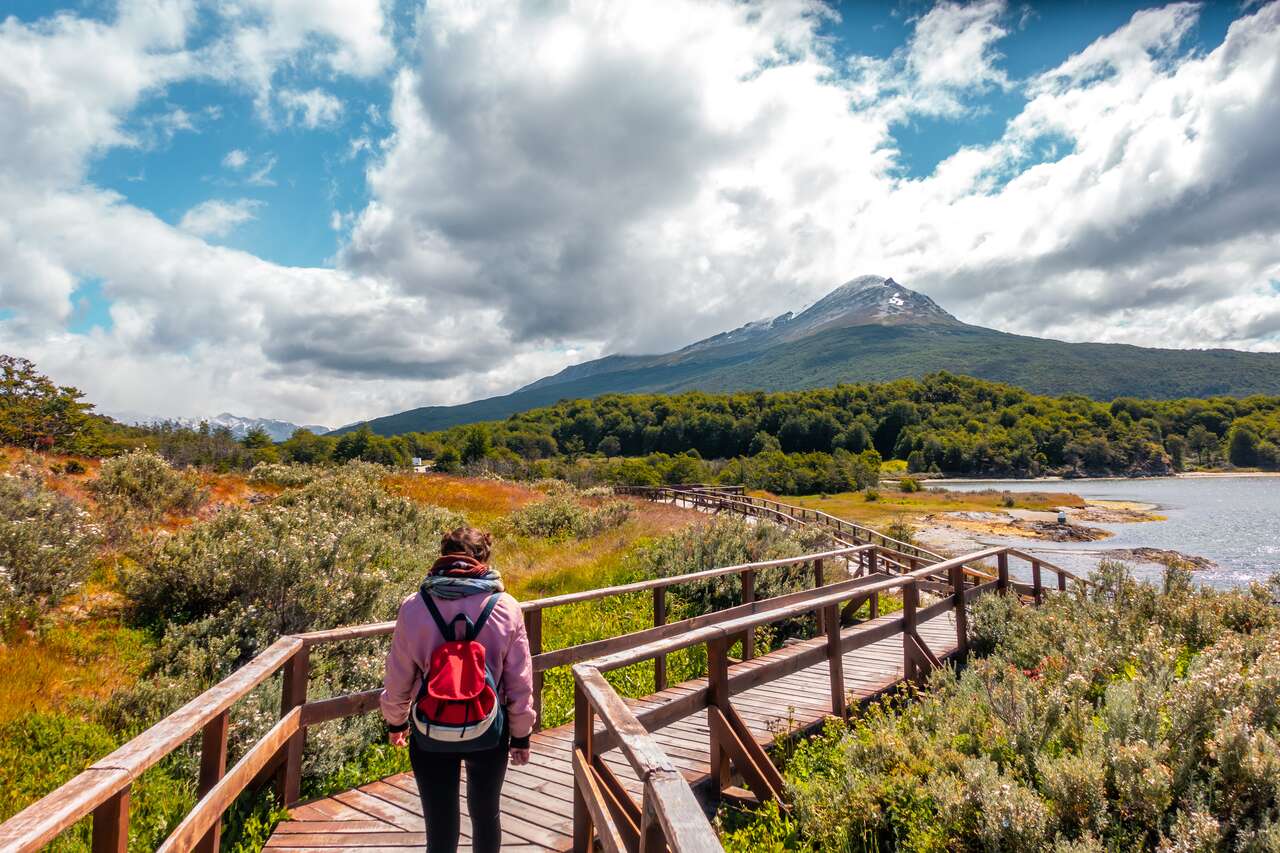
After arriving in Ushuaia, you will literally be at the end of the world. Here, you will find one of the last civilizations located at the most southern tip of the world. This is where you can launch yourself into Antarctica if you have 8000 USD to spare.
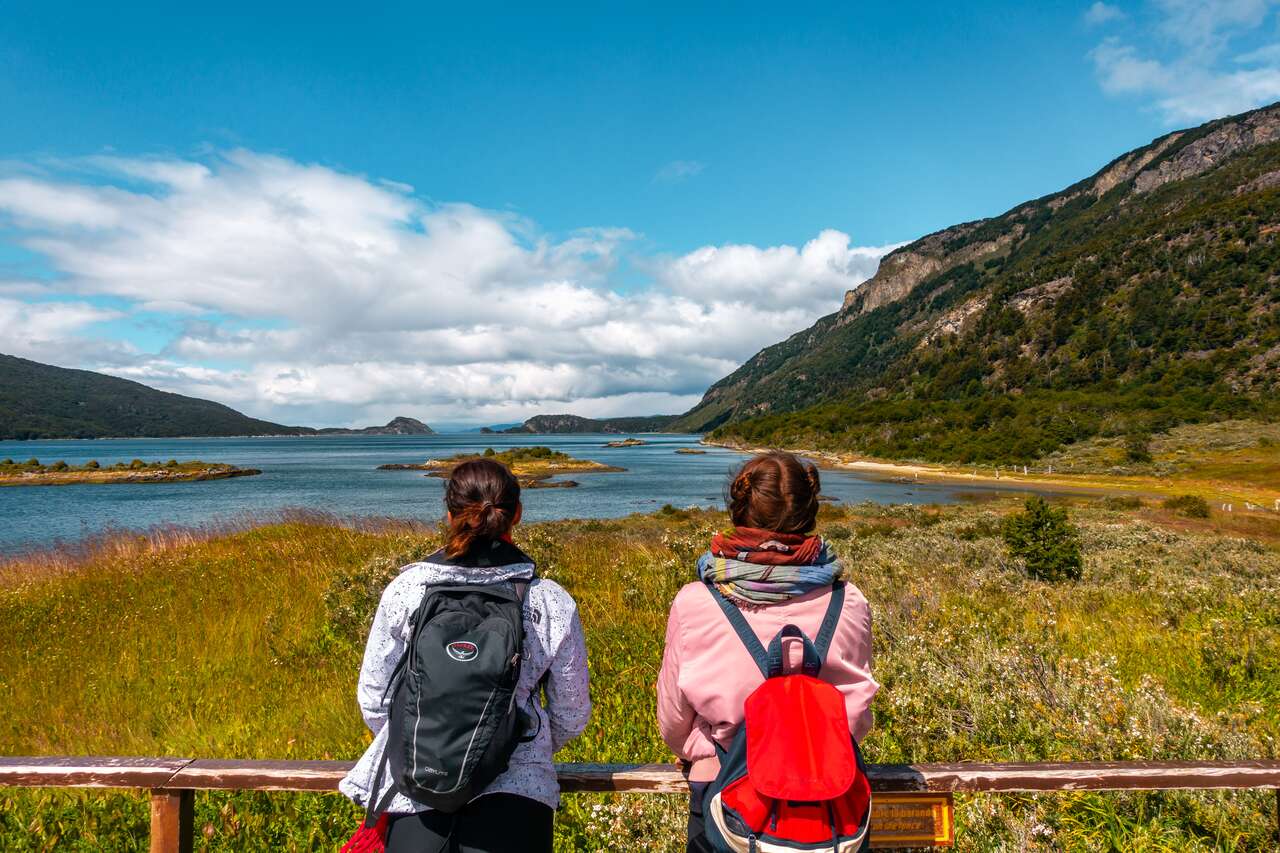
If not, you can spend a day hiking in Tierra del Fuego National Park among the rare plantations only found in this part of the world. The next day you can rest from all the hiking by taking a boat tour to the Les Eclaireurs Lighthouse and spend a day enjoying fresh food in Ushuaia city.
If you are looking for more activities to do here, be sure to check out some of the available tours and day trips.
Where to Stay in Ushuaia?
Getting From Ushuaia to Buenos Aires
Don’t worry, I’m not gonna make you go through the bus ride through Patagonia again. From Ushuaia, you can fly directly to Buenos Aires via Aerolineas Argentinas from Ushuaia airport.
The flight should take about 3.5 hours and cost around 66 USD. The flight usually departs at 14:15 and arrives in Buenos Aires at 17:43. You can book your ticket with Skyscanner or Expedia.
Buenos Aires, Argentina (4 Nights)
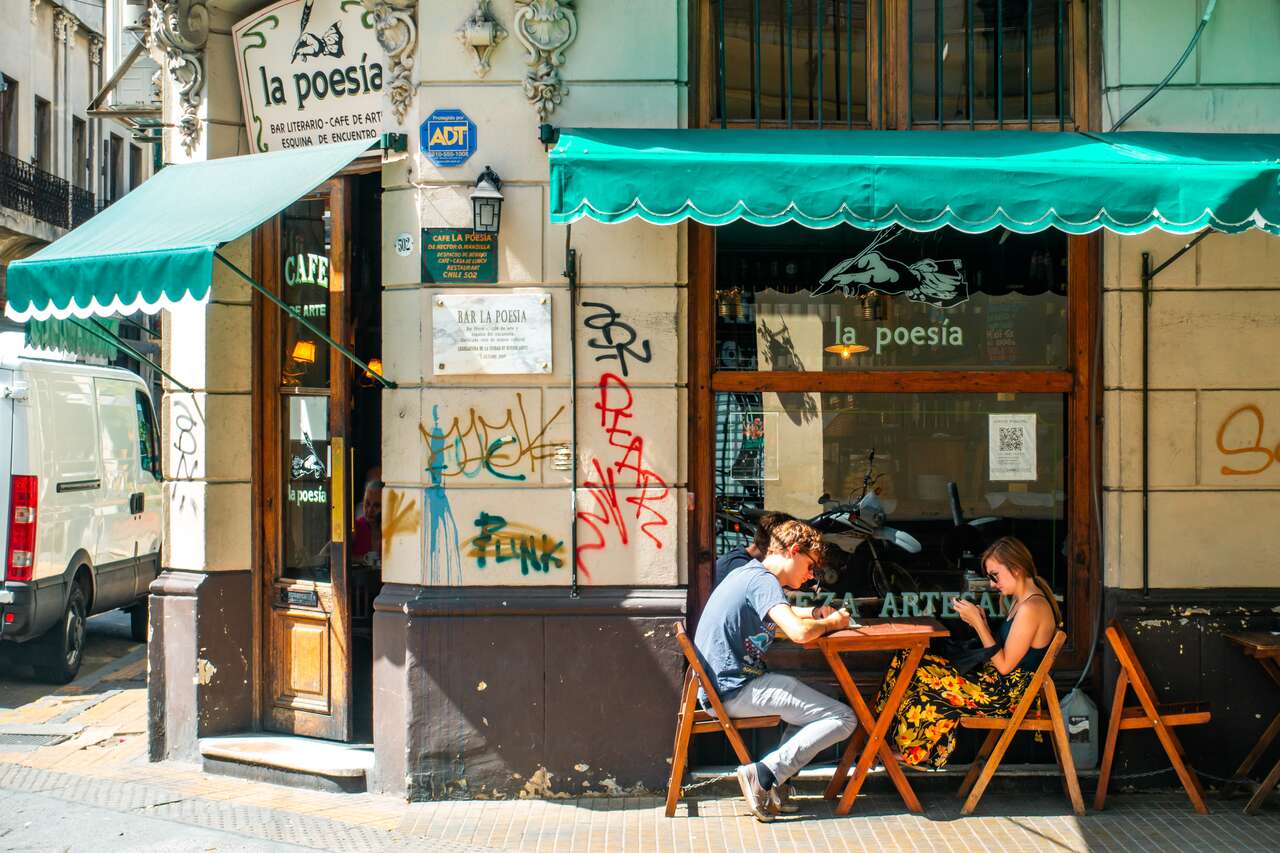
Buenos Aires is the capital city of Argentina, and with most capital cities, there come many things to keep you busy for a few days. Now that you are back from Patagonia, you can spend some time spoiling yourself by trying the famous Argentinian beef in one of the many restaurants in San Telmo.
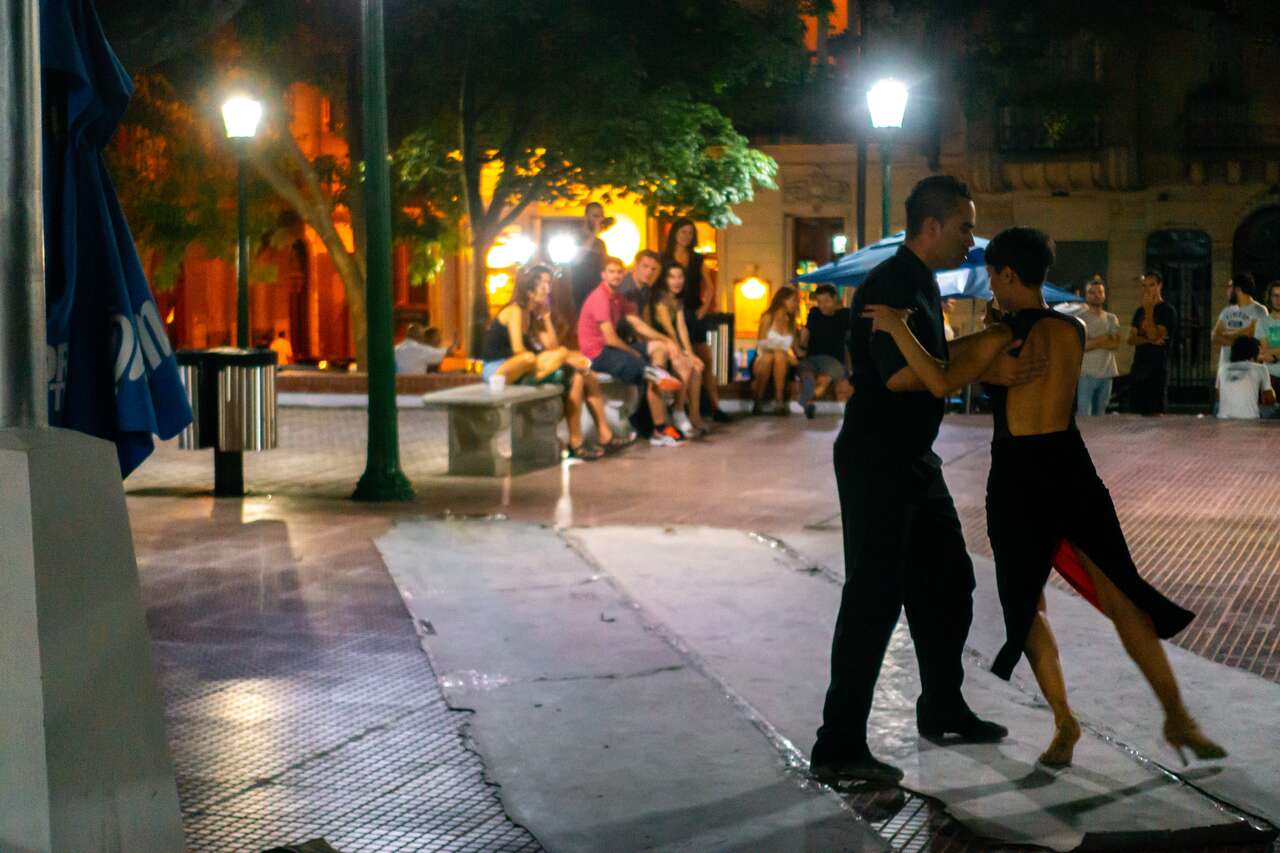
Argentina is also home to Tango, so you can attend a class and learn how to move like Argentinians. You can also learn the history of the country by visiting the many museums available in the city such as the National History Museum and the Museo Casa Rosada.
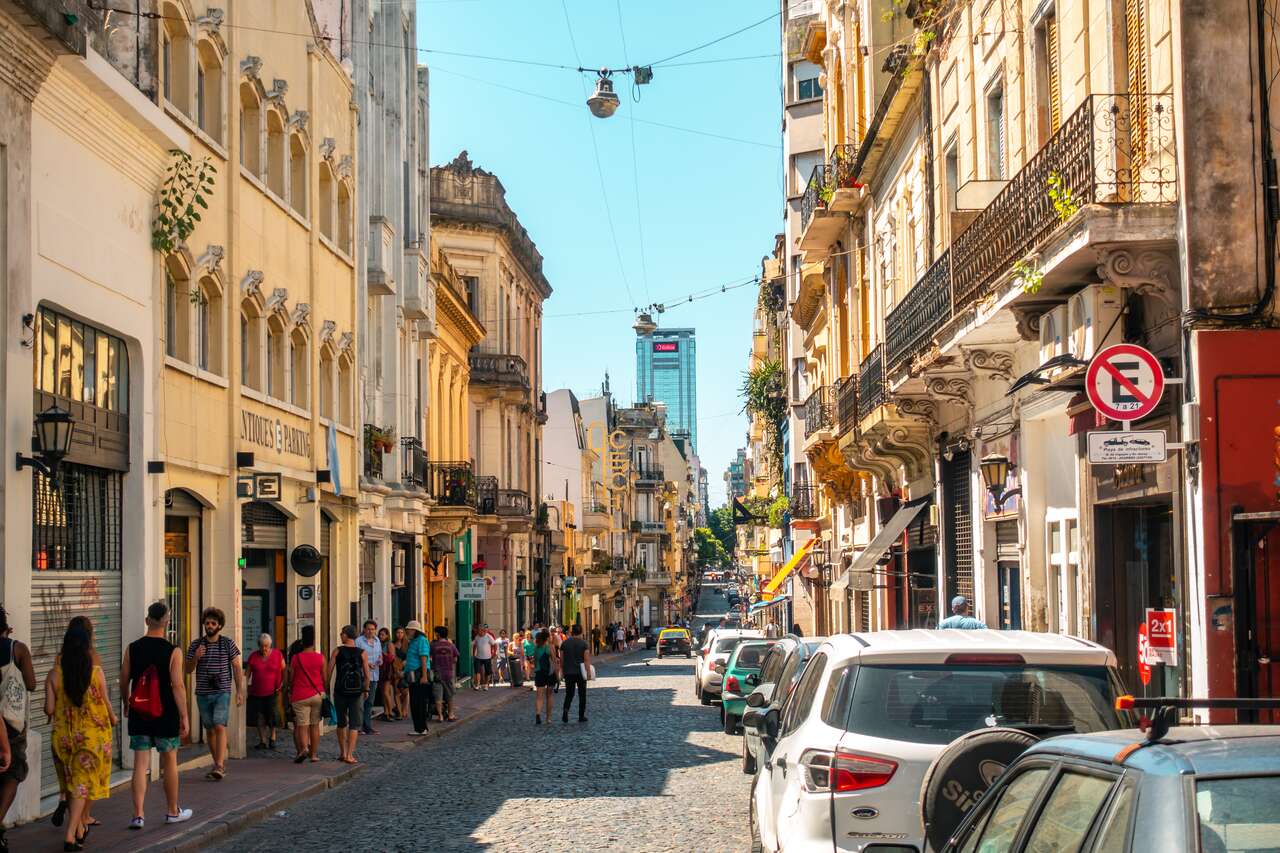
For a great photo spot, you can spend a day exploring the La Boca district and get a photo of yourself with the colorful houses of La Boca.
If you are looking for more activities to do here, be sure to check out some of the available tours and day trips.
Getting From Buenos Aires to Iguazu Falls
From Buenos Aires, you will have to fly to Iguazu Falls via Aerolineas Argentinas. There are multiple flights per day, but they don’t operate every day of the week, so be sure to align your trip accordingly.
Where to Stay in Buenos Aires?
The journey should take you around 2 hours and cost as low as 60 USD. You can book your ticket with Skyscanner or Expedia.
Iguazu Falls, Argentina (3 Nights)
I thought I had seen the most epic waterfall in the world already when I was in Zambia visiting Victoria Falls. There was no way any waterfall could top that. However, when I arrived at Iguazu Falls, I was blown away by its sheer beauty.
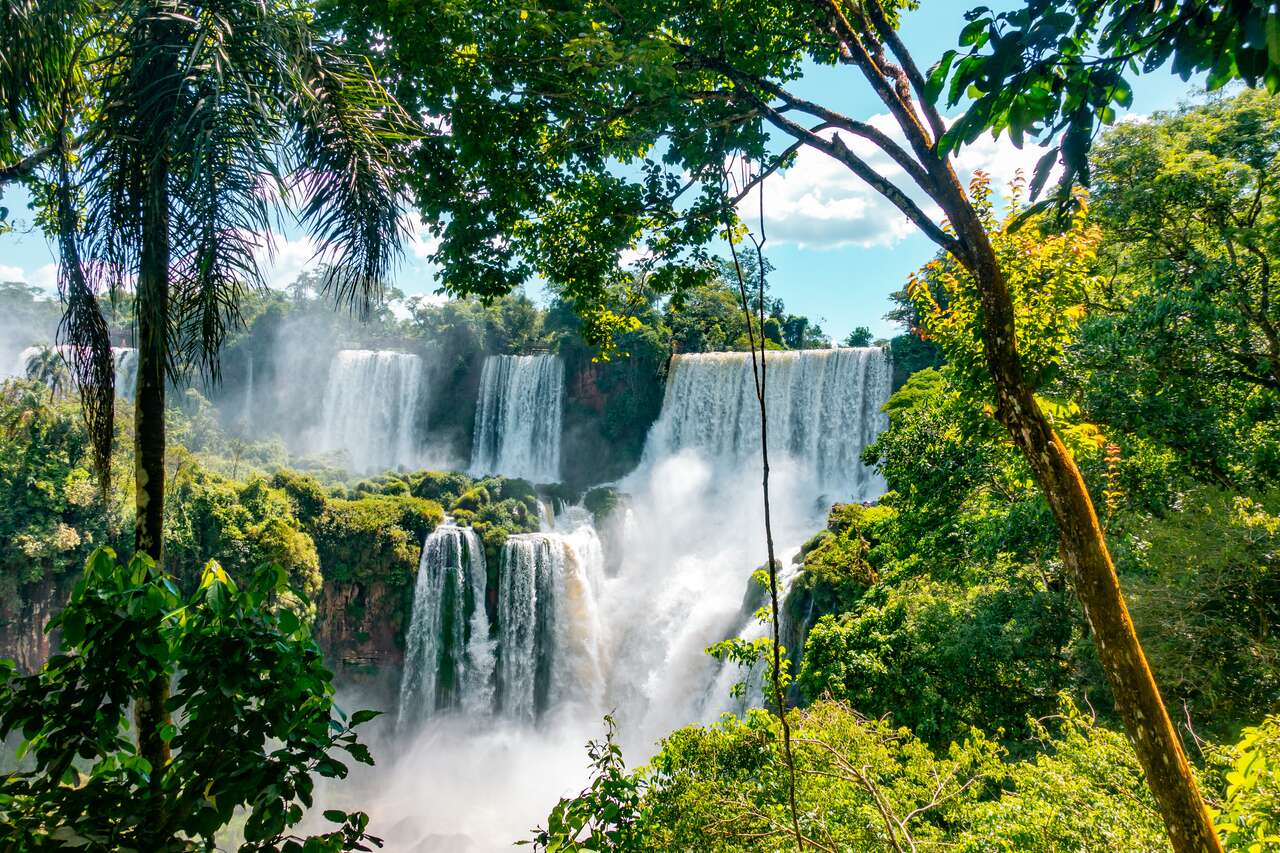
While Victoria Falls has the title of the largest waterfall in the world based on its combined width, Iguazu Falls is in its own league, earning the title of the largest waterfall system in the world with several massive waterfalls all concentrated in this one area.
You can spend your first day exploring the Argentinean side first, as there is a lot more to do than on the Brazilian side, which we will get to eventually.
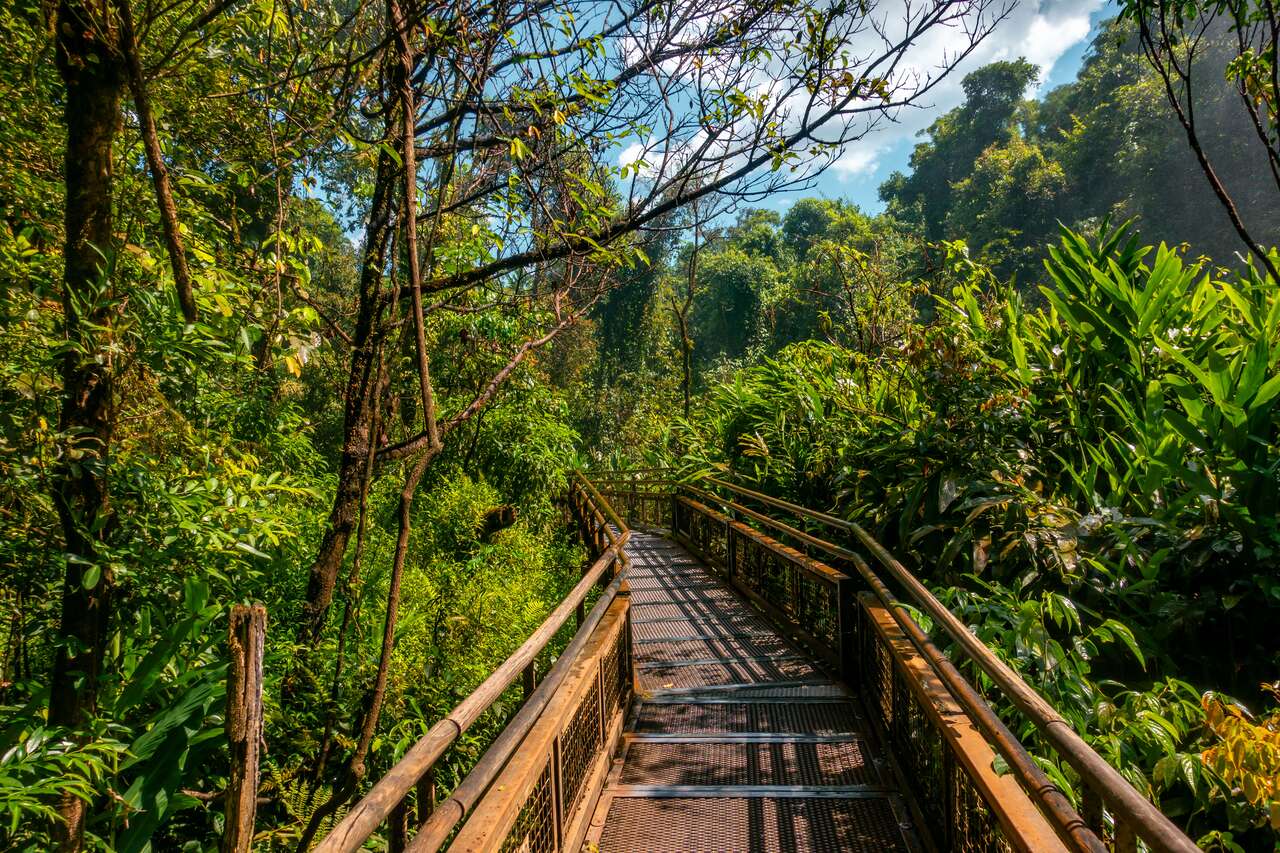
On the second day, you can rest by the pool and escape the humidity or hang out at your accommodation before we set out to Brazil the next day.
If you are looking for more activities to do here, be sure to check out some of the available tours and day trips.
Looking for a complete travel guide to Iguazu Falls?3 Days Itinerary For Iguazu Falls
Where to Stay in Iguazu?
Getting From Iguazu Falls to Foz do Iguaçu
To get from the Argentinian side of the Iguazu Falls to the Brazilian side, you will have to go to the Iguazu Bus Terminal and get on the bus with the sign “Foz do Iguaçu”. It will take you through the border and drop you off on the other side or right at the entrance of the Brazilian Iguazu Falls.
For this route, you do not have to book anything as you can just go to Iguazu Bus Terminal as early as possible and get on the next bus to Foz do Iguaçu. It should cost around 1.5 – 2.5 USD for a ticket and take about an hour, depending on the line at immigration.
Foz do Iguaçu, Brazil (1 Night)
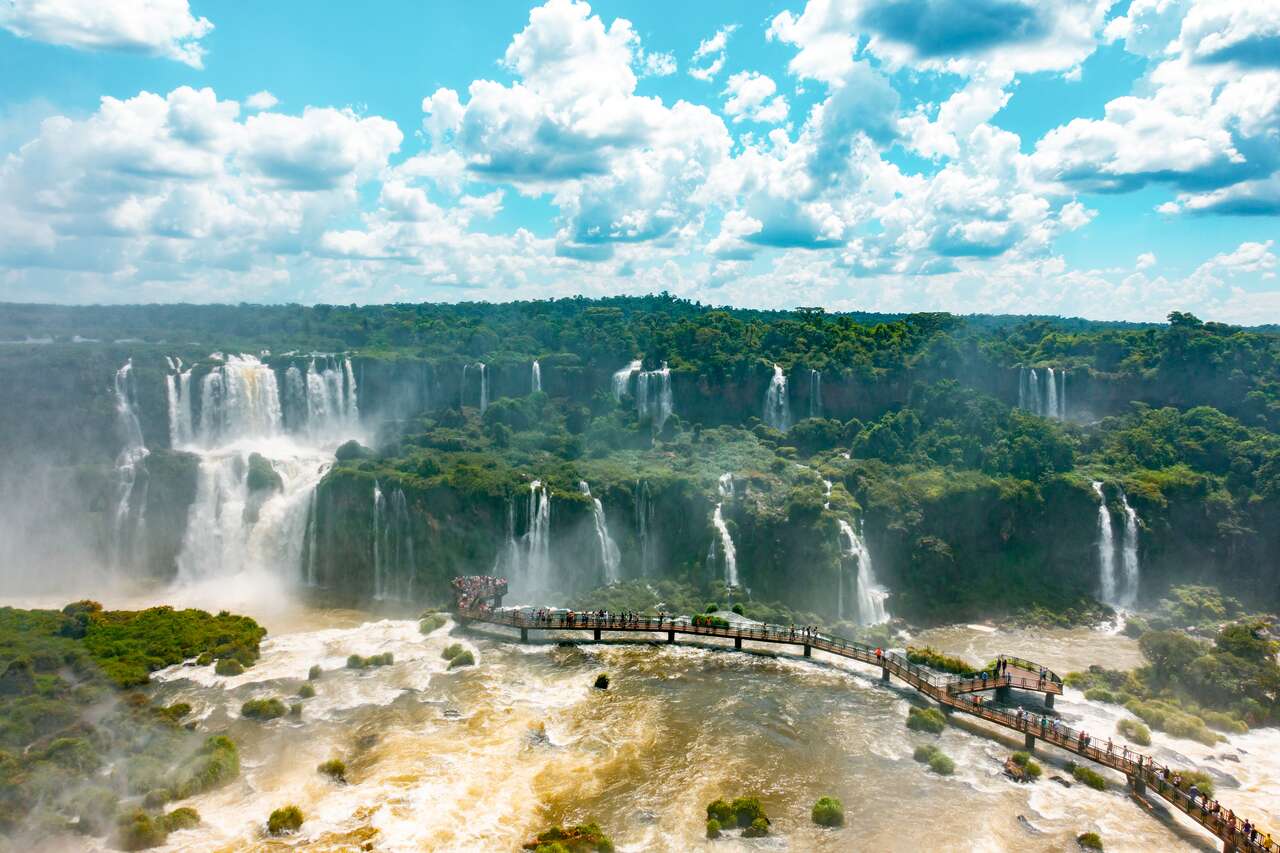
You can either go directly from the border to the Brazilian side of the Iguazu Falls with all your belongings locked up in a locker in front of the entrance, or you can spend more than 1 night in Foz do Iguaçu before we continue our journey through Brazil.
If you are looking for more activities to do here, be sure to check out some of the available tours and day trips.
Brazil (1 Month)
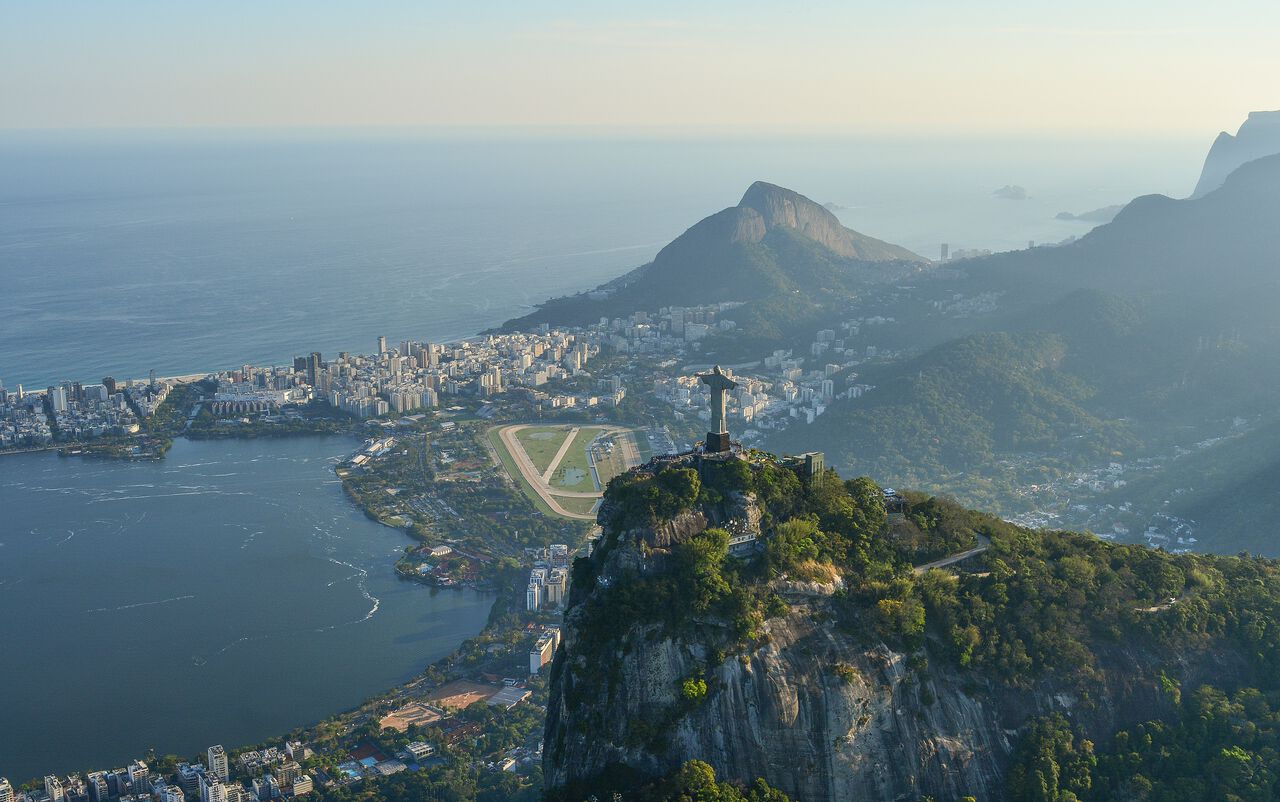
Personally, I have not backpacked in Brazil yet due to time constraints, but it would be a shame for you not to see Brazil while you have already traveled the length of South America. Also, if you arrive in Brazil in February, you will be able to attend the famous Carnival celebration in Sao Paulo or Rio de Janeiro, which I’ve heard is one of the most spectacular events in the world.
Since Brazil is not my domain, I will refer to a better one-month itinerary from other fellow travel bloggers. From what I have heard, Sao Paulo, Paraty, Rio de Janeiro, and Salvador are all worth visiting, so be sure to check them out while you are in Brazil.
For a complete one-month backpacking itinerary for Brazil, check out: One Month in Brazil: Weirdosabroad’s Detailed Itinerary.
If you are looking for more activities to do here, be sure to check out some of the available tours and day trips.
Where to Stay in Sao Paulo?
Where to Stay in Paraty?
Where to Stay in Rio de Janeiro?
Where to Stay in Salvador?
South America Travel Videos
You can find more South America travel videos here: Ecuador, Peru, Bolivia, Chile, and Argentina.
When to Visit South America?
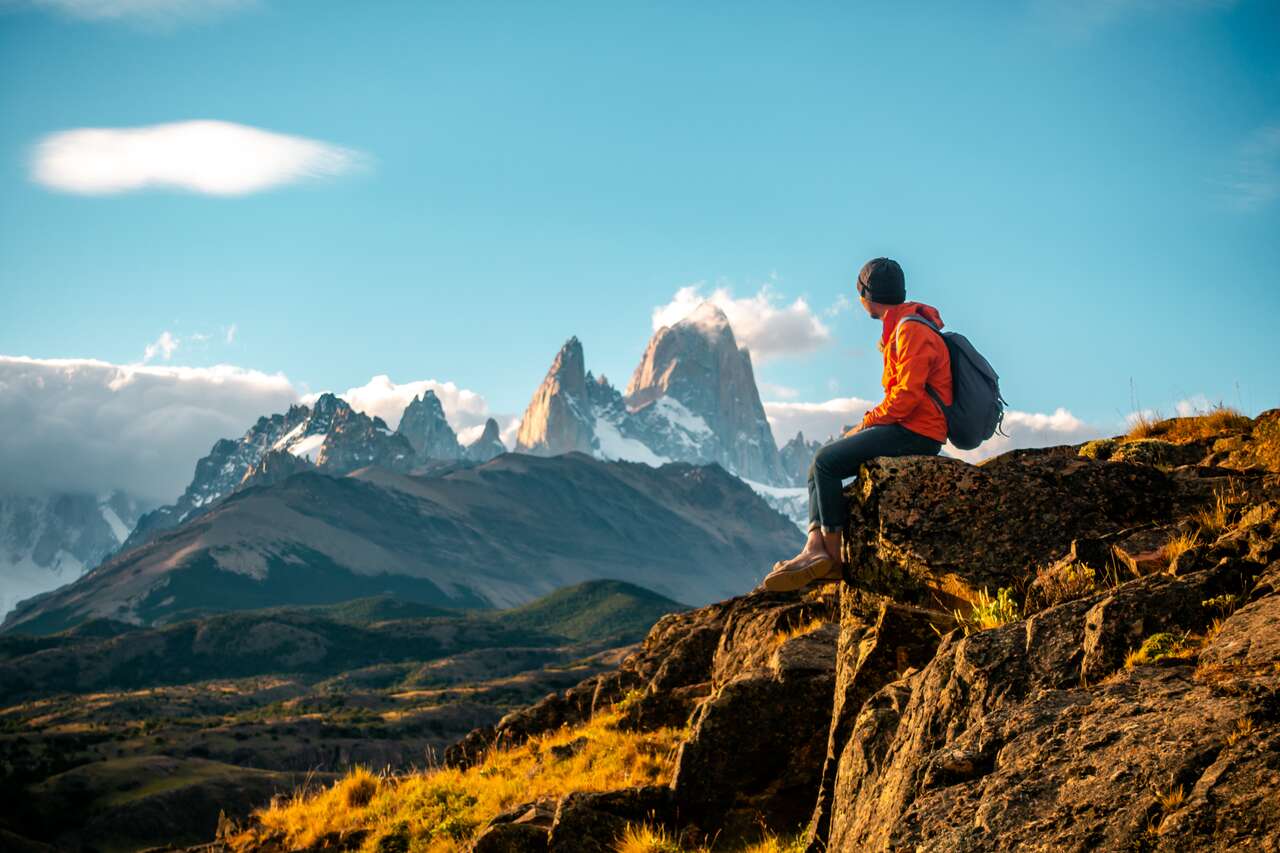
Since we will be traveling through 7 countries across the continent, we will be experiencing a variety of climates and environments that are best visited in certain seasons. So, it is essential that we pick the best time to begin our trip to align with the best seasons for our travel.
With a 6-month period, I have found that starting our journey in Colombia in August and finishing our trip in February in Brazil, we will be getting the best weather in all the countries we will be visiting.
Colombia in August is great, as the rainfall will most likely have already passed by the time you arrive, which should allow you to enjoy the outdoors a bit more. Expect a variety of weather in Colombia, as the places we will be visiting vary drastically in altitude and climate. Colombia can be tropical and humid near the coast, while cold and rainy near the Andes, so be sure to prepare for all kinds of weather here.
Ecuador in September is also great, as the area at sea level, like the Galapagos, is nice and warm with the water not too cold to swim in (still pretty cold for my warm Southeast Asian blood). Meanwhile, it is not too cold in the mountainous regions like Cotopaxi and Banos. Again, you will be experiencing a lot of different climates and temperatures in Ecuador, so prepare accordingly.
Peru in October will be dry and sunny, making it the perfect time to go hiking in places like Huaraz in the Andes region and see Machu Picchu at its best with low clouds and blue sky. The same goes for Peru, as you will require winter hiking gear if you plan to hike in Huaraz. Additionally, along the coast in places like Nazca and Ica, you will experience a desert climate, so be sure to prepare accordingly.
Bolivia in October, even though you won’t get that beautiful reflection from the salt flat and water left during the rainy season in February, you will have a higher chance of having nice clear days during this month, which makes it a great time to visit Salar de Uyuni and Bolivia in general.
Chile and Argentina in November and December are the perfect times to go hiking in the Patagonia region. By the time we arrive at the end of the world, the summer weather should make it more fun for you to engage in outdoor activities, and there are a ton of things to do in the Patagonia region.
Brazil in January should be great for visiting cities along the eastern coast of the continent, as the weather should not be too hot to explore comfortably. If you stay a little longer into February, you will also get to experience the extravagant Carnival festival, which is a great way to end this trip of a lifetime.
How to Get to South America?
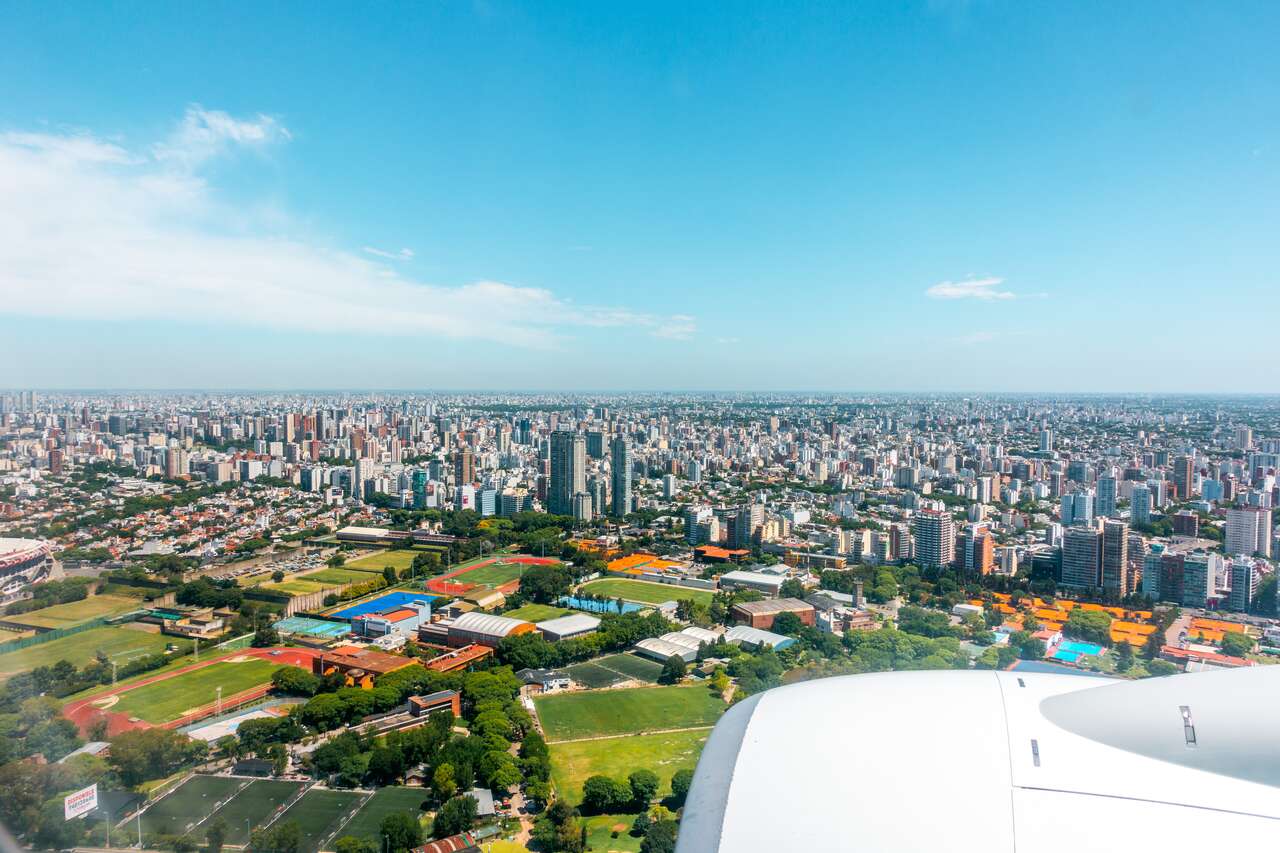
Since I recommend that you start your journey in Colombia, there are several airlines for you to choose from depending on your location. The best way to start this itinerary is to fly into Bogota, the capital city of Colombia. There are several flights from the US and Europe that go directly to Bogota. I would recommend browsing through Skyscanner or Expedia to find a cheap flight from your location to Bogota that best fits your itinerary.
From the US, you can fly directly to Bogota via Delta or Avianca Airlines, or you can choose a low-cost airline, Viva Air Colombia, which connects Miami with Bogota. You can find more information on Skyscanner or Expedia.
From Europe, you can fly directly with British Airways or KLM from London or Amsterdam to Bogota, respectively.
From Asia, there is no direct flight (except maybe through Japan), but you can fly through Europe (make sure to get a flight that doesn’t go through more than one city in Europe; otherwise, you will need a Schengen visa for it) or through the US if you already have a valid US visa. AirFrance is a great airline to fly via Europe, or you can fly with United Airlines via the US to Bogota.
How to Get Around South America?
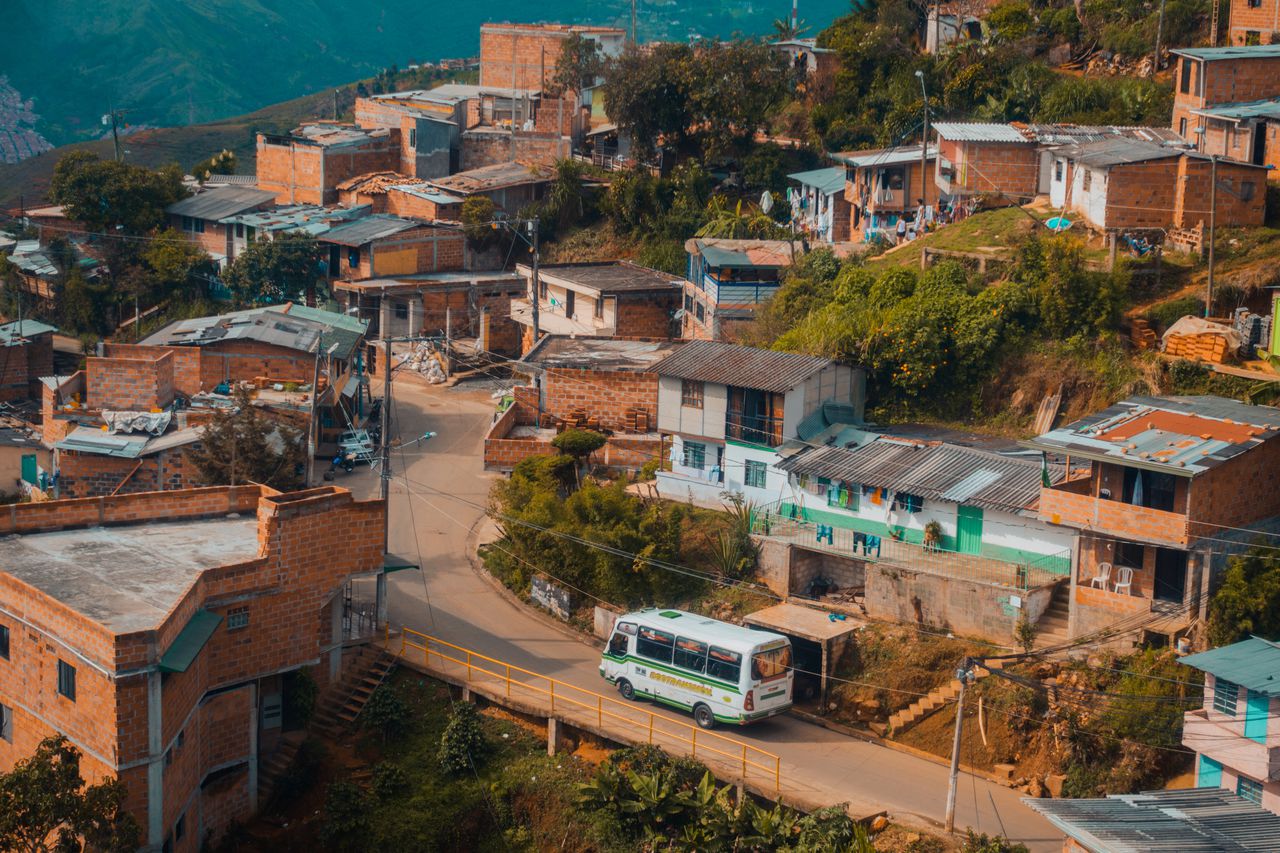
Since we will be traveling the length of a continent, we will be relying on several modes of transportation, from buses to airplanes. However, most of the time, we will save costs and go with the bus if the journey isn’t too painful.
Getting Around South America by Bus
This will be our main mode of transportation in South America. Buses vary in size, price, and quality. Personally, I found buses in Peru, Chile, and Argentina extremely comfortable to travel in; some even come with food onboard. In contrast, bus service can be a bit lackluster in Colombia, Ecuador, and Bolivia. You can find most bus routes to book, as well as schedules, online via Busbud.com.
One thing to keep in mind for buses is that each country has its own bus system. Some have their buses all congregated at the main bus station, while others have each bus company operating from its own bus stations that you have to get to in order to board the bus.
The countries where you can get buses at main bus stations are Bolivia, Brazil, Chile, Argentina, and most places in Colombia and Ecuador, while the countries that have bus companies operating their own bus terminals are Peru and a few places in Colombia and Ecuador.
Here are some recommended bus companies in South America, organized by country:
For Colombia, I do not have any favorite bus companies because the roads, especially in the South, were pretty bad to traverse in the first place, so I did not enjoy much of land travel in Colombia.
For Ecuador, although buses can be old, surprisingly, the road conditions in Ecuador are excellent throughout the country. Again, I do not have any favorite bus company to recommend here, so you can pick whichever one is most convenient.
For Peru, Cruz del Sur and Oltursa are highly recommended for long-haul southern routes, Linea for northern routes, and any local bus companies are fine for short-haul trips.
For Chile, Turbus and Pullman provide a great range of buses that cover many popular locations.
For Argentina, Andesmar or ViaBariloche are great options for long-distance trips around the country.
When it comes to safety on buses, I have heard many reports from friends that they had their bags snatched on overnight buses while they were sleeping in Colombia and Ecuador. So, always have your belongings with you at all times. I’ll be providing more tips on how to stay safe in South America under the Safety in South America section, so be sure to check that out.
Getting Around South America by Collectivo
Collectivo or shared vans are another way to get around Colombia, Ecuador, Peru, and Bolivia, especially on a less traveled route. You can’t book these vans online, so you will have to ask for the collectivo schedule at your hostel and get the ticket from the bus terminal on the spot. Usually, if you are traveling on popular routes, you should have no trouble finding one at the main bus station.
Getting Around South America by Flights
There are a lot of low-cost options if you want to reduce your travel time and do not mind spending more. We will also be utilizing domestic flights on a few routes to either reach some islands or avoid traversing the same route on our way back.
For Colombia, VivaColombia offers a cheap way for you to skip a 20-hour bus ride without breaking the bank, although they are often delayed and do not provide the best service.
For Ecuador, specifically, to travel to the Galapagos, you will have to get a domestic flight from Guayaquil to Isla Baltra via LATAM or TAM. A roundtrip ticket should be fixed at $351 USD from Guayaquil to Galapagos and back.
For Peru, you will be using land travel for the most part, as there are a lot of important stops along the way, so there is no need to fly here.
For Bolivia, again, you won’t need to fly here as you will be spending your time traversing Salar de Uyuni to get to Chile, which will take 2-3 days.
For Chile, you can fly domestically with Sky Airline, which is cheap and has good coverage all over the country. For Easter Island, there is only one airline that connects the mainland to the remote island, which is LATAM, so be sure to check them out if you want to visit Easter Island.
For Argentina, Aerolineas Argentinas covers a wide range of popular destinations in Patagonia and around the country, and their prices are pretty affordable.
Getting Around Cities in South America
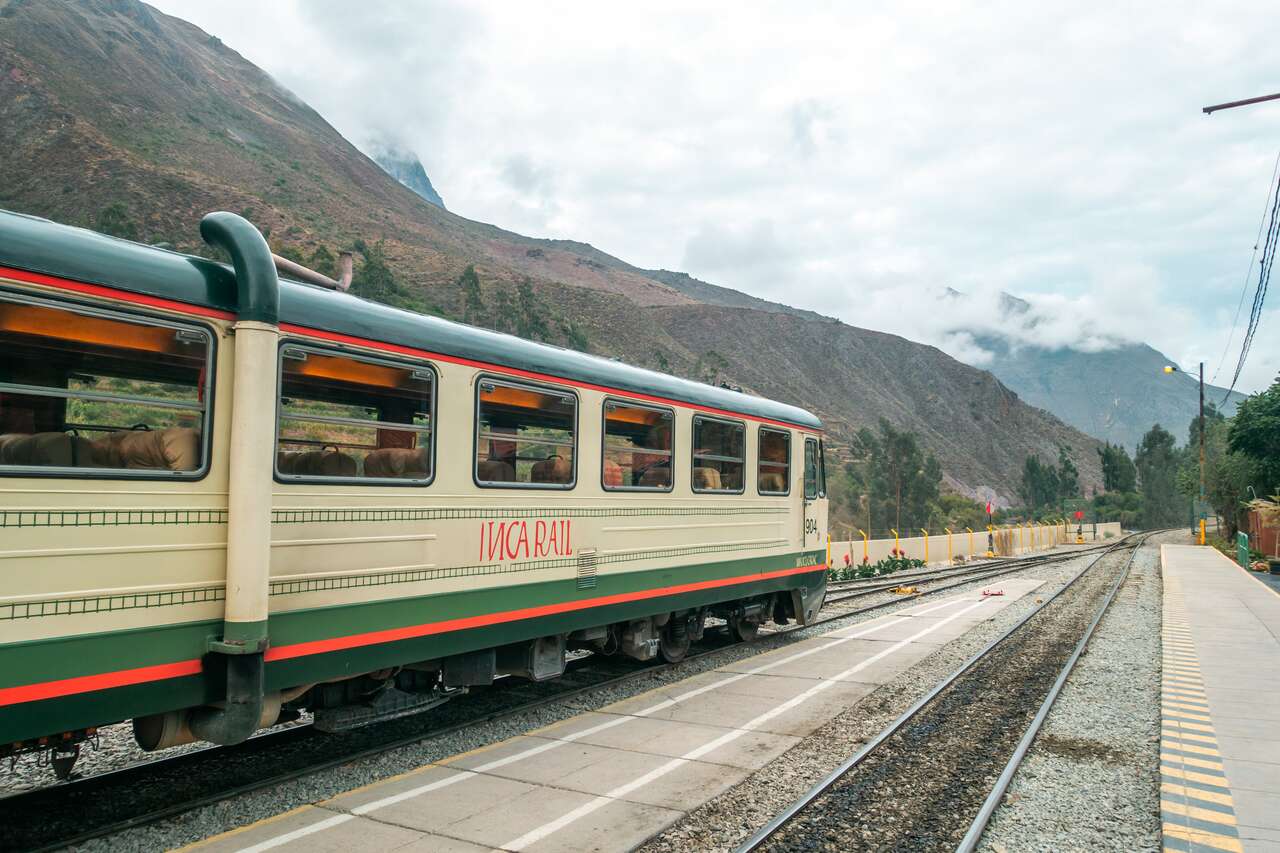
South American cities, especially the capital, aren’t super well-known for being safe, so one of the best ways many locals recommend to me to get around big cities like Bogota, Santiago, and Buenos Aires is to get an Uber, which is convenient and will cost you less than a regular taxi.
Most capital cities also have a mass transit system that you can use, but be sure to keep track of your belongings at all times and avoid traveling at peak times when you will have to deal with crowds. I’ll be illustrating more on safety in South America under the Safety in South America section.
How Much Money Do I Need For South America?
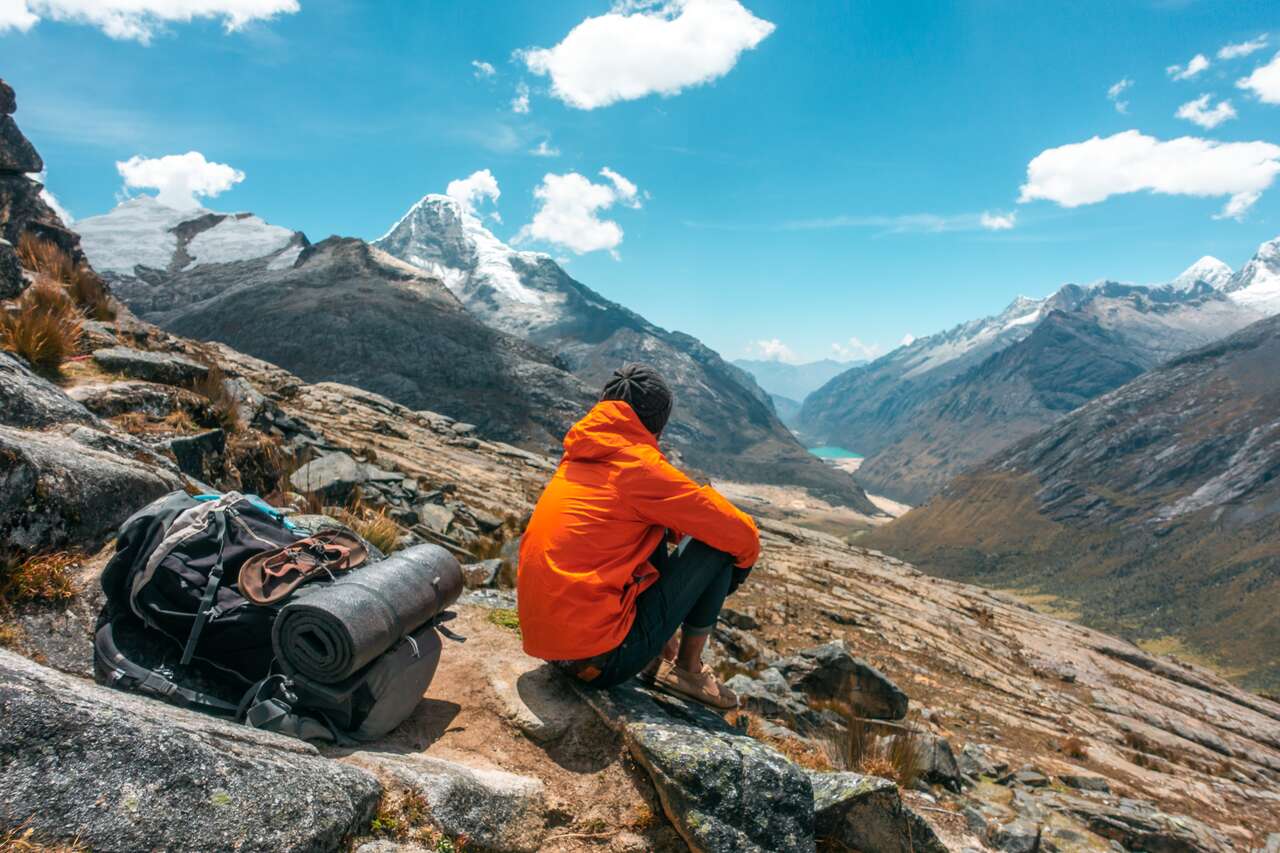
Since this is a 6-month itinerary, it will be very difficult to come up with an accurate budget for you, but I’ll try my best to give you a ballpark figure so you can consider the budget for this trip in South America.
Accommodation: One month in Colombia costs 240 USD, one month in Ecuador costs 184 USD, one month in Peru costs 178 USD, one week in Bolivia costs 118 USD, 2 months in Chile and Argentina cost 570 USD and 258 USD respectively, and one month in Brazil costs 240 USD. Therefore, the total cost for 6 months of accommodation in South America is 1,788 USD.
Food: One month of food in Colombia is 450 USD, one month of food in Ecuador is 540 USD, one month of food in Peru is 450 USD, one week of food in Bolivia is 126 USD, 2 months of food in Chile and Argentina is 1260 USD, one month of food in Brazil is 495 USD, so in total, you will be paying 3,021 USD for 3 meals a day for 6 months in South America.
Transportation: This is very hard to calculate, so I’ll focus more on long journeys from place to place instead of shorter trips, etc. For Colombia, it will be 155 USD; Ecuador will be 376 USD; Peru will be 102 USD; Chile and Argentina will be 1884 USD; Brazil will be 196 USD. So, in total, the transportation cost for 6 months in South America is 2,713 USD. Keep in mind that this includes flights to Galapagos and Easter Island, as well as other domestic flights that are required, hence why it looks so pricey.
Activities: This will depend entirely on what you want to do while you are traveling, but I’ll try my best to calculate the big activities I recommend you do, like a cruise around the Galapagos, an Amazon trip, and a tour around Salar de Uyuni, etc. In total, you will be paying around 2090 USD for activities from the ones listed above, as well as a flight to see the Nazca Line, climb an active volcano in Pucon, the Lost City Trek, a train trip to Machu Picchu, and more.
Total Budget for 6 months in South America: $9,602 USD or around $50 USD per day.
Is South America Safe?
Safety in South America is a quite sensitive subject. On the one hand, there are people like me who did not experience anything bad during my entire time in South America, except maybe getting chased by angry dogs at Vilcabamba, Ecuador, and there are people who got their stuff stolen on buses or robbed at knifepoint in sketchy streets.
Don’t walk alone at night: One thing I quickly learned in South America is that people don’t usually walk alone at night on quiet streets.
You might find many in the party area, but you won’t find them walking around in dark streets as you would see in Asia or Europe. And if the locals don’t do it, you should not do it either. Just call an Uber if you need to get somewhere at night.
Don’t Use Your Phones in Crowded Areas: Petty thefts are common in big cities around touristy areas, so be sure not to use your phone while walking around outside. Otherwise, you will just paint yourself as a target.
Always look like you know where you are going, and if you need to look at a map, just stop by, retreat to the side, and look or just go into a nearby shop, and check your phone there.
Keep your belongings with you at all times on public transportation: This includes both public transportation in cities as well as overnight buses. Be aware of your things when getting on or off a crowded bus or train because that is how pickpockets will steal your stuff.
Do not put your backpack under your seat on an overnight bus. Sleep on it if you must, but always keep your belongings with you at all times. It will be a little safer in countries like Chile and Argentina since they have a better luggage system there.
Use an ATM During the Day: I have heard stories about people getting robbed right at the ATM in Colombia, so what I often do is stick to the ATM in places like shopping malls where there are security personnel around, and where you will be surrounded by people. This way, there’s no chance someone will rob you.
Other than these points, if you follow all of them, which I recommend you do not only in South America but anywhere you travel, then you should have no problem in South America. Again, if the locals don’t do it, you shouldn’t be doing it either.
Which tourist SIM card is best for South America?
Update: If your phone supports eSIM, I highly recommend checking out Airalo, a global eSIM marketplace. It allows you to stay connected affordably while traveling in South America without having to switch out your physical SIM card.
Gone are the days when you needed to scramble to find a local SIM card at an airport upon arrival. You can purchase an eSIM before your arrival, and you’ll be good to go. If your phone doesn’t support eSIM, here is how you can get a local SIM card in South America:
WIFI is available in most places, but less so in remote areas like the Amazon, Salar de Uyuni, Galapagos, and Patagonia. However, if you want to stay connected during your trip, I highly recommend getting a local SIM card for countries where you will be staying longer than 2 weeks. For this itinerary, I recommend getting one for Colombia, Ecuador, Peru, Chile, Argentina, and Brazil.
For Colombia, I recommend you get a SIM card from Claro. For the 2 GB 30-day plan, it should cost you about 46,000 COP. The coverage was very good around the country, except maybe in San Agustin. All in all, I highly recommend Claro. For more information, visit the Colombia Prepaid Data Sim Card website.
For Ecuador, Claro is, again, a great place for you to get a local SIM card (You can’t use the one from Colombia so you will need to get one in Quito). It worked well with good coverage, except on Galapagos and Mindo. It can be recharged via any shop that sports the Claro logo sign. For more information, visit Ecuador Prepaid Data Sim Card.
For Peru, Claro is widely available in Peru, and I found it to be more tourist-friendly than Movistar. They offer a 2GB data SIM card for only 30 SOL (8 USD). Refilling the SIM card is as easy as going to any shop with a Claro sign and asking them to refill the money for you, and you can reactivate any package you like. For more information, visit Peru Prepaid Data Sim Card.
For Bolivia, if you want to get a SIM card for Bolivia, Entel is a great option for you. You can get 3 GB for around 140 BOB, which is around 20 USD. However, do not expect any internet access while you are in the Salar de Uyuni salt flat throughout the whole 3 days. For more information, visit Bolivia Prepaid Data Sim Card.
For Chile, Entel SIM card is highly recommended. They have good coverage even on Easter Island, and their packages are quite affordable. For more information, visit Chile Prepaid Data SIM Card.
For Argentina, I have had quite a mixed bag of experiences with the SIM card provider here. Claro is good in big cities like Buenos Aires, but in Patagonia, it only works 60% of the time. In El Chalten, I was unable to connect to the internet for 3 days due to poor Wi-Fi and no coverage in that area.
Even though the internet package from Claro has unlimited data, they cap the data each day at 50 MB, and you have to pay extra to get the speed back, with another 50 MB capped. That is bullsh*t if you ask me, but there are not many options available. For more information, visit Argentina Prepaid Data Sim Card.
For Brazil, Claro provides SIM cards for tourists with good rates that aren’t available for locals, so it is recommended that you get one from Claro. Be sure to get it at a dedicated Claro shop so that they can help you out with the registrations. They will often ask for your passport, so be sure to have that on hand with you. For more information, visit Brazil Prepaid Data SIM Card.
Tips: To stay connected with people at home, be sure that you have a VPN, such as ProtonVPN, installed before traveling. It’s FREE, and you can gain access to services that may be blocked in certain countries.
What to Pack for South America?
As you may already know, I am an advocate of light traveling, and indeed, packing light for a journey like this is a unique art form. Here are some packing tips for your upcoming trip to South America:
Walking/Hiking Shoes: With all the walking and possible hiking during your travel, a comfortable pair of shoes is a must. I recommend the Timberland 3-Eye Classic Boat Shoes that are my go-to pair for long strolls and hikes.
Breathable Shirts: Given the potential for hot weather, pack a few breathable shirts for your outdoor adventures.
Shorts/Jeans: Anticipate lots of walking during your travels? Be sure to pack some breathable shorts and a pair of Levi’s jeans for when the weather cools. For women, leggings are excellent for both hot and cold climates, so consider packing some as well.
Fleece Jacket: For colder weather, layering is the key, and a fleece jacket makes an excellent insulating layer. I recommend the Columbia Steens Mountain Fleece (for women).
Outer Shell Jacket: An outer shell jacket is great for windy or rainy conditions. I highly recommend the Columbia Watertight Jacket (for women). It’s lightweight, breathable, and even comes in a cool orange color.
Microfiber Towel: A Microfiber towel is the ideal backpacker’s towel due to its lightness, quick drying, and compressibility.
Camera: You should also pack a good camera for your trip so that you can capture all the beautiful experiences you might have. I recommend the Sony a7R V camera together with the Sony 24-70mm f2.8 GM II lens, which is probably the highest-performance camera and lens combination you can get right now.
Power Bank: Keep your electronics charged on the go with a 20,000+ mAh Power Bank.
Water Bottle: The Hydro Flask Trail Water Bottle is a great insulated water bottle to have with you in cities or on hiking trails. It is lightweight and can keep your water cold or warm for more than 12 hours. It’s a total game-changer.
Universal Adapter: You’ll need just one universal adapter to plug in your electronics in any country you visit.
Packing Cubes: Packing Cubes will help you save space in your backpack and keep all your belongings organized.
Daypack: The Langly Alpha Globetrotter is my go-to everyday camera backpack. It’s large enough to carry all my travel gear, and it comes with plenty of slots and pouches. Plus, it’s stylish as hell!
Large Backpack: You will need a large backpack to carry all of your stuff. I recommend the Osprey Atmos AG 65L backpack. With excellent weight distribution and a lifetime guarantee, you can’t go wrong with Osprey.
For more information on what I pack in my backpack for this trip, check out: My Packing List: 60 Travel Essentials.
Further Reading for South America
I hope you found this massive South America travel guide useful. If you are looking for more information about traveling in South America, be sure to check out these articles below:
First time in South America? Check out the 20 Best Places to Visit in South America.
Packing for a trip to visit South America can be extremely daunting. Here’s a packing guide to help you: What to Pack for South America
Only have one month? Why not spend that month in Colombia? Here is a complete One Month Backpacking Itinerary for Colombia.
If you love wildlife, Ecuador is one of the best places in the world for you to visit. Here is a complete One Month Backpacking Itinerary for Ecuador.
Peru is, hands down, my favorite country in South America. It has everything from great food to stunning mountains to climb. Here is a complete guide on how to spend One Month Backpacking in Peru.
Bolivia is home to Salar de Uyuni, the largest salt flat in the world, and it would be a shame if you missed it. Here is a One Week Backpacking Bolivia Itinerary.
Chile and Argentina are best traveled together so you can see everything in Patagonia in one go. Here is a complete guide on how to backpack through Argentina and Chile in 2 months.
If you want to visit Patagonia only, here’s a 2-week Patagonia itinerary for hikers and backpackers.
You can watch all of my travel videos in South America here: Colombia, Ecuador, Peru, Bolivia, Chile, and Argentina.
To see all articles about South America, check out my South America Travel Guide Section.
For more of my travel guides, visit my Destinations page.