
Torres del Paine is probably one of the most popular hikes you can do in Chile. When I first heard of Torres del Paine while researching places to hike in Patagonia, I always imagined that I would have to do a multi-day trek (W-Trek). However, when I arrived in Chile, the trek was already fully booked well before the hiking season began, which is a big problem for most Patagonia hikes because they are very crowded. If you want to do the full trek, you will have to book months in advance.
What if I told you that you don’t really need to trek for multiple days to see Torres del Paine and its iconic Patagonian 3 Towers? That is exactly what I did. I hiked the Torres del Paine trail independently to this iconic location in one full day without having to book anything in advance.
Here is a backpacking guide to hiking Torres del Paine in one day for those who want to see the three towers but are not as keen on fighting for a camping spot during the multi-day trek. Let’s hike!
Table of Contents
Torres del Paine Hiking Map
Quick Summary: Best things to do in Puerto Natales
One Day Hiking Itinerary for Torres del Paine, ChilePuerto Natales to Laguna Amarga/Park Entrance
Park Entrance to Estancia Cerro Paine
Estancia Cerro Paine to Mirador Las Torres/The 3 Towers Viewpoint
More Puerto Natales Activities
Where to Stay in Puerto Natales?
Chile Travel Video
When to Visit Torres del Paine?
What to Pack for Torres del Paine Hike?
How to Get to Puerto Natales?
How to Get to Torres del Paine?
Torres del Paine Entrance Fee
Which tourist SIM card is best for Chile?
Further Reading for Chile
[Show More]
Torres del Paine Hiking Map
🌤️ Best time:
September-November and March-April
🚘 Get around:
Hiking
🕓 Time to spend:
1 day
🏛️ Ticket:
30 USD
Quick Summary: Best things to do in Puerto Natales
1. Puerto Natales to Laguna Amarga/Park Entrance
Prepare and pack everything you need the day before in Puerta Natales, such as snacks, water, and lunch. It’s cheaper than buying them last minute at Estancia Cerro Paine.
Read More
2. Park Entrance to Estancia Cerro Paine
Once you are done, you can either choose to walk from the entrance to the trailhead, which takes around 1.5 hours, or continue with the shuttle bus to Estancia Cerro Paine.
Read More
3. Estancia Cerro Paine to Mirador Las Torres/The 3 Towers Viewpoint
The trail begins in a flat grassland by Hotel Las Torres, heading west for about 1 km until you start going uphill northward. You will be climbing for about 1 to 1.5 hours until it starts to peak, and then it is an easy stroll to the first refuge camp, Refugio Chileno.
Read More
Planning to visit soon?
🛌 Booking hotels: Booking.com, Agoda, and Hostelworld.
The Singing Lamb Backpackers (Budget)
Hostal Andes Patagonicos (Mid-Range) 👍 Top Pick
Hotel Vendaval (High-End)
🏄 Booking tours:
Viator, GetYourGuide, and Klook.
Full day tour Torres del Paine + Milodon cave (11 to 12 hours)
Full-Day Tour to Torres del Paine National Park from Puerto Natales(First Class) (8 to 10 hours) 🏅 Top Pick
Balmaceda and Serrano Glaciers Sightseeing Cruise from Puerto Natales (7 hours)
🚘 Renting a car: Discover Cars.
🏥 Travel Insurance: Heymondo. Get 5% off today!
One Day Hiking Itinerary for Torres del Paine, Chile
Prepare and pack everything you need the day before in Puerta Natales, such as snacks, water, and lunch. It’s cheaper than buying them last minute at Estancia Cerro Paine.
Wake up as early as you can to catch the first bus (7 AM) leaving from Rodoviario Puerto Natales Bus Station. Unless you organize a taxi through your hotel, do not rely on grabbing a taxi off the street during that time because you will end up running to the terminal at the last minute like me and a few other people with poor planning skills 😅.
Once you get on the bus, it will take you approximately 2 hours before you stop at Laguna Amarga, where you will have to buy the ticket to the park. There will be a long line when you arrive, so wait patiently. The entrance fee to the national park is 11,000 or 21,000 CLP (low/high season prices). Get the form once you are at the ticket office register with the details of your plan and pay for the ticket.
No time to read?
Don’t worry. You can save this page to Pinterest and come back later.
Want to explore other places in Patagonia? Check out2 Weeks Itinerary For Patagonia
Park Entrance to Estancia Cerro Paine (10 mins)
Once you are done, you can either choose to walk from the entrance to the trailhead, which takes around 1.5 hours, or continue with the shuttle bus to Estancia Cerro Paine.
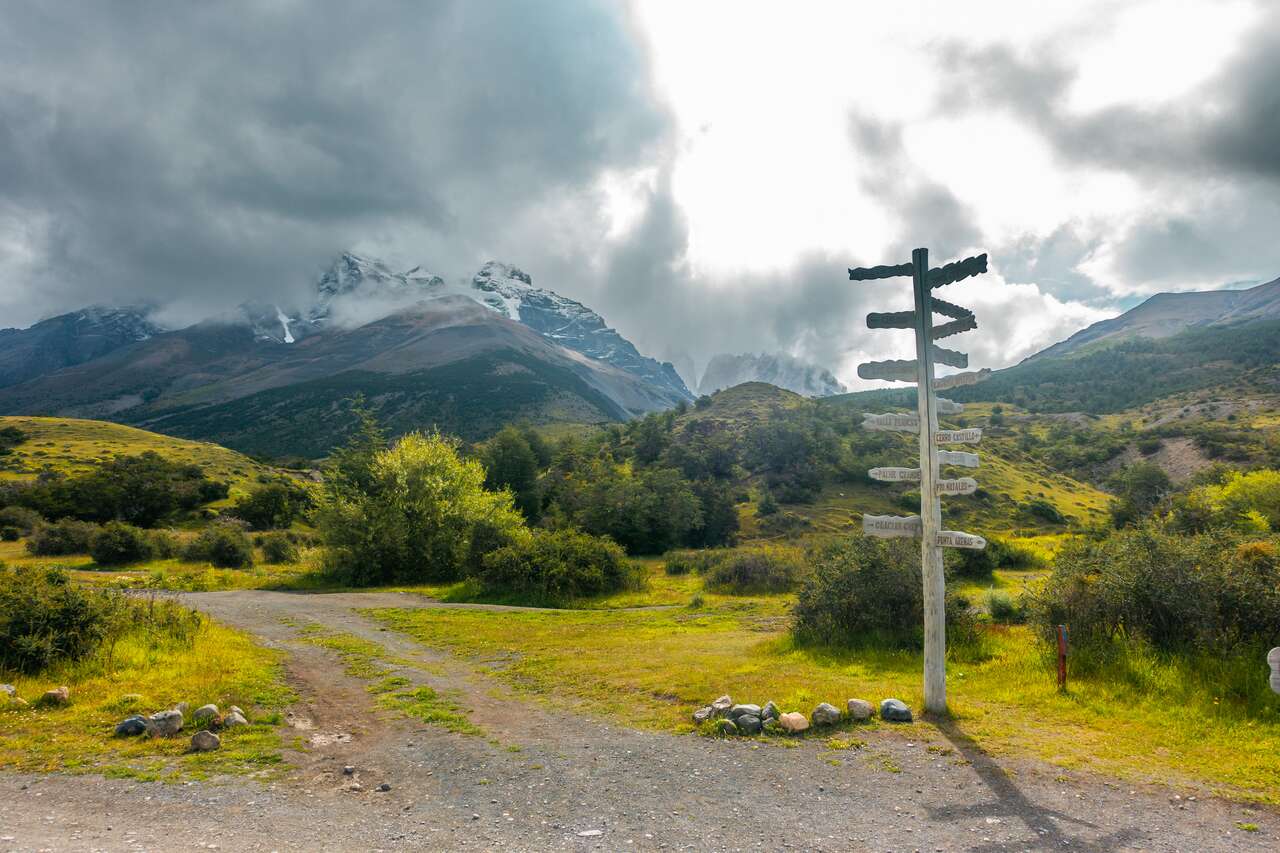
Once you are in Estancia Cerro Paine, here is your last chance to stock up on some overpriced snacks before you hit the trail. From here, it’s another 20 minutes walk until you arrive at the trailhead, where you will start your journey into Torres del Paine.
Estancia Cerro Paine to Mirador Las Torres/The 3 Towers Viewpoint (3 – 4 hrs)
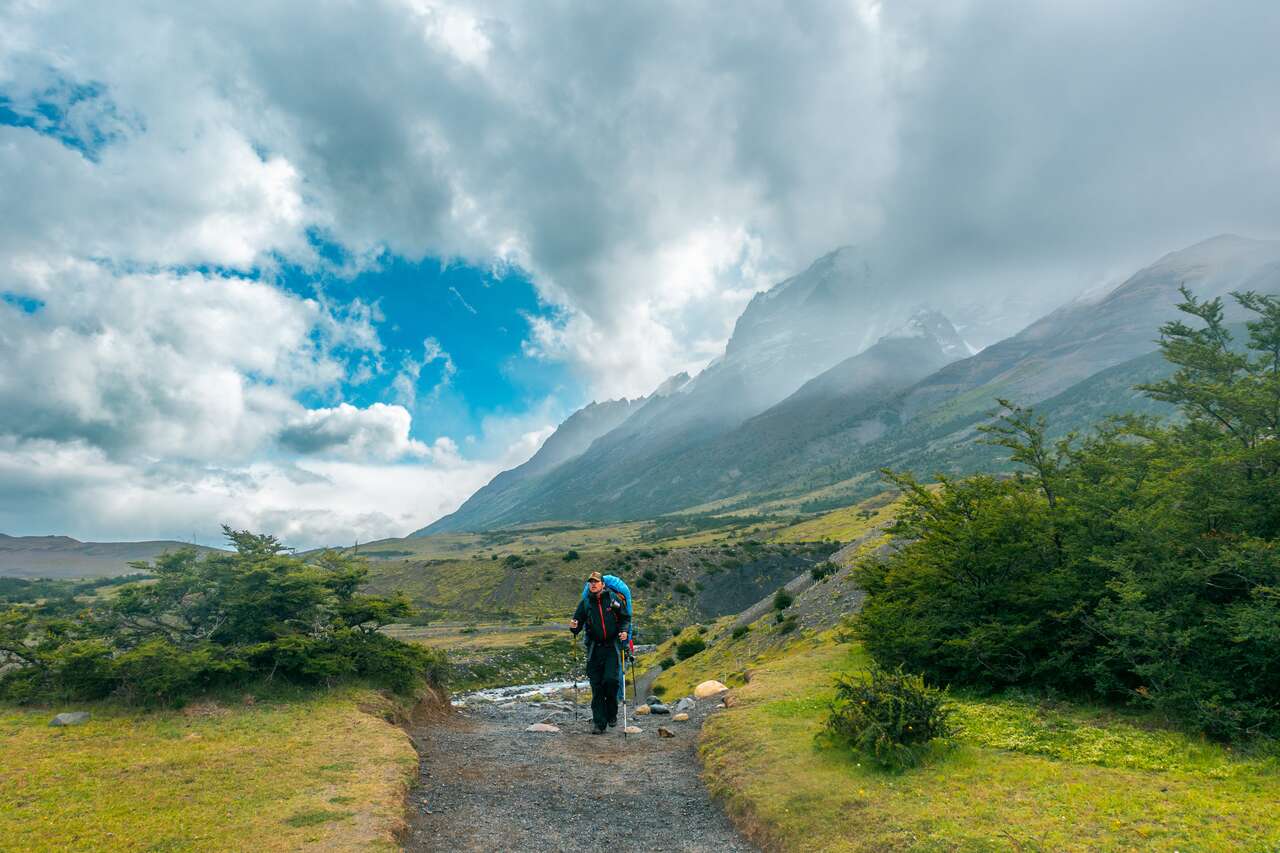
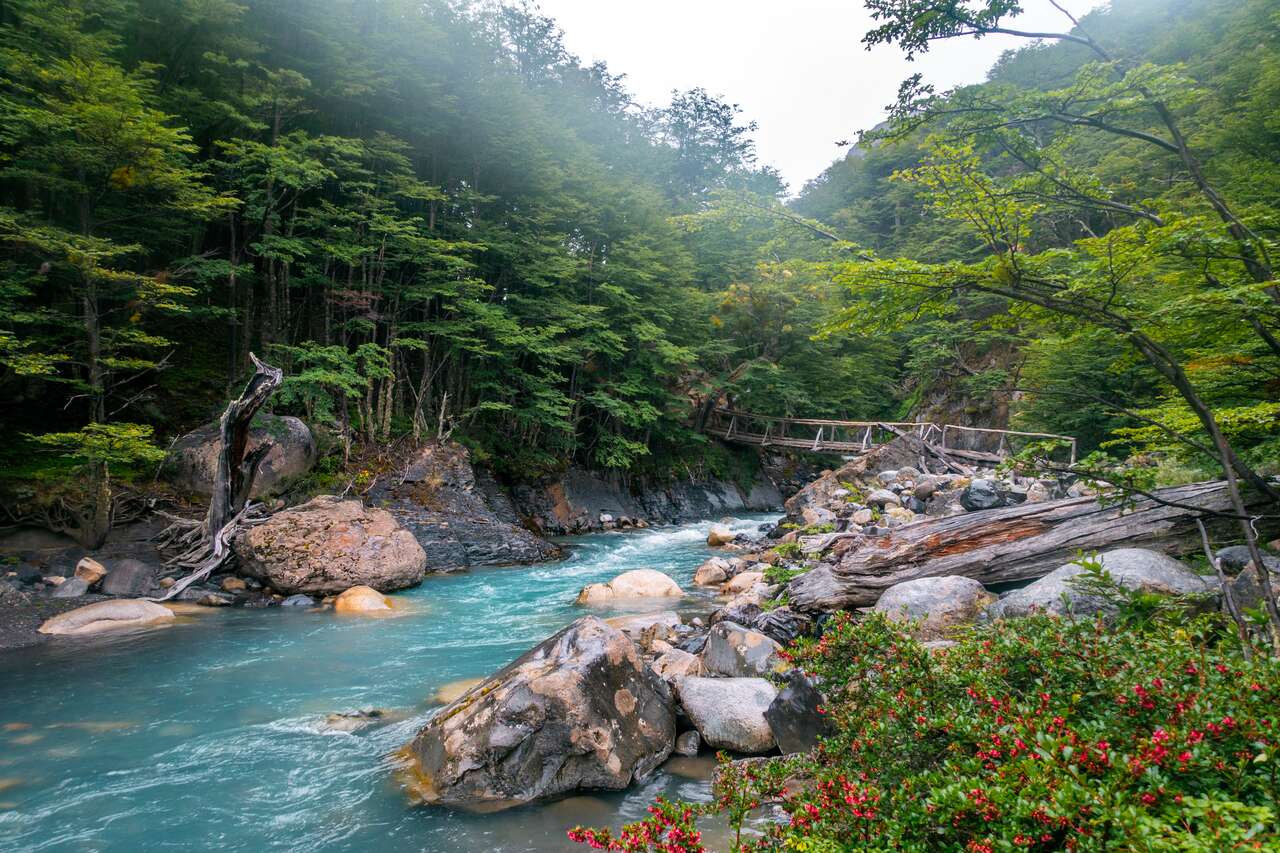
The trail begins in a flat grassland by Hotel Las Torres, heading west for about 1 km until you start going uphill northward. You will be climbing for about 1 to 1.5 hours until it starts to peak, and then it is an easy stroll to the first refuge camp, Refugio Chileno.
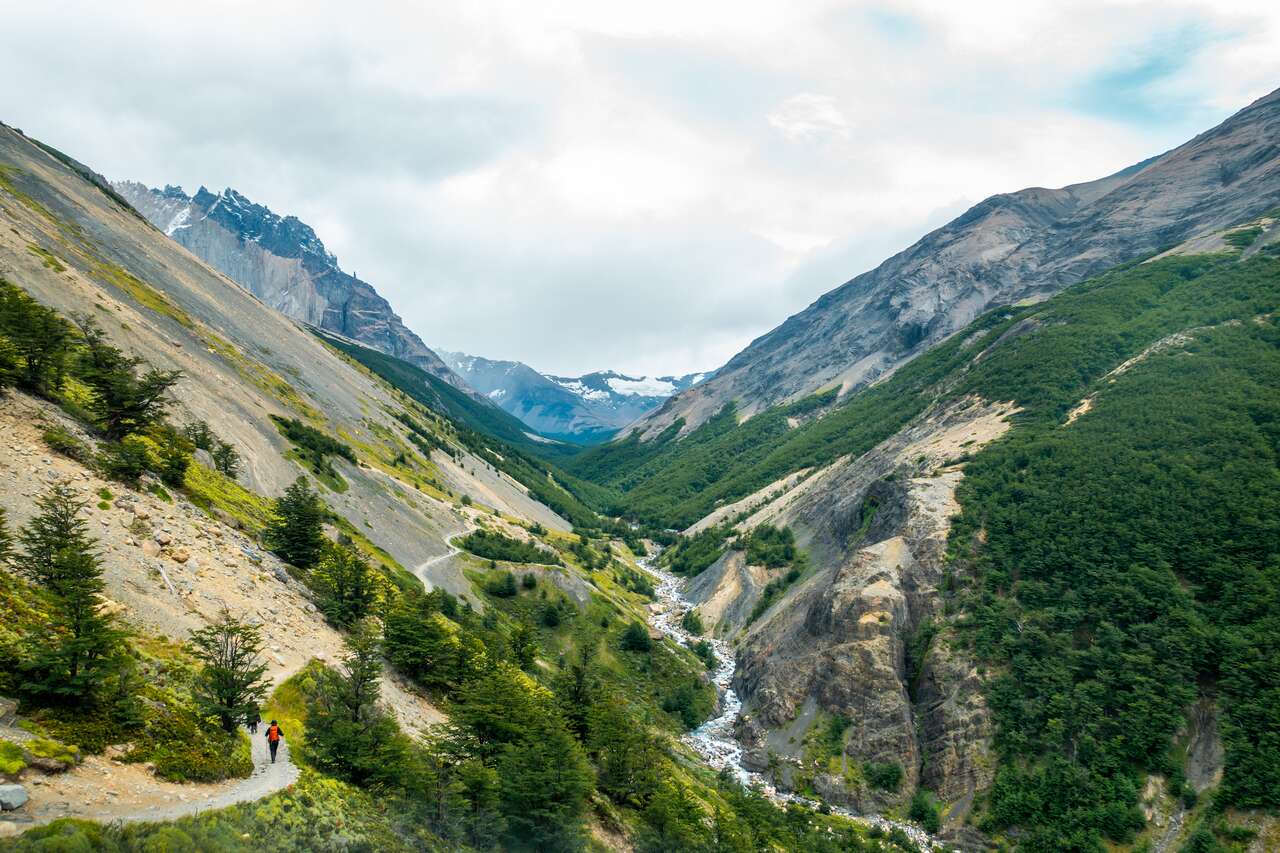
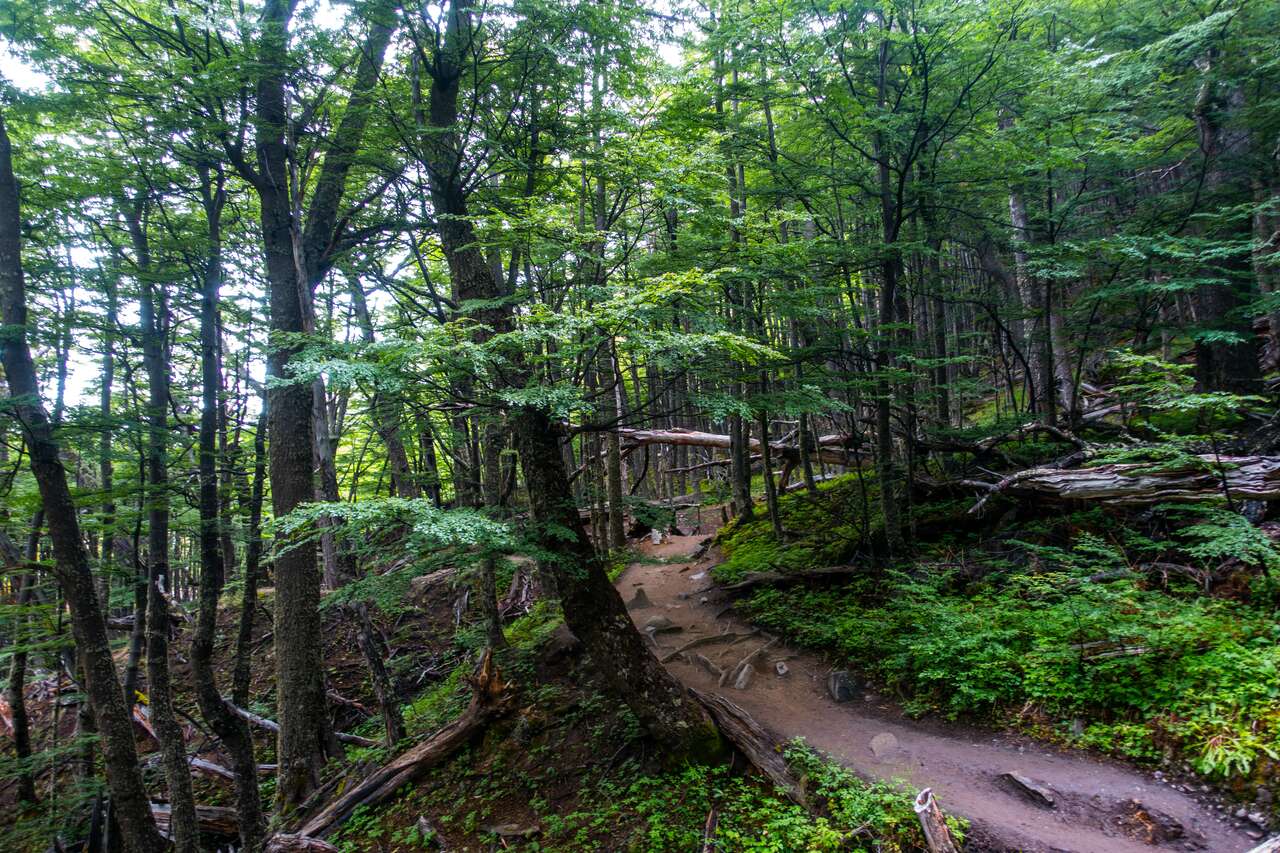
You can rest for a bit here or push on, heading north. From Refugio Chileno, the trail is pretty flat and mostly under the trees, which helps protect you from the strong wind coming from the valley.
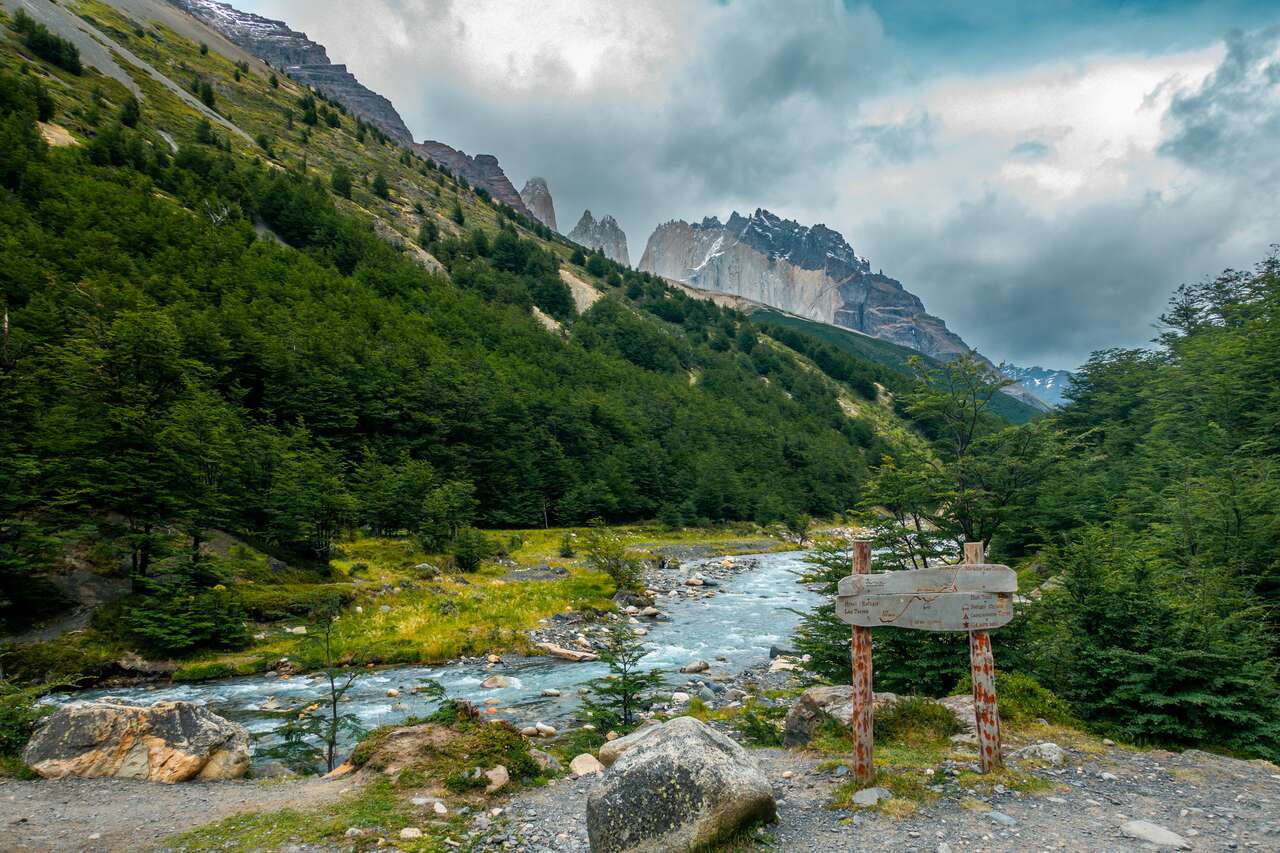
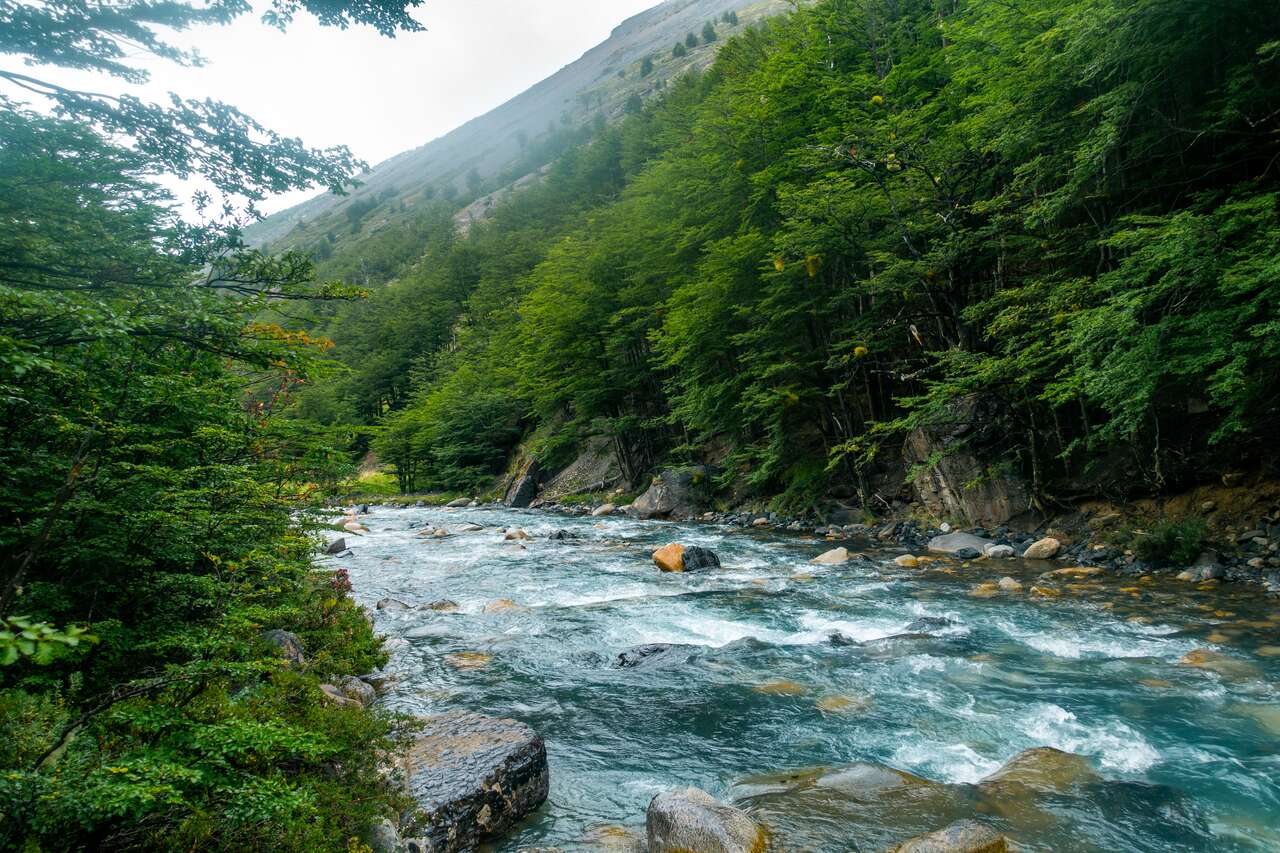
You will be walking along the river for about 2 hours, crossing a few bridges, gaining little elevation until the trail starts to go west again.
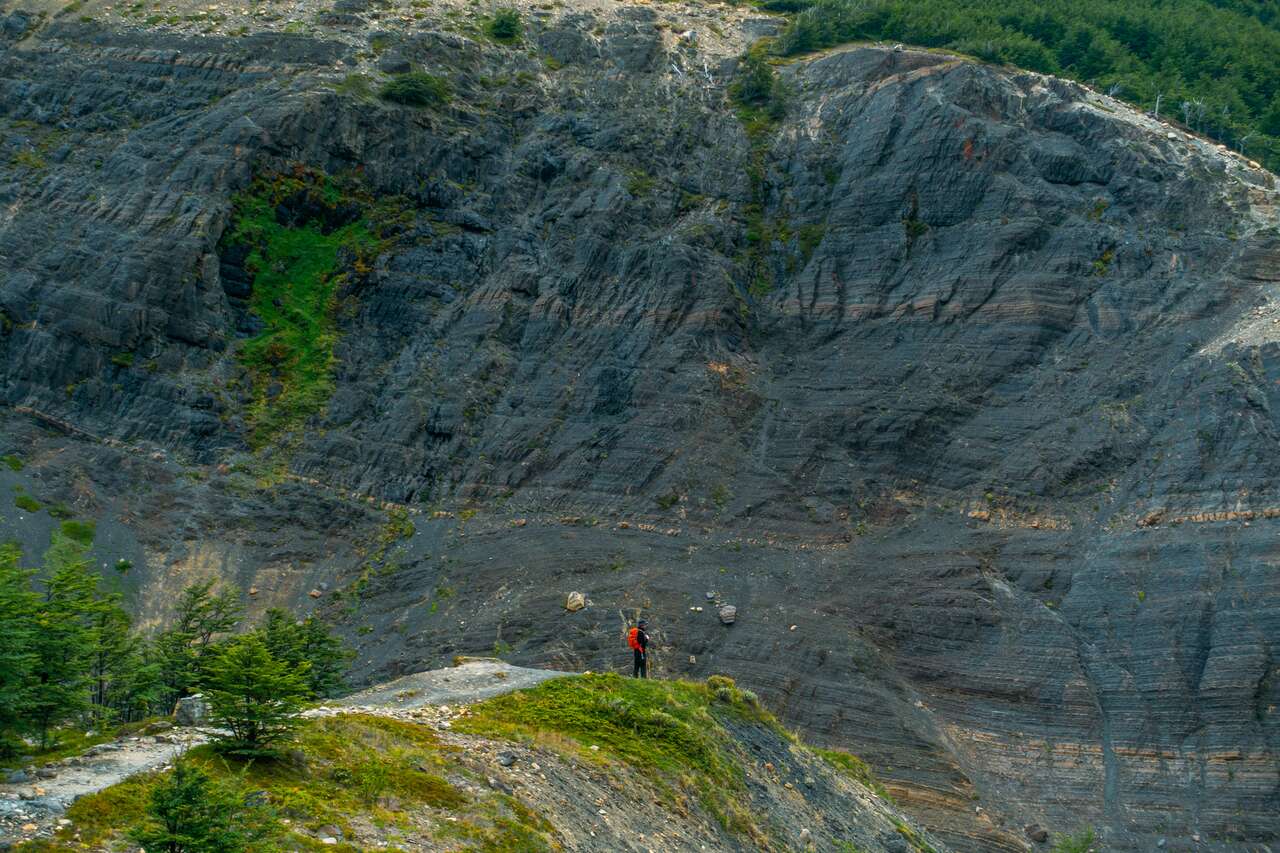
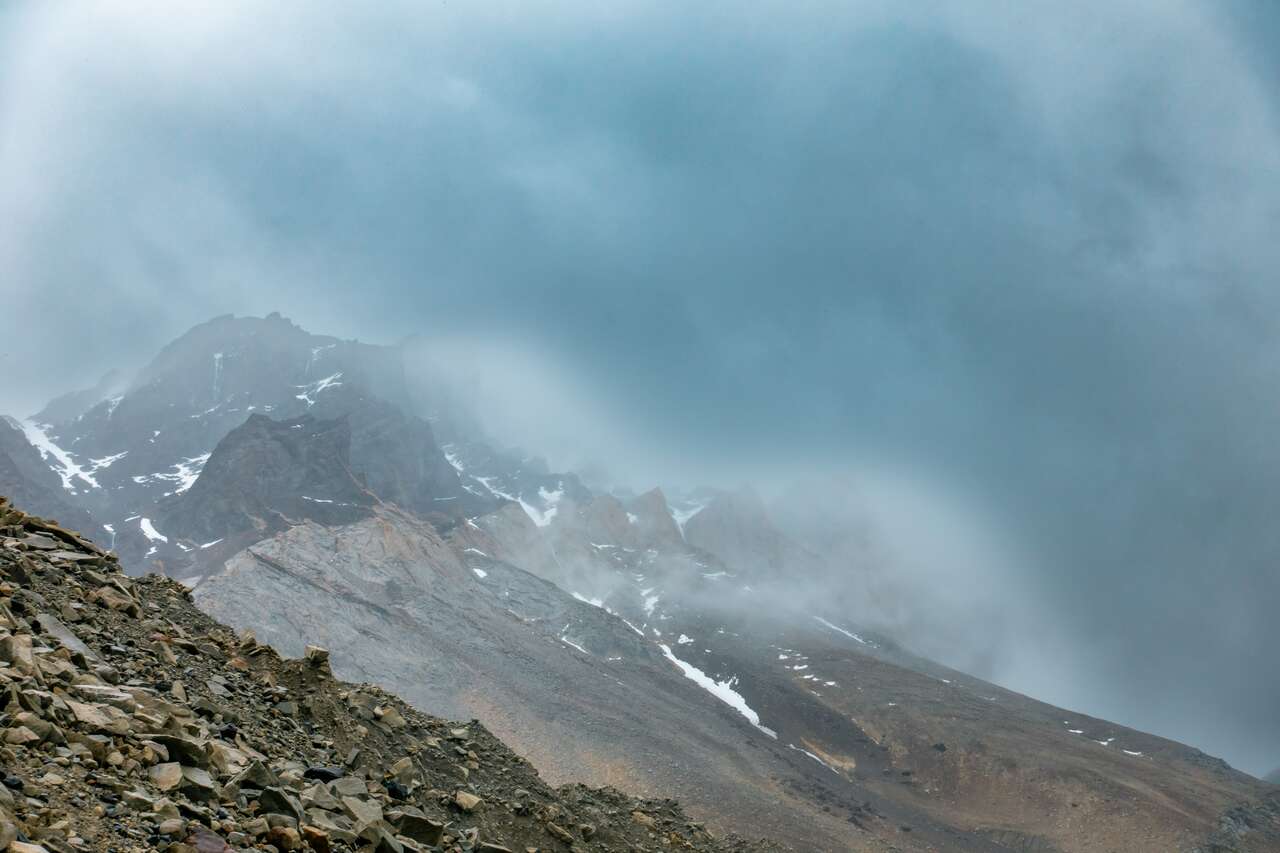
From here on out, it’s an uphill battle to Mirador Las Torres, which will take you around an hour to reach the viewpoint. You will be hiking on a rocky trail, jumping from boulder to boulder, exposed to the Patagonian elements for the entire time, so be sure to prepare for the wind and rain.
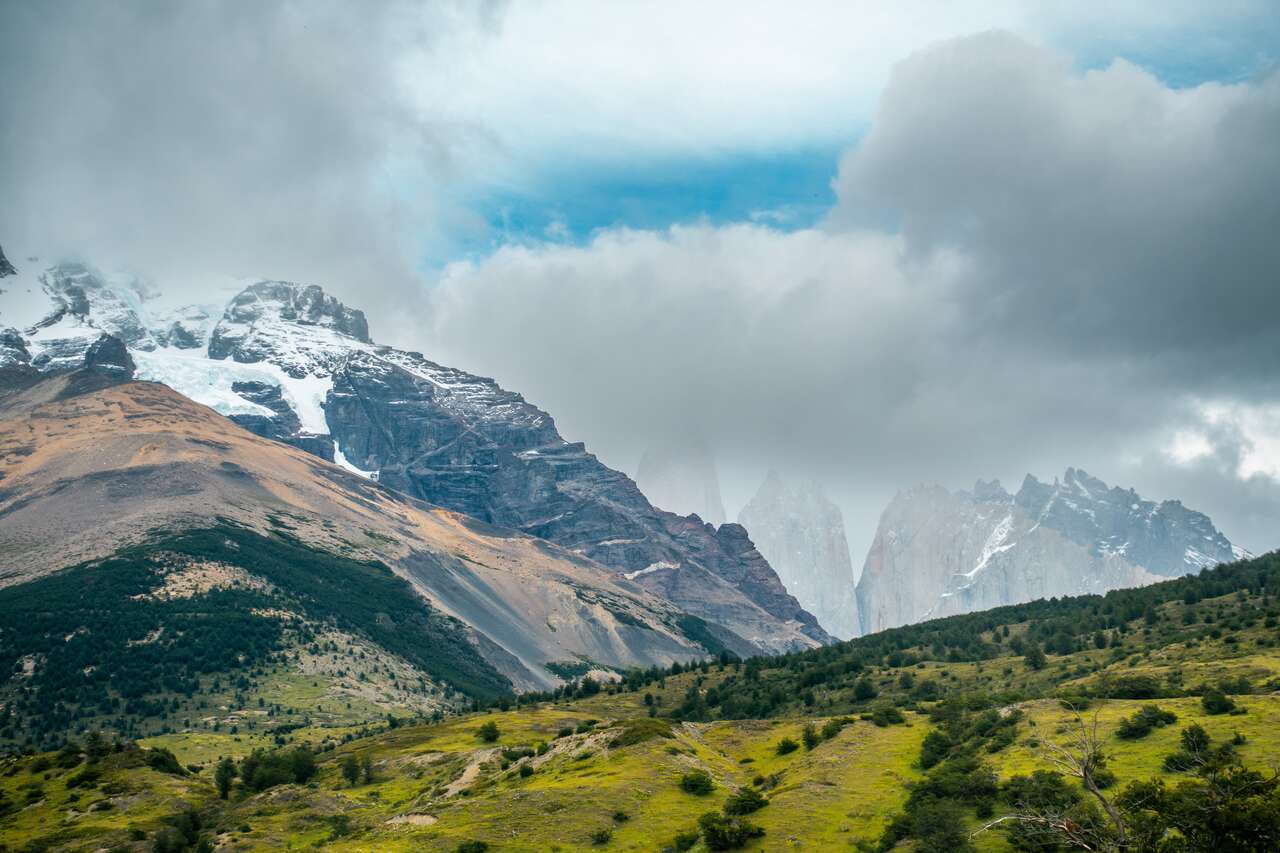
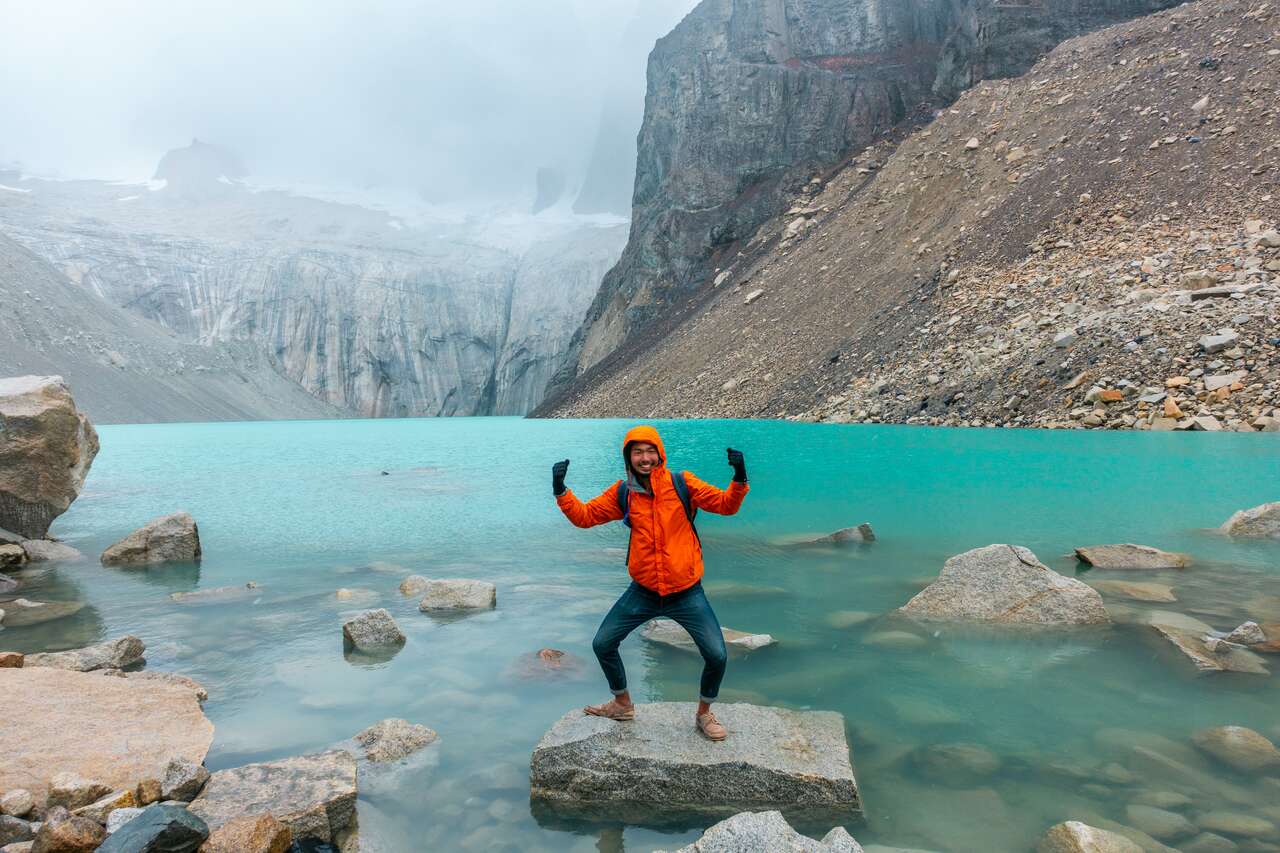
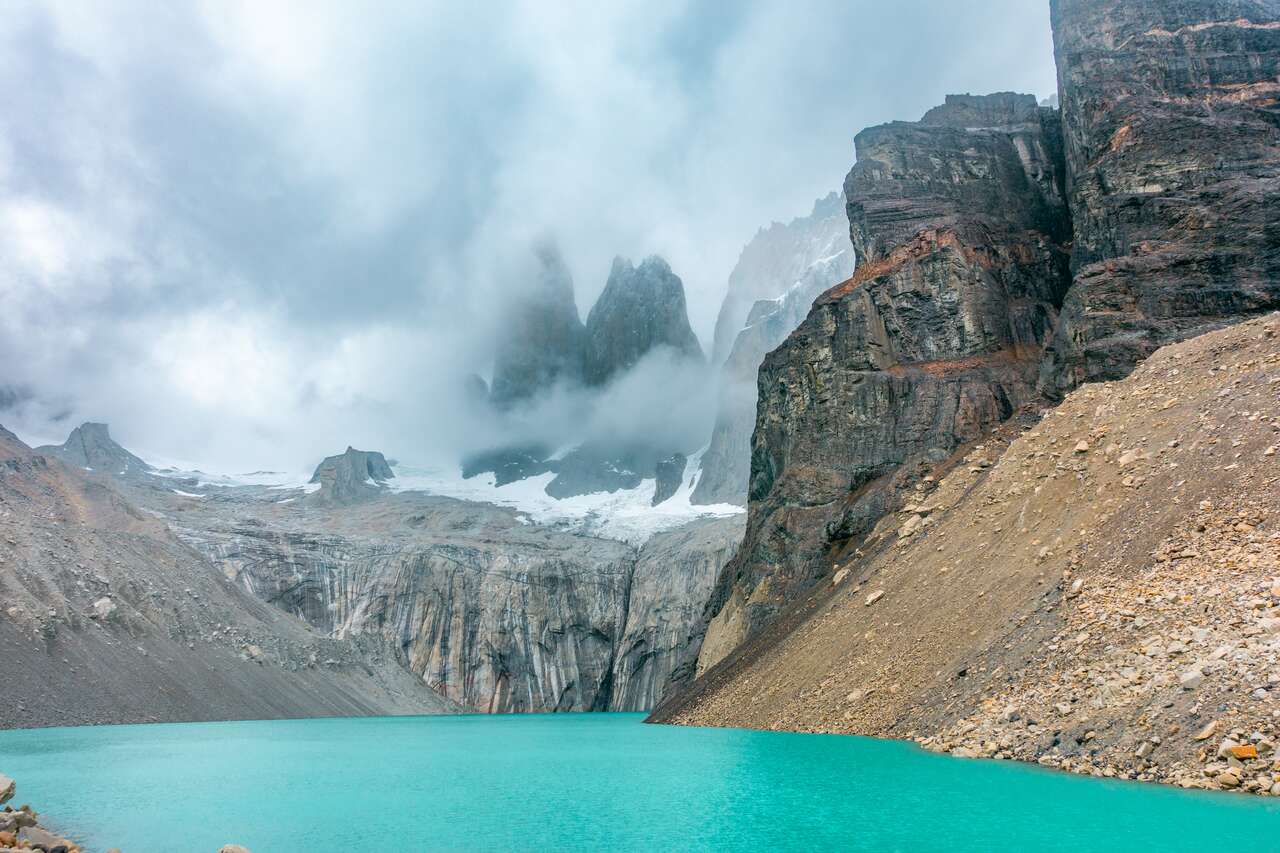
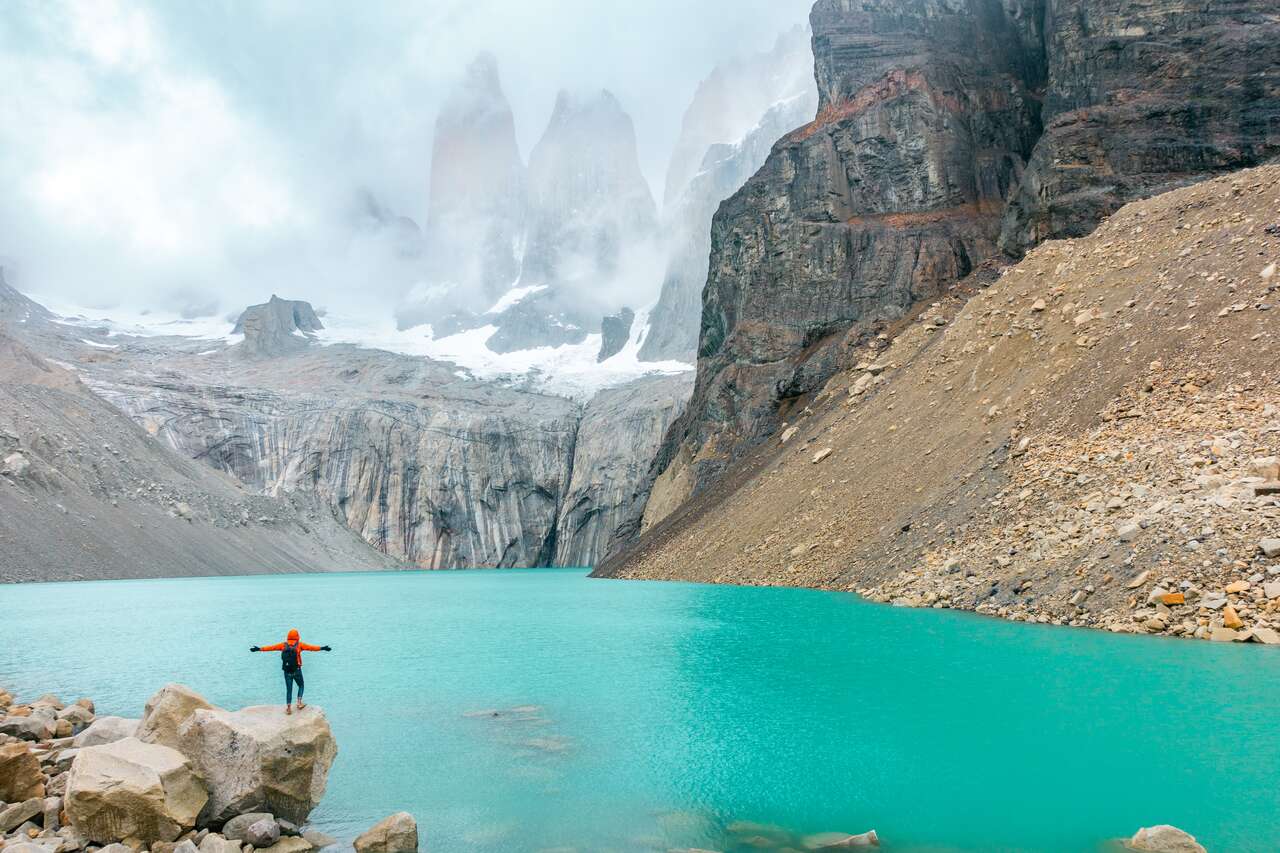
For about an hour, you should arrive at the lake with the iconic view of the 3 Towers (Las Torres) towering over you. I have seen all the photos of this place, but it is nothing like being there in person, looking up at the famous peaks with your own eyes.
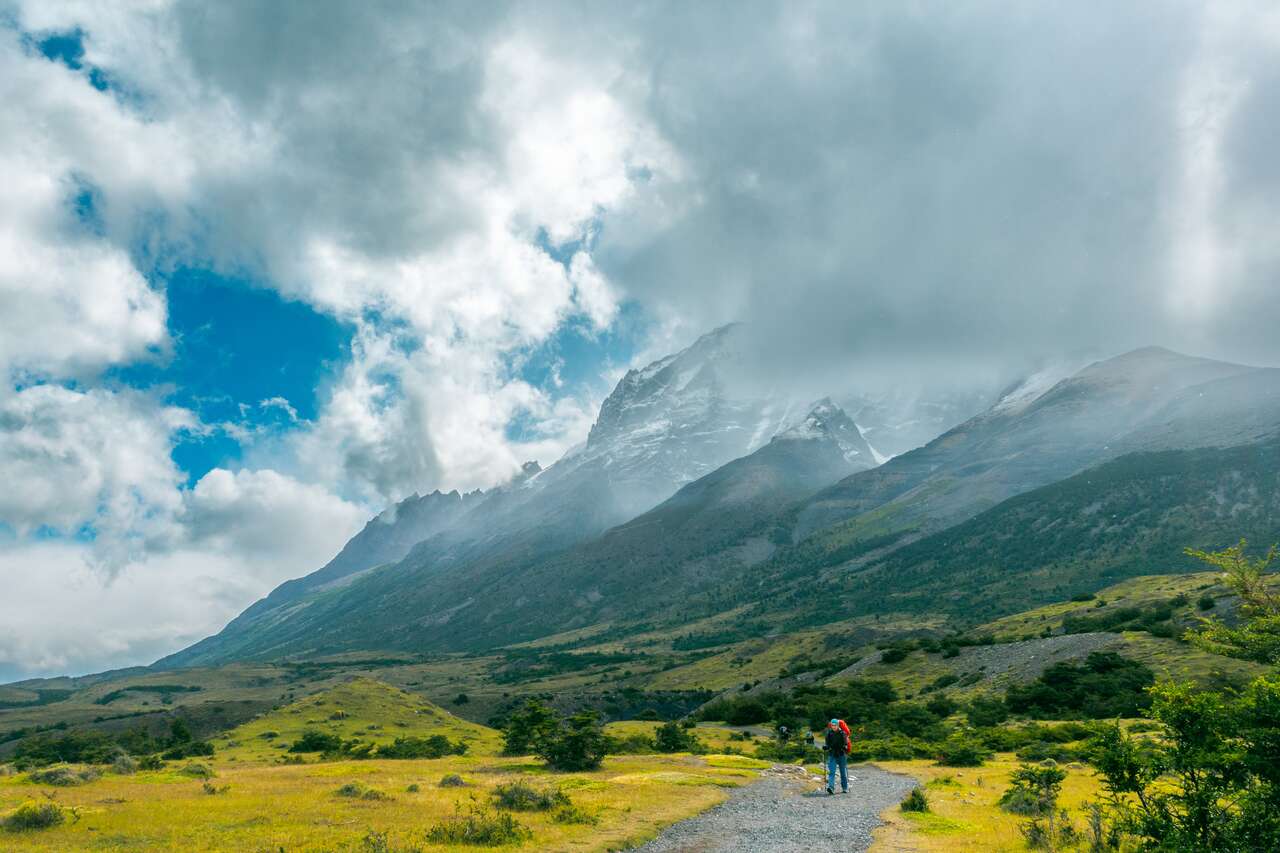
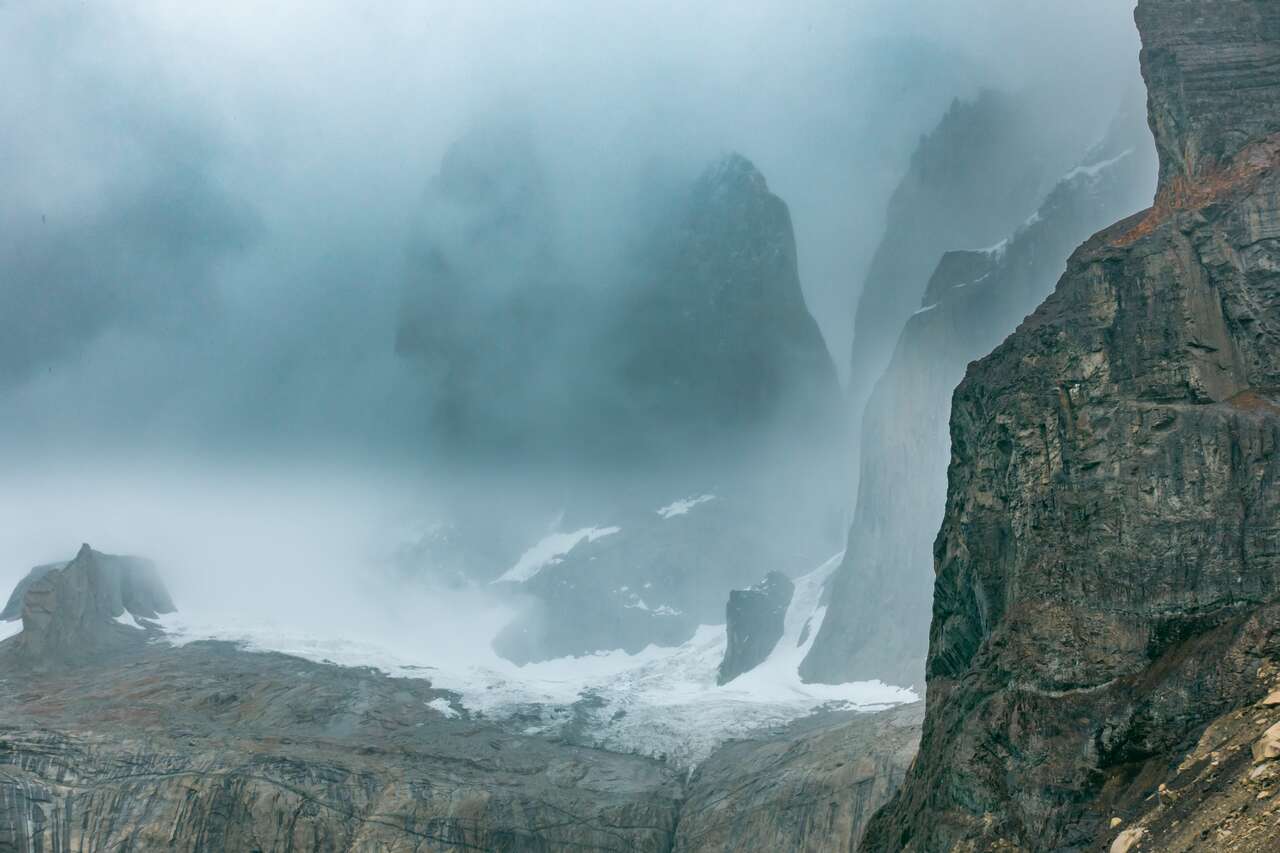
Spend about an hour up there, resting, eating lunch, and taking photos before heading back the same way. As with most mountains, the afternoon is when the clouds roll in. So, don’t underestimate the difficulty of returning as the weather might worsen by the time you descend, which was the case for me.
It should take you around 3-4 hours to get back to Estancia Cerro Paine, where you will have to get a ticket for the shuttle bus and wait until the bus arrives. Get on the one before 6:30 PM so that you can catch the 6:30 PM bus back to Puerto Natales on time.
If you are interested in hiking the full W-Trek in Patagonia, check out: A Complete Guide to the W-Trek in Torres del Paine, Patagonia.
First time in South America? Check out:20 Best Places to Visit in South America
More Puerto Natales Activities
Where to Stay in Puerto Natales?
Always book accommodation in Patagonia at least one week in advance if you are planning to visit during the peak or even shoulder seasons. Everything gets booked annoyingly quickly everywhere in Patagonia!
Chile Travel Video
Watch it on Youtube
When to Visit Torres del Paine?
In my opinion, the best months to visit Torres del Paine are during the shoulder season, which is around September to November and March to April. You will be competing less with the crowd, while the temperature is still manageable (10-15 °C), and the colors of autumn/fall are in full swing.
Patagonia is very crowded to the point where it is no longer fun. So, try your best to avoid visiting during the peak season (November-March).
What to Pack for Torres del Paine Hike?
Rain & Warm Jackets: The weather changes fast in Torres del Paine, and even in the summer, it could be raining all day. Therefore, it is advisable to have a nice warm waterproof jacket with you for the hike. Here is a jacket I recommend for the trip: the beautiful orange Columbia outer-shell jacket.
Food, Snacks, and Water: The hike takes around 7-8 hours, so you will need to pack your own lunch and enough water for the entire hike. I would recommend buying everything in Puerto Natales supermarket before you start the trail because, trust me, you will not want to know how much food costs at the Patagonia entrance. I always carry my 2-liter hydration pack, which I recommend so you don’t have to stop to stay hydrated.
Good Sturdy Shoes: The trail is pretty easy and straightforward, but the weather can make it quite challenging at times, so good, comfortable, and sturdy shoes are recommended. These Timberland Shoes are my go-to hiking boots in most situations.
Money: You will have to pay for the national park entrance fee, which ranges from 11,000 CLP to 21,000 CLP (15 – 30 USD), depending on the season. You can pay with a credit card if needed.
Check Out My Hiking Packing List
How to Get to Puerto Natales?
Puerto Natales is located in the deep south of Chile, which makes it a little difficult to travel to. First, you have to get yourself to Santiago, either via Emirates, KLM, or Air France if you are coming from Asia or Europe. For the US, you can fly via American, Delta, United, or LATAM airlines. Be sure to check out the prices on Skyscanner and Expedia for the best possible deal for your trip.
From Santiago, the fastest way is to fly to the nearest airport in Puerto Arenas, which is 360 km away from Puerto Natales, where all the accommodations are.
From Puerto Arenas, there are buses that go to Puerto Natales daily either from the airport or the bus terminal in the city. The cheapest bus operator is Buses Fernandez, which runs almost every hour during peak season, takes around 3 hours, and costs around 7,900 CLP (11 USD) one way.
Again, to ensure that there will be space available on the bus, please book transportation in advance, especially during the peak season, as everything gets booked quickly.
How to Get to Torres del Paine?
Once you are in the Puerto Natales bus terminal, do not leave just yet. Head over to one of the bus counters (Bus Sur or Buses Gomez) and get a round-trip ticket to Torres del Paine for tomorrow. The current 2019 schedule is 7:00 AM, 7:15 AM, and 12:00 PM.
I would recommend that you get the earliest one possible. The bus will leave from the terminal where you bought the ticket, and it will take around 2 hours to reach Torres del Paine National Park.
To get back from Torres del Paine to Puerto Natales, you can choose between the one at 6:30 PM or 7:00 PM when you buy your ticket at the Puerto Natales terminal. Since the hike will take at least 7-8 hours, I would recommend you get the 7:00 AM and 6:30 PM tickets to give yourself enough time to hike and enjoy the scenery.
Torres del Paine Entrance Fee
As of 2019, foreigners will have to pay 21,000 CLP (30 USD) for a 3-day entry ticket during the high season (October – April) and 11,000 CLP (15 USD) during the low season (May – September).
Unfortunately, the cheapest option is a 3-day pass, regardless of whether you are only staying for one day. This is a shame because a $30 one-day entry fee is unaffordable.
Which tourist SIM card is best for Chile?
Update: If your phone supports eSIM, I highly recommend checking out Airalo, a global eSIM marketplace. It allows you to stay connected affordably while traveling in Torres del Paine, Chile without having to switch out your physical SIM card.
Gone are the days when you needed to scramble to find a local SIM card at an airport upon arrival. You can purchase an eSIM before your arrival, and you’ll be good to go. If your phone doesn’t support eSIM, here is how you can get a local SIM card in Torres del Paine, Chile:
Internet access in Puerto Natales is manageable, with Wi-Fi available in most hostels/hotels. Data access with a local SIM card maintains 3G speed in the city area most of the time with Entel. However, for Torres del Paine, I wouldn’t count on it, as internet access becomes scarce the further you travel inside the national park.
For more information: Chile Data SIM Card Wiki.
Tips: To stay connected with people at home, be sure that you have a VPN, such as ProtonVPN, installed before traveling. It’s FREE, and you can gain access to services that may be blocked in certain countries.
Further Reading for Chile
I hope you found this Chile travel guide useful. If you are looking for more information about traveling in Chile, be sure to check out the articles below.
Looking for a complete backpacking guide to the entire South America continent? Here is the ultimate 6-Month Backpacking Itinerary for South America.
First time in South America? Check out the 20 Best Places to Visit in South America.
Packing for a trip to visit South America can be extremely daunting. Here’s a packing guide to help you: What to Pack for South America.
Looking for a complete travel guide for Chile and Argentina? Here’s a 2-month itinerary for Chile and Argentina.
If you want to visit Patagonia, here’s a 2-week Patagonia itinerary for hikers and backpackers.
Easter Island is one of the best experiences you can have in Chile. It is expensive, but with its unique culture, especially during the Tapati festival, you will not regret traveling to Easter Island. Here is the ultimate 5-day itinerary and travel guide for Easter Island, including everything you need to know, like how to get there cheaply, how much it will cost you, and many more.
You can also visit Puerto Natales in Chilean Patagonia and hike the Torres del Paine trail in one day if you don’t have 2 weeks to spare. Here is how to hike Torres del Paine independently in one day.
You can watch my Chile travel video here: “Charming Chile” travel video.
To see all articles about Chile, visit the Chile Travel Guide page.
Looking for a place to go after Chile? How about Argentina or Bolivia?
Looking for more travel guides for South America? You can find more on my South America Travel Guide page.
For more of my travel guides, visit my Destinations page.